
Introduction
Feature films are the sort of movies you can see at the cinema. They are usually about one-and-a-half hours to two hours long, and require a lot of time, money and effort to produce.
In this chapter we’ll show you how full-length feature films are made and you’ll learn how to produce your own short (5–20min) fiction-genre films.
| |
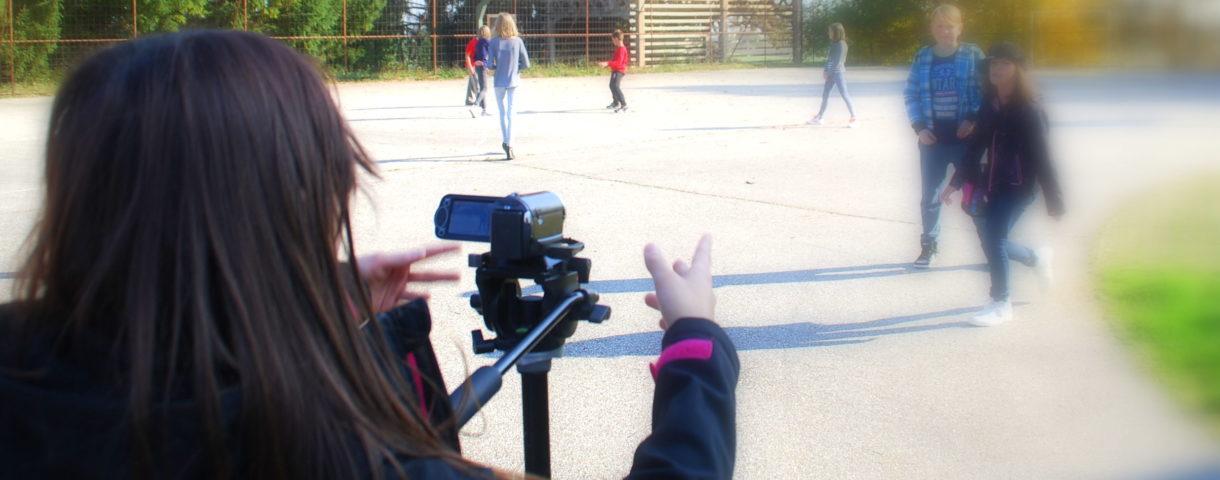
Vision in action |
|
|
||
Equipment and tools
- For the planning stage:
- DVD player, computer or other equipment for playing and watching films. This will help you discuss the direction of your project and get inspiration.
- whiteboard to help you brainstorm ideas as a group
- flipchart and sticky notes to help you document the production process
- paper so you can write down the synopsis, script, storyboard and production schedule
- For the shoot:
- camera(s)
- tripod(s)
- external microphones, preferably with boom arms, pop filters for recording indoors and blimps/windmuffs for recording outdoors
- additional sound recording devices (if necessary)
- clapperboard and chalk or non-permanent marker pen
- lights for illuminating the set
- external monitors that can be connected to the cameras to help the director see what is on the camera screens easily
- computer for watching and backing-up the recorded footage
- rain protection for equipment – either ready-bought or something you make yourself out of sticky tape and waterproof materials
- costume and make-up
- props
- For editing the film
- computer with editing software
Main section
When it comes to producing full-length films, nothing is left to chance.
All scenes and dialogues are clearly defined in the script and storyboard, and rehearsed many times by the actors. Camera angles, panning and dolly shots are also specified in the script and storyboard.
To make sure everything runs smoothly, there needs to be a clear plan of the whole production process from idea to final product. In addition, you’ll have to write a shooting plan with information on what needs to be filmed, when and where, which actors and technicians involved, and what costumes and props are needed.
You’ll find details on all of these elements in Writing a synopsis, script, storyboard and shooting schedule. You’ll also need to be familiar with the advice in chapters such as Camera basics, Composition and colour, Film structure, Basics of lighting, Sound, music and sound effects, and, if necessary, Camera advanced. If your project is led by a youth worker or teacher, they may train you in the skills you need to shoot your film.
In this chapter we focus on how feature films are different from other types of film, what the production process involves, and what to pay attention to in particular.
Video: Communicate! (project VISION)
Typical feature-film production process
1. Allocate roles
Decide who will do what in your project team. One person could perform multiple tasks, or you can split a single task between two or more people. Team members could also swap roles, as long as this doesn’t affect the production process.
You’ll normally need to fill the following roles:
- main organiser: responsible for organising the whole shoot and calculating costs. The young person who takes on this task could work on their own or with help from a youth worker/teacher.
- script writer: responsible for preparing the synopsis, script, storyboard and shooting plan. The script can be based on a well-known story or on an original.
- actors
- acting trainer: this role can be fulfilled by teachers and youth workers, or by external drama instructors
- costume and make-up artists (MUA)
- location scouts: project members that look for suitable shooting locations
- people in charge of props
- people in charge of organising shooting days
- director: responsible for directing, rehearsing with the actors, and providing instruction at the editing stage
- assistant director: helps the direcor, including by making sure everyone is following the instructions in the script
- camera operators: responsible for setting up the cameras and filming; may also help to set up other equipment such as lighting
- sound engineers
- lighting engineers
- film editors
- best boy: (male or female): helps the main organiser and provides technical support to the camera operators; also responsible for things like refreshments for the crew
2. Organise the production process
Divide the production process into phases, and each phase into several steps or tasks as necessary. Put people in charge of each task.
You can use a flipchart to write down all the tasks in chronological order, then stick the flipchart sheet onto the wall so people can refer to it at any time.
Or you could write each name and corresponding task on a sticky note. You can then move the note around the different production phases if necessary.
The main organiser will need to know on an ongoing basis how production is progressing. Hold informal meetings with everyone and share your views about how the project is going.
3. Find a story or write your own
Unlike documentaries, which rely on real-life footage, the story in feature films is told through acting.
Whether or not the viewer will like your film depends on what they’re interested in, and that would be very difficult for you to find out. Unless you’ve been given a topic to work with – for example if you want to submit a film to a themed competition – your subject can be anything you like. So ask yourself: what films do you like to watch yourself, and what sort of film would you like to work on?
Even if your film has to focus on a particular topic, there’s still a lot of room for creativity. Try to find issues that resonate with you, that are exciting, and that are not often explored on film or in the media in general.
You can pick a little-known story you’re already aware of, adapt a popular one, or write something completely new. It’s a good idea to watch lots of different films, discuss and analyse them (see Plot and character analysis) to help you with developing a script.
If you want your film to be as authentic as possible, or if you want to deal with an issue in depth, you’ll need to research the story thoroughly. This includes talking to people that have a lot of knowledge on the subject.
When you’re choosing your story, think about how it might affect the scope – or size – of the film project. For example, how many actors will you need? Which locations will you need to shoot at, and do you have access to them? How easy is it to get hold of props?
Full-length films take a lot of time and effort to make. A big professional production often involves shooting just 5 minutes or less a day. That’s why in this chapter we focus on producing a short film of about 5-20 minutes.
Video: Za prijatelje si je treba čas vzet (‚Always make time for your friends‘) – (LIJAmedia Slovenia)
4. Work on the synopsis, script and storyboard
Whether you’re using an existing story or creating a new one, you’ll need to write a synopsis summarising your film. You can use this whenever you need to introduce your project, for example during a pitch to potential funders (see Writing a synopsis, script, storyboard and shooting schedule).
The next step is writing the script. As well as all dialogues, this will include information about locations, props, costumes, and the motivation and background of the characters.
Include details of camera angles and the types of shots you’ll be using (panning, tracking, etc) on the storyboard. Switching camera angles frequently helps to bring out the dynamics of an action-packed scene, while avoiding different camera angles or fast panning shots creates a calmer effect.
5. Look for actors, locations, props and costumes
As you work on the script and storyboard, think about suitable locations for the shoot and potential actors. People who perform in the film could include members of your project team, friends, family, amateur and professional actors.
Remember to get everyone’s consent to publish footage with their image. Parents or legal guardians will need to sign the consent form for any actors under the age of 18.
You’ll also need permission from the owners or leaseholders of the locations where you want to shoot. Some might be less willing to give consent than others, especially at locations like shops or performance venues.
If you’re planning to film in a public space, you’ll have to consider the possible conditions on the day. For example, there might be too much noise from visitors/shoppers or passing cars.
Video: The Miller from Wettin (‚Der Müller aus Wettin‘): A short film using period (in this case medieval) costume, locations and props. Produced by WTV users.
There are several ways you can source props and costumes. Project members can bring along items they have at home. You could buy props and costumes second-hand. Or you could try to borrow them from a local theatre. Keep an eye on your budget if you decide to buy or borrow any items.
Last but not least, you’ll need to pick your actors. They should ideally look and sound like the characters in the story. Get prospective actors to read out lines from one or more roles, and decide if they’re a good match.
6. Write a detailed shooting schedule
The production schedule includes all phases and steps of the production process. This includes information on where you’ll be shooting and when.
You can make the whole process easier by shooting one after the other all the scenes that happen at the same location, even if they don’t come in this order in the script. That way you won’t have to travel back and forth between locations.
However, you might find that young actors in particular have difficulty with this concept, and prefer to act out the scenes chronologically. If that’s the case, it might be easier to shoot the scenes in the right order, even if that means frequently switching between locations.
Another factor that affects planning, especially in an outdoor shoot, is the weather. Consult the weather forecast and plan accordingly, though remember that you can never guarantee exactly what the weather will be like. And if you’re shooting a scene over several hours or days, bear in mind that the weather is likely to keep changing, which can affect filming conditions.
Look after your equipment if you’re shooting in the rain. You can use specially adapted covers, waterproof materials and tape, and/or umbrellas.
The exact time of day you choose for your shoot is another factor that will affect the quality of your footage. Think about the effect you’re trying to achieve.
Available light changes throughout the course of the day, and it’s best to film before of after noon. The light quality is particularly good in the hour after sunrise and the hour before sunset. Avoid shooting at noon, when the sun is at its strongest.
Last but not least, remember to plan breaks. Shooting can be really exhausting, so pace yourself and don’t use up all your energy on the first day of filming.
7. Rehearse acting and cinematography
The actors in your film should have ideally learned their lines and rehearsed their scenes before the shoot starts.
More experienced actors should be able to rehearse on their own time, either alone or with friends. Beginners might need help from people with more acting experience or from drama instructors. The film’s director should also take part in rehearsals, and will often help to guide actors through their scenes.
In the meantime, the camera crew should be familiarising themselves with the types of camera angles and shots they’ll be using.
The same goes for the sound crew. They should use the storyboard to plan where to stand and where the microphones should be. It’s important that both microphones and sound engineers are close enough to the actors to be able to record good-quality sounds. At the same time, they shouldn’t be too close, or they might be caught on camera or cast a shadow in the shot.
8. Shoot the film
Does everybody know what they should be doing? Is everyone following the director’s instructions?
Yes? Great, because this is the key to a smooth shoot.
It might seem odd that, in a project that is otherwise all about teamwork, everyone should listen to one person on the set. That’s because when the shoot begins, there is little time for discussion, and decisions have to be made very fast. Over time, a hierarchical approach with the director at the top has proved to be the most successful.
As well as making the production process more efficient, this also gives directors the necessary artistic freedom. Still, all good directors remain flexible and open to suggestions during filming. And it’s important to remember that, off the set, all team members are equal.
So what happens when everybody’s finally on the set? As soon as the director or assistant director hears ‚Ready!‘ from all participants, he or she can give the signal to start filming – for example ‚Three, two, one… Action!‘
Give the cameras a couple of seconds to start recording, and use the clapperboard before the actors begin acting. This needs to be labeled with the scene’s script ID and the number of the specific take.
The clapperboard should be held at approximately the same distance from the camera as the actor/object in the scene. This is to ensure that the writing on the board is in focus, and also to avoid affecting any cameras using an autofocus.
The person holding the clapper board should announce the scene and take loudly. Together with the board labelling, this will help you a lot during editing, when you’re trying to match scenes and takes, and synchronising image and sound from various devices.
During the shoot, the assistant director will be checking that things like dialogue, plot and camera work match the outline on the storyboard. But it’s important that the director can adapt and respond appropriately to any changes and suggestions that might come up on the day. This will help to keep the film spontaneous and natural.
After the first day of shooting, check how realistic your schedule is and see if you need to lengthen or shorten it. But no matter how much you plan, you won’t be able to control all the factors that can affect how long it takes to shoot individual scenes. You might come across technical issues, or you might have to shoot several takes of one scene because the acting isn’t good enough. Be realistic about what you can achieve and don’t spend too long trying to get the perfect shot, or the team’s motivation will decrease.
9. Sort through the recorded material
Make sure you’re constantly uploading recorded material to a computer and reviewing it throughout the day to check content and quality are as you planned.
There’s no point in discovering that you need to reshoot a scene when you’ve already moved to a different location. It would be very difficult to recreate the same conditions again.
When you go through the content take into account technical elements such as picture brightness, contrast, colour temperature and sound quality. Look out also for the framing, acting performance, and general look and feel of the footage.
10. Edit the film
Once you’ve finished filming, make sure you save all raw material securely on two different types of storage. After that:
- Get a good overview of the structure of your material using a file browser like Windows Explorer. Reorder the shots and scenes in line with the script.
- Move any takes you don’t need to an ‚outtakes‚ folder, but don’t delete them – you never know, you might actually use them. Now you’ll have fewer clips to import to your editing software.
- (if you’ve used multiple cameras) Assign the video footage from each camera to a video track, then choose the clips you want to use (see Film editing). Depending on the dynamic you want to create, you might use more clips or fewer. You don’t have to stick to the script if you realise that doing something different will improve the dramatic composition of a scene.
- Complete the edit. Only two people can work on the editing at any one time (as they’ll be sharing a computer), and usually that’s the director and assistant director. Other team members are welcome to share their opinions, but, as on the set, it’s a good idea to leave the final decision to one person.
- Show the edit to someone who isn’t involved in the project. That way you can make sure the film can be understood by people who don’t know the script.
- Add any other sound, music and sound effects. This can include the voice of a narrator or specially recorded noise that’s louder than the original sound (for example a creaking door). You could also use sound effects that help to change the viewer’s perception of space – for example using echo to transform a dark room into a giant cave. Finally, think about how you can use music to create a specific mood.
- Make colour corrections to ensure colour is consistent throughout the film.
- Adjust the sound levels of all sound tracks.
- Add an intro and credits listing everyone involved, including sponsors. You can do this in Adobe Photoshop by using ‚Titles‘ (see Film editing).
- If you have time, you could compile funny glitches from the shoot and create a sequence of outtakes. You could also create a ‘making of’ video about the filming process.
Common mistakes
- Project participants don’t stick to the production plan and shooting doesn’t run smoothly.
- Tapes and memory cards aren’t labelled properly, or aren’t backed up
- No consent from actors for footage to be published.
- Actors forget their costumes at home.
- No permission to film at the necessary locations.
- Project members aren’t familiar enough with the script before shooting starts shooting.
- Boom arms or other equipment are visible in the frame.
- Cameras, camera operators or other crew members casting shadows into shots.
- Lack of continuity from one shot to the next, for example a person walking from left to right in one shot, and standing in the next.
- Lack of continuity in actors‘ appearance in the same scene, for example a change in clothing or haircut from one shot to the next. This can happen when a scene is shot over several days.
- The project team is exhausted because of insufficient brakes
- The director demands too much from actors and crew, and motivation drops.
- No copyright permission for use of specific sounds and music. This can prevent you from publishing the film.
Related topics and links to external sources
Chapters: Camera basics / Composition and colour / Basics of lighting / Film structure / Writing a synopsis, a script, a storyboard and a shooting schedule / Sound, music and sound effects / Camera advanced / Plot and character analysis
Methodology
The interests of the young people in the project group are the most important factor when choosing a story to base the film on. Work with them to find out which subject inspires them and could motivate them for the duration of the project.
The quality you can achieve will depend on factors such as the age of the participants, and their previous experience of filming. The type of equipment available to you will also affect the final result.
But the main thing to decide on is the goal of the project. Is it to help the young people develop new skills and learn how to work as a team? Or do you want to produce a high-quality film that can be submitted to a competition?
Make sure the young people are neither bored nor overwhelmed by the project; this could lead to a lack of motivation in the long term. At the same time pushing the young people beyond their abilities temporarily can be a good thing – it can help them realise what they are capable of and create pride in their achievement.
Even though you’ll be producing a short film, you’ll still need a number of different skills to make the project possible: from creative writing, acting and camera work to teamwork and leadership skills.
Stay focused and feel free to stop filming if you notice a mood change or rising tension between project participants. Bring the young people together several times a day and get feedback on their progress. You can use this opportunity to check their motivation levels and mood.
Regularly highlight achievement, praise everybody for their good work, and make sure any criticism is constructive and offered in a positive way. Try changing a young person’s role/task if they don’t seem to be very motivated.
Make sure everyone takes regular breaks. You could introduce physical games and improvisation exercises to put everyone at ease. Relaxation and concentration exercises can help too.
End the project with a public viewing of the film. Invite all the participants, their friends and relatives, and create an opportunity for the young people to reflect on the production process.
Terminology
clapperboard, costumes, props, make-up, external monitor