
Introduction
If you are following the Animavision part of the handbook systematically then you already have a list of characters, objects and backgrounds with all sizes and movable parts that you will need to create in order to be able to film your story. If not – please read the previous chapters of the Animavision part of this handbook first and follow the necessary steps that we recommend to make a stop motion animation film. In this chapter we will explain more about the creation of all the necessary elements for two 2D techniques; silhouette animation and cut out animation. We will also give some short tips on creating and using a multiplane table that can enable you to animate in 2D easier and better.
| |
AnimaVision in action |
|
|
||
Material, equipment and tools
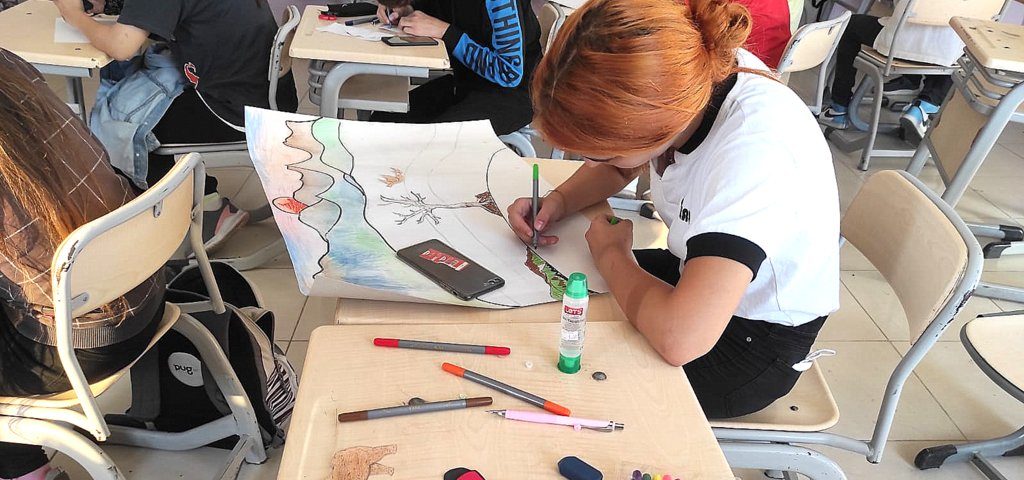
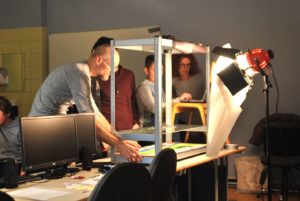
In order to successfully create the characters, objects and backgrounds for the silhouette or cut out animation you will need lots of thick paper in different colors, scissors – sometimes in different sizes, a utility knife can be useful as well. Don’t forget some glue, removable glue pads and some pencils and crayons. A measuring tape or a ruler can be useful to measure the sizes of the elements that you want to create.
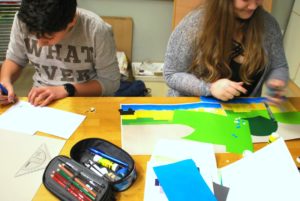
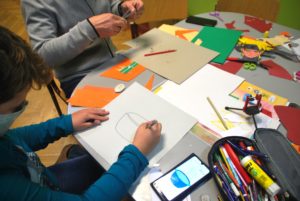
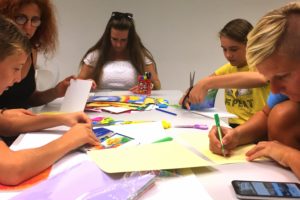

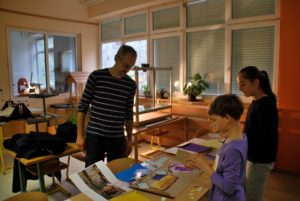
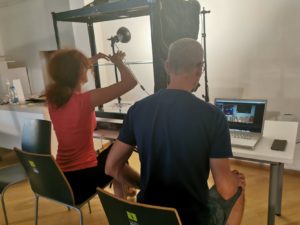
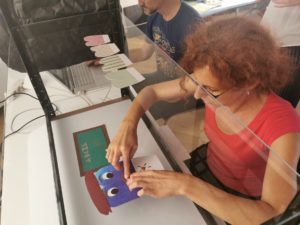
In the four pictures above you can see the participants in different cut out animation film workshops creating backgrounds, objects, characters and even titles from different kinds of paper.
For building a simple multiplane table you will need a piece of glass and some extra books or pieces of wood to put the glass on. For a more complex multiplane table you will need a garage shelf, glass plates measured and cut to the size of a garage shelf, some black color (in spray) and some tools. The process of making will be shortly explained below.
Main part
Silhouette and cut-out and animation are two of the techniques that you can quickly use when beginning with stop motion because they are very affordable and accessible. The only thing you need is paper, some glue, scissors and removable glue pads and sometimes some other material listed above. That is mostly material that you often have at home, your youth center, your association or school, or is well accessible in many everyday or specialized shops.
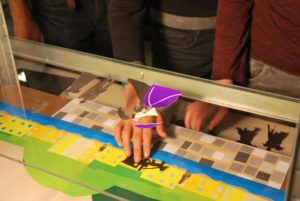
In the pictures above you can get a quick glimpse into an animation workshop in which we combined cut-out and partially silhouette technique on a self made multiplane table. All the used materials were accessible in school where the workshop took place.
We recommend you to make a test setting of your animation setup including the camera that you plan to use for your film before you start creating it big scale. For this, please follow the advices in the chapter about the camera so you can peek into the chapter already now. That will help you create all the necessary elements more precisely.
Creating characters and objects in 2D
Creating characters and objects is one of the key steps in making your stop motion animation. When building a story, character profiles and overall style of the film, you should put a lot of thought into the appearance of your main character or characters. You should define their physical appearance (body type, the color of their skin, eyes, clothes that they are wearing…) as well as their personality traits and mood is reflected in their physical appearance. Now when you’ve started making them – and on the basis of the technique that you are using – you have to think even more in detail.
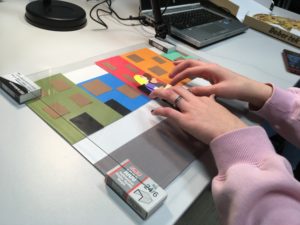
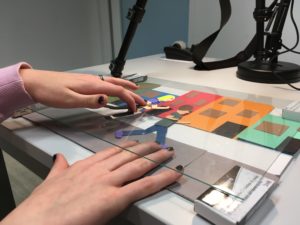
When creating characters you can use internet resources or go to a nearby museum or gallery for inspiration. In the photos above you can follow both processes.
Creating characters and objects in silhouette animation
The simplest but not necessarily the easiest form of the 2D stop motion animation technique is a silhouette animation that has a long tradition. For more information we recommended that you research a German animator from the first half of the 20th century, Lotte Reiniger, whose influence on stop motion animation is nowadays rediscovered and who paved a way to many well known animators and studios. For some more information on Lotte Reiniger please see chapter Introduction into stop motion animation.
In the video above you can follow the process of making of a silhouette animation.
For the silhouette animation you can create your characters and objects out of black or some other colored or evenly texturised paper and animate it on a white or some other coloued background. Silhouette stop motion animation has a simple and clean aesthetics but requires some thought put into creating characters and objects since the viewer can only see them as silhouettes. Therefore you are not able to put details into your characters with the help of color or give them features that the viewers would see from the front, like movement of the lips and eyes.
For creating characters and objects in silhouette animation the thicker paper or cardboard is recommended since it doesn’t crumple very much and the characters and objects are easier to move. For connecting the body parts together you can use removable glue pads and stick the joints in the back, although you have to make them longer in order to be able to stick them to the body. See more about the use of removal glue pads down below.
For cutting detailed parts of your characters or objects you can use average size scissors as well as precise small scissors or a cutter blade.
In the video above (For the nature, LIJAmedia – SI) you can see the results from the silhouette animation workshop.
Creating characters and objects in cut out animation
The cut out stop motion animation in which you create your characters and objects from different colored, patterned or textured paper is a form of stop motion that is widely used.
When making cut out animation from different kinds of paper you already have more options for creating your characters and objects than in silhouette animation since the spectator can see their features from the front as well.
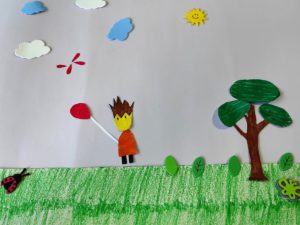
For creating characters and objects you can use colored, patterned or textured paper, draw some characters or object features with colored pencils or crayons and also combine the paper with some other material like textile, threads, objects from nature…
It is not always easy to get exactly the color, pattern or texture of the paper that you want. Check what kind of paper is available in your shops and maybe adjust the overall style of your film to the offer.
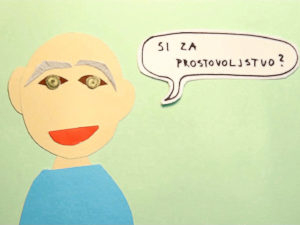
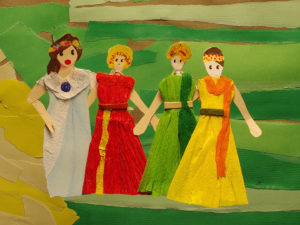
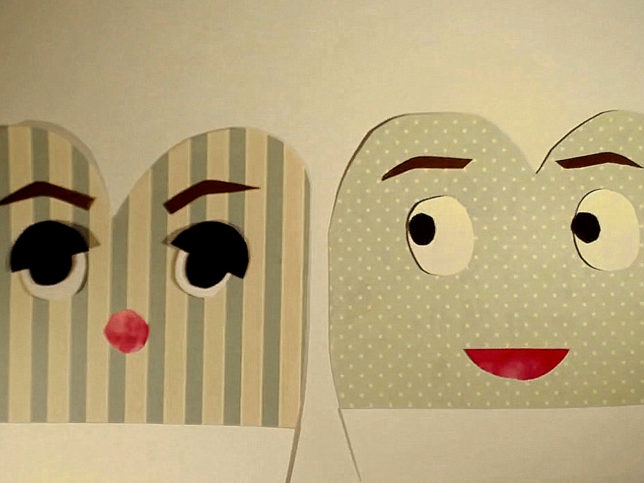
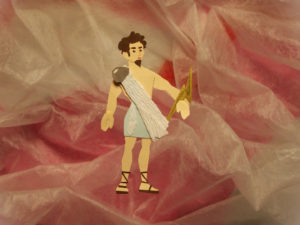
Above you can see some examples of the use of different paper. The character in picture one is made of colored paper, two characters in picture two (on the right) are made partially of patterned paper, the character clothes in picture three are made partially or entirely of crepe paper.
You can also create necessary colors yourself by coloring some white paper with pencils or crayons.
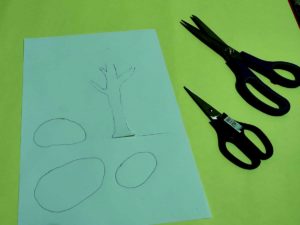
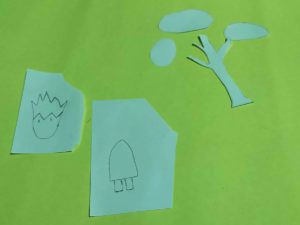
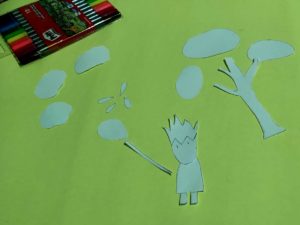
In the pictures above you can follow the process of creating characters and objects in the way mentioned above.
In the video above (Baloon, Ülkü Muharrem Ertaş Anadolu Lisesi– TR) you can follow the described process together with the outcome.
Very popular cut-out type is a collage where characters and objects or parts of them are cut out from different magazines and newspapers.
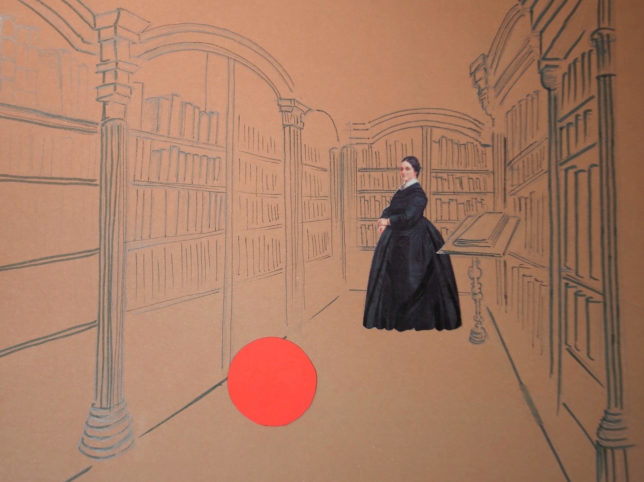 In the picture above you can see the use of three different techniques in the same shot. The woman is cut out from a printed brochure, the red ball is cut out from colored cardboard paper and the background is drawn with a pencil.
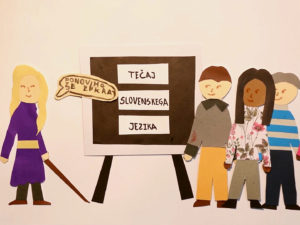
Don’t forget that your character doesn’t have to be necessarily humanlike, they can as well be in some other form and can have some extra powers which are not possible in the real world.
Above you can see examples of cut out characters from patterned paper in an imaginative form with humanlike features.
For creating cut-out characters – similar to creating silhouette animation – thicker paper or cardboard is recommended since it doesn’t crumple so much and the characters are easier to move.
If you cut some characters, objects or parts of them out of some magazines or newspapers on thinner paper or draw them on thinner paper, you can still glue them to some thicker paper in order to be able to easily move them around when animating and extend their durability.
For cutting detailed parts of your characters or objects in cut out technique you can – also similar as for the silhouette technique – beside average size scissors use some precise small scissors or a cutter blade.
Connecting the movable parts of characters and objects
When creating characters and objects you will usually create them with some movable parts that you will be able to position in different ways while animating in order to make them feel more real and alive. These movable parts can be human or animal limbs like arms, legs or parts of objects like levers, covers… There are different ways of connecting the movable parts together. You can use small pieces of wires and glue them with tape at the backside of your character. You can easily connect them to the body in the back with removable glue pads that enable you to keep them more or less in place. Removable glue pads are made from artificial material that enables you to temporarily glue different pieces of paper or some similar material on the wall, glass or together. They are removable, reusable, quite cheap and widely accessible. Look for them in your local office shop or online. For easier sticking together and moving, you have to make all the movable parts longer in order to stick them to the body.

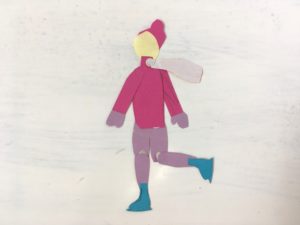
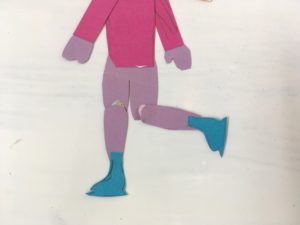
This ice skater on the pictures above has her legs connected to the body in the back in knees with removable glue pads.
Changing forms and rotations
Although silhouette and cut-out techniques are great for beginning with stop motion they also demand some extra work for certain kinds of moves. As a technique they are a bit more demanding when you want to change forms (transform a character into something else) or move the character or object from the front to the side positions. You usually need to make all these stages separately from the paper when, for example, using 3D puppets like plasticine puppets, you can just easily remould or rotate them.
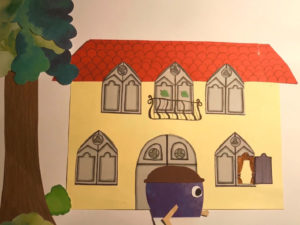

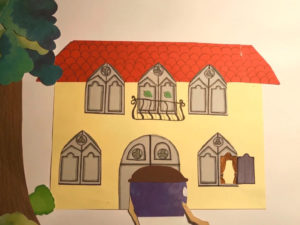
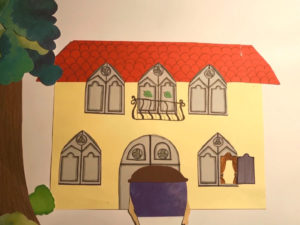
In the pictures above you can see an example of a character rotating in cut-out technique. In every picture a character had to be redone and set separately.
In the video example above (Transformation – LIJAmedia-SI) you can see an animal turning into a letter. All the steps of transformation had to be designed separately.
Creating background in 2D
When doing animation in 2D style your background is usually flat, fixed on the table or floor. When creating it you can mostly rely on the material of your chosen technique, but sometimes you can combine it with some other material or techniques. For example, you can make your characters completely out of paper but add some textile, plastic or some other material to the background.
You can even draw it or use drawing as a draft so you know where to glue paper or some other material.
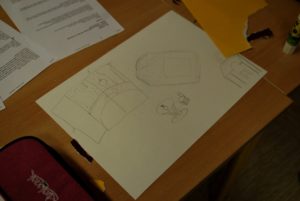
On the pictures above you can see an example of making a draft of the background with a pencil and later gluing the background on with different paper.
Creating background for silhouette animation
In the silhouette animation you don’t usually use a lot of other options as your background apart from the paper of some color. Of course you can sometimes play with other materials but you have to be careful not to overdo it because the attention of the viewers can shift from the main character to the background if the background is too versatile.
It is good to outline the background with some structures made in the silhouette technique.
In silhouette animation, a light can play a special role to outline your characters and objects nicely. For achieving a good effect you can use a special lightbox for lightening your shot from below or you can use some glass from a glass table or photo frame, cover it with paper and light it from below with some ordinary table lamp. Please be aware that this, depending on light, can get very hot, so you have to use cold lamps.
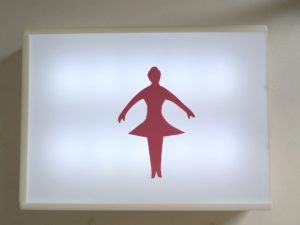
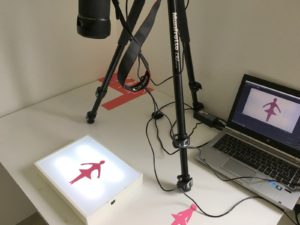
In the pictures above you can see a simple lightbox that you can buy in different local shops for a dood price and create an interesting way to light the background of your silhouette animation.
Creating background for cut out animation
Similar to creating characters and objects in cut-out stop motion technique that can be cut out of paper or drawn, colored and later cut out, backgrounds can also be drawn, cut out of cardboard, made with some other materials or as a combination of different materials.

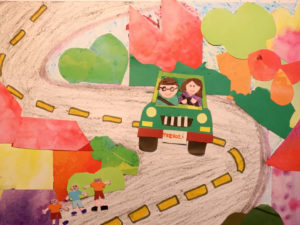
The three pictures above show you the examples of use of different techniques or materials when creating backgrounds. In picture one the background is made completely out of paper, in picture two – as a combination of colored pencil drawing (the road) and paper. In picture three the background is the combination of paper and textile.
Always be aware that the background and all the elements of it should be in appropriate ratios to the character and objects and big enough to cover the entire shot.
Green screen background
You can film your animation on a greenscreen as the background, and change the background later during the editing stage. Sometimes it is possible to change it in a stop motion application.
When filming with greenscreen or some other color instead of green you have to be careful that your characters and objects don’t contain the same color as the background paper.

Participants of the workshop are using simple green screen.
Moving background and multiplane animation table
Although background is something that is in our animation usually completely fixed in order to give the viewer the feeling of stability of the location it could also be movable in order to create an illusion of movement of the character or object. If you keep your main character in one place (even if it moves the body parts) and move the background, you create an character movement illusion. This is especially handy to use while animating on a multiplane animation table.
Multiplane animation table is a table with transparent layers with an aim to create a depth of picture but to also be able to animate your objects and characters in separate planes easier. It can contain at least two separate layers. It was one of great inventions of Lottie Reiniger, the German animator that we already mentioned in our handbook, and upgraded in the professional industry by Walt Disney.
You can create a simple but effective multiplane table on your own using a garage shelf just by putting in glass shelves instead of wooden ones ( you have to purchase glass shelves separately and spray the inner construction with black paint) or you can simply put a piece of glass from the glass table or from a photo frame on the books or some other holders on the side.
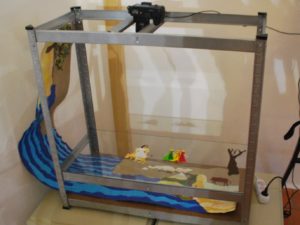
In the pictures above you can see a simple multiplane animation table with one glass layer.
In the pictures above you can see a multiplane table made of garage shelves with a wooden first layer and two glass layers above. On the second picture you can see details from animating on the second layer while the objects and characters on the upper and lower layers stay fixed.
Using a multiplane table when animating moving backgrounds is almost a necessity in order to keep characters and objects that don’t move around. The second important thing is that your background has to be long enough. You should be able to pull it for a certain amount of frames. For the shorter moves the background can be shorter but for longer moves it should be much longer than the whole fixed scene.
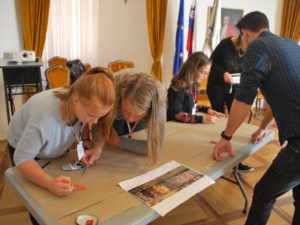
In the picture one you can see workshop participants creating a background on a long piece of brown paper. From the second picture it is visible how long was the background in comparison to the characters and the length of the animation table.
In the video above (Animirana Evropa, LIJAmedia-SI) you can see an example of an animation in which the animators moved the background on a lower layer and kept the main character on an upper level in the same position just moving some body parts.
Final remarks
Many computer generated animated images are based on the silhouette or cut out technique with body parts which are made in computer program and the movements defined with the help of computers.
But the handmade animation definitely has its magic in getting to know different materials, touching and feeling them and developing the fine motorics when creating the pieces.
Silhouette and cut out animation are usually made in 2D with the camera filming from above, but they can be made in 3D with the camera filming from the front as well. Although the objects and the background can stay flat. Look for some inspiration watching the traditional Japanese paper theatre (kamishibai) or shadow theatre and some modern variations of it.
Common mistakes
- One of the common mistakes when preparing your characters, objects and backgrounds is the use of inappropriate material. Glossy paper, for example, can reflect the light, thin paper can crumple while moving. It can also happen that when you use different materials, they don’t fit well together due to color or texture.
- The second common mistake is not attaching different parts properly together so they fall off or the seams are visible. This is especially important with close shots where the spectator can see a lot of details.
- Another type of mistakes is not fixing the fixed background strong enough so it moves when animating. That gives a spectator an impression of instability.
- When using a multiplane table there can be some problem with reflection of lights on glass layers. Take enough time and prepare the lights carefully before animating and spray the inner construction of the shelf with matte black color.
Exercises
- If you have time and no exact project in mind, you can play with different kinds of paper and other materials for creating different characters and objects. See what you like and what looks good.
- You can also play with different kinds of background: use fixed backgrounds, movable backgrounds, one color backgrounds, backgrounds lighted from below and green screen backgrounds.
- Changing form can be a great practice when you start with cut-out stop motion animation. Decide for the first and last form and then make a character in the first and last form and in different stages in between and animate all of the positions.
- Make a simple or even more complex multiplane table, set it and try to animate a scene on it.
Related topics and links to external resources
Chapter: Basics of creating characters, objects and backgrounds
Walt Disney’s multiplane camera
Japanese shadow theatre
Japanese paper theater (Kamishibai)
Methodology
When working in a group divide the tasks based on the character plan as well as objects and backgrounds that you did in the preparation phase. Dividing the group into smaller groups can be extremely effective and quick if the tasks are divided properly. Some of the participants can create backgrounds, others can create characters and objects. Those with more practise and/or talent in drawing can be in charge of the more demanding tasks like drawing the background and creating the prototype of the characters, others can only execute more supportive tasks like coloring, cutting out… In this way, a variety of participants can be included and find their place in a group and in a process.
Terminology
Removable glue pads, greenscreen, multiplane animation table, moving background, kamishibai