
Introduction
In the chapter Detailed Introduction into Stop-Motion we described that there are basically only two different kinds of animation: the two-dimensional animation (2D) and the three-dimensional animation (3D).
In this chapter we want to explain how to build the technical set-up for the different types of animated film. Often normal furniture or simple planks are enough for this. However, there are also ways to construct specific layouts yourself.
Of course, suitable locations are also important for the technical set-up, which is why we will also discuss this in this chapter.
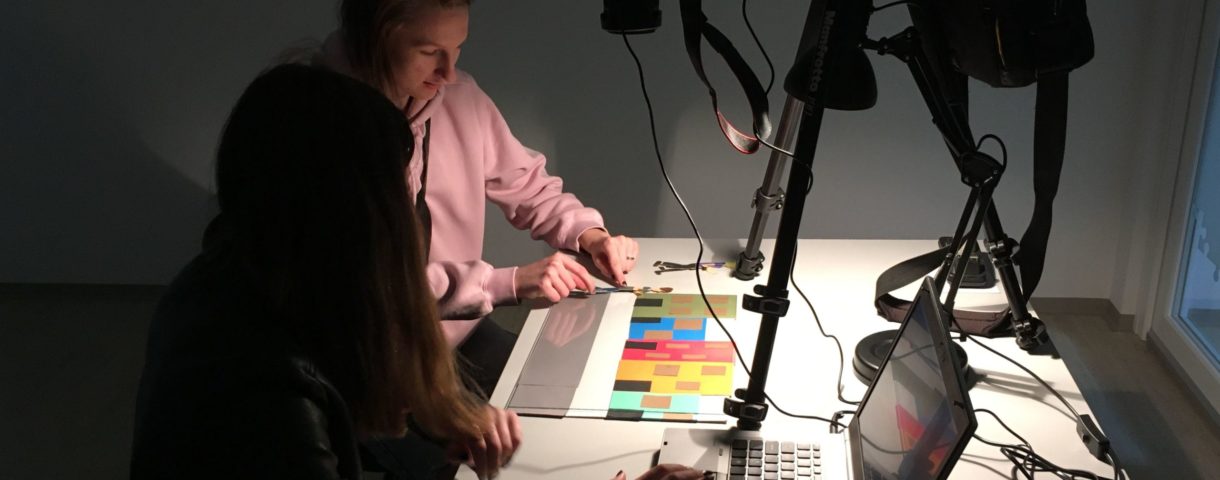
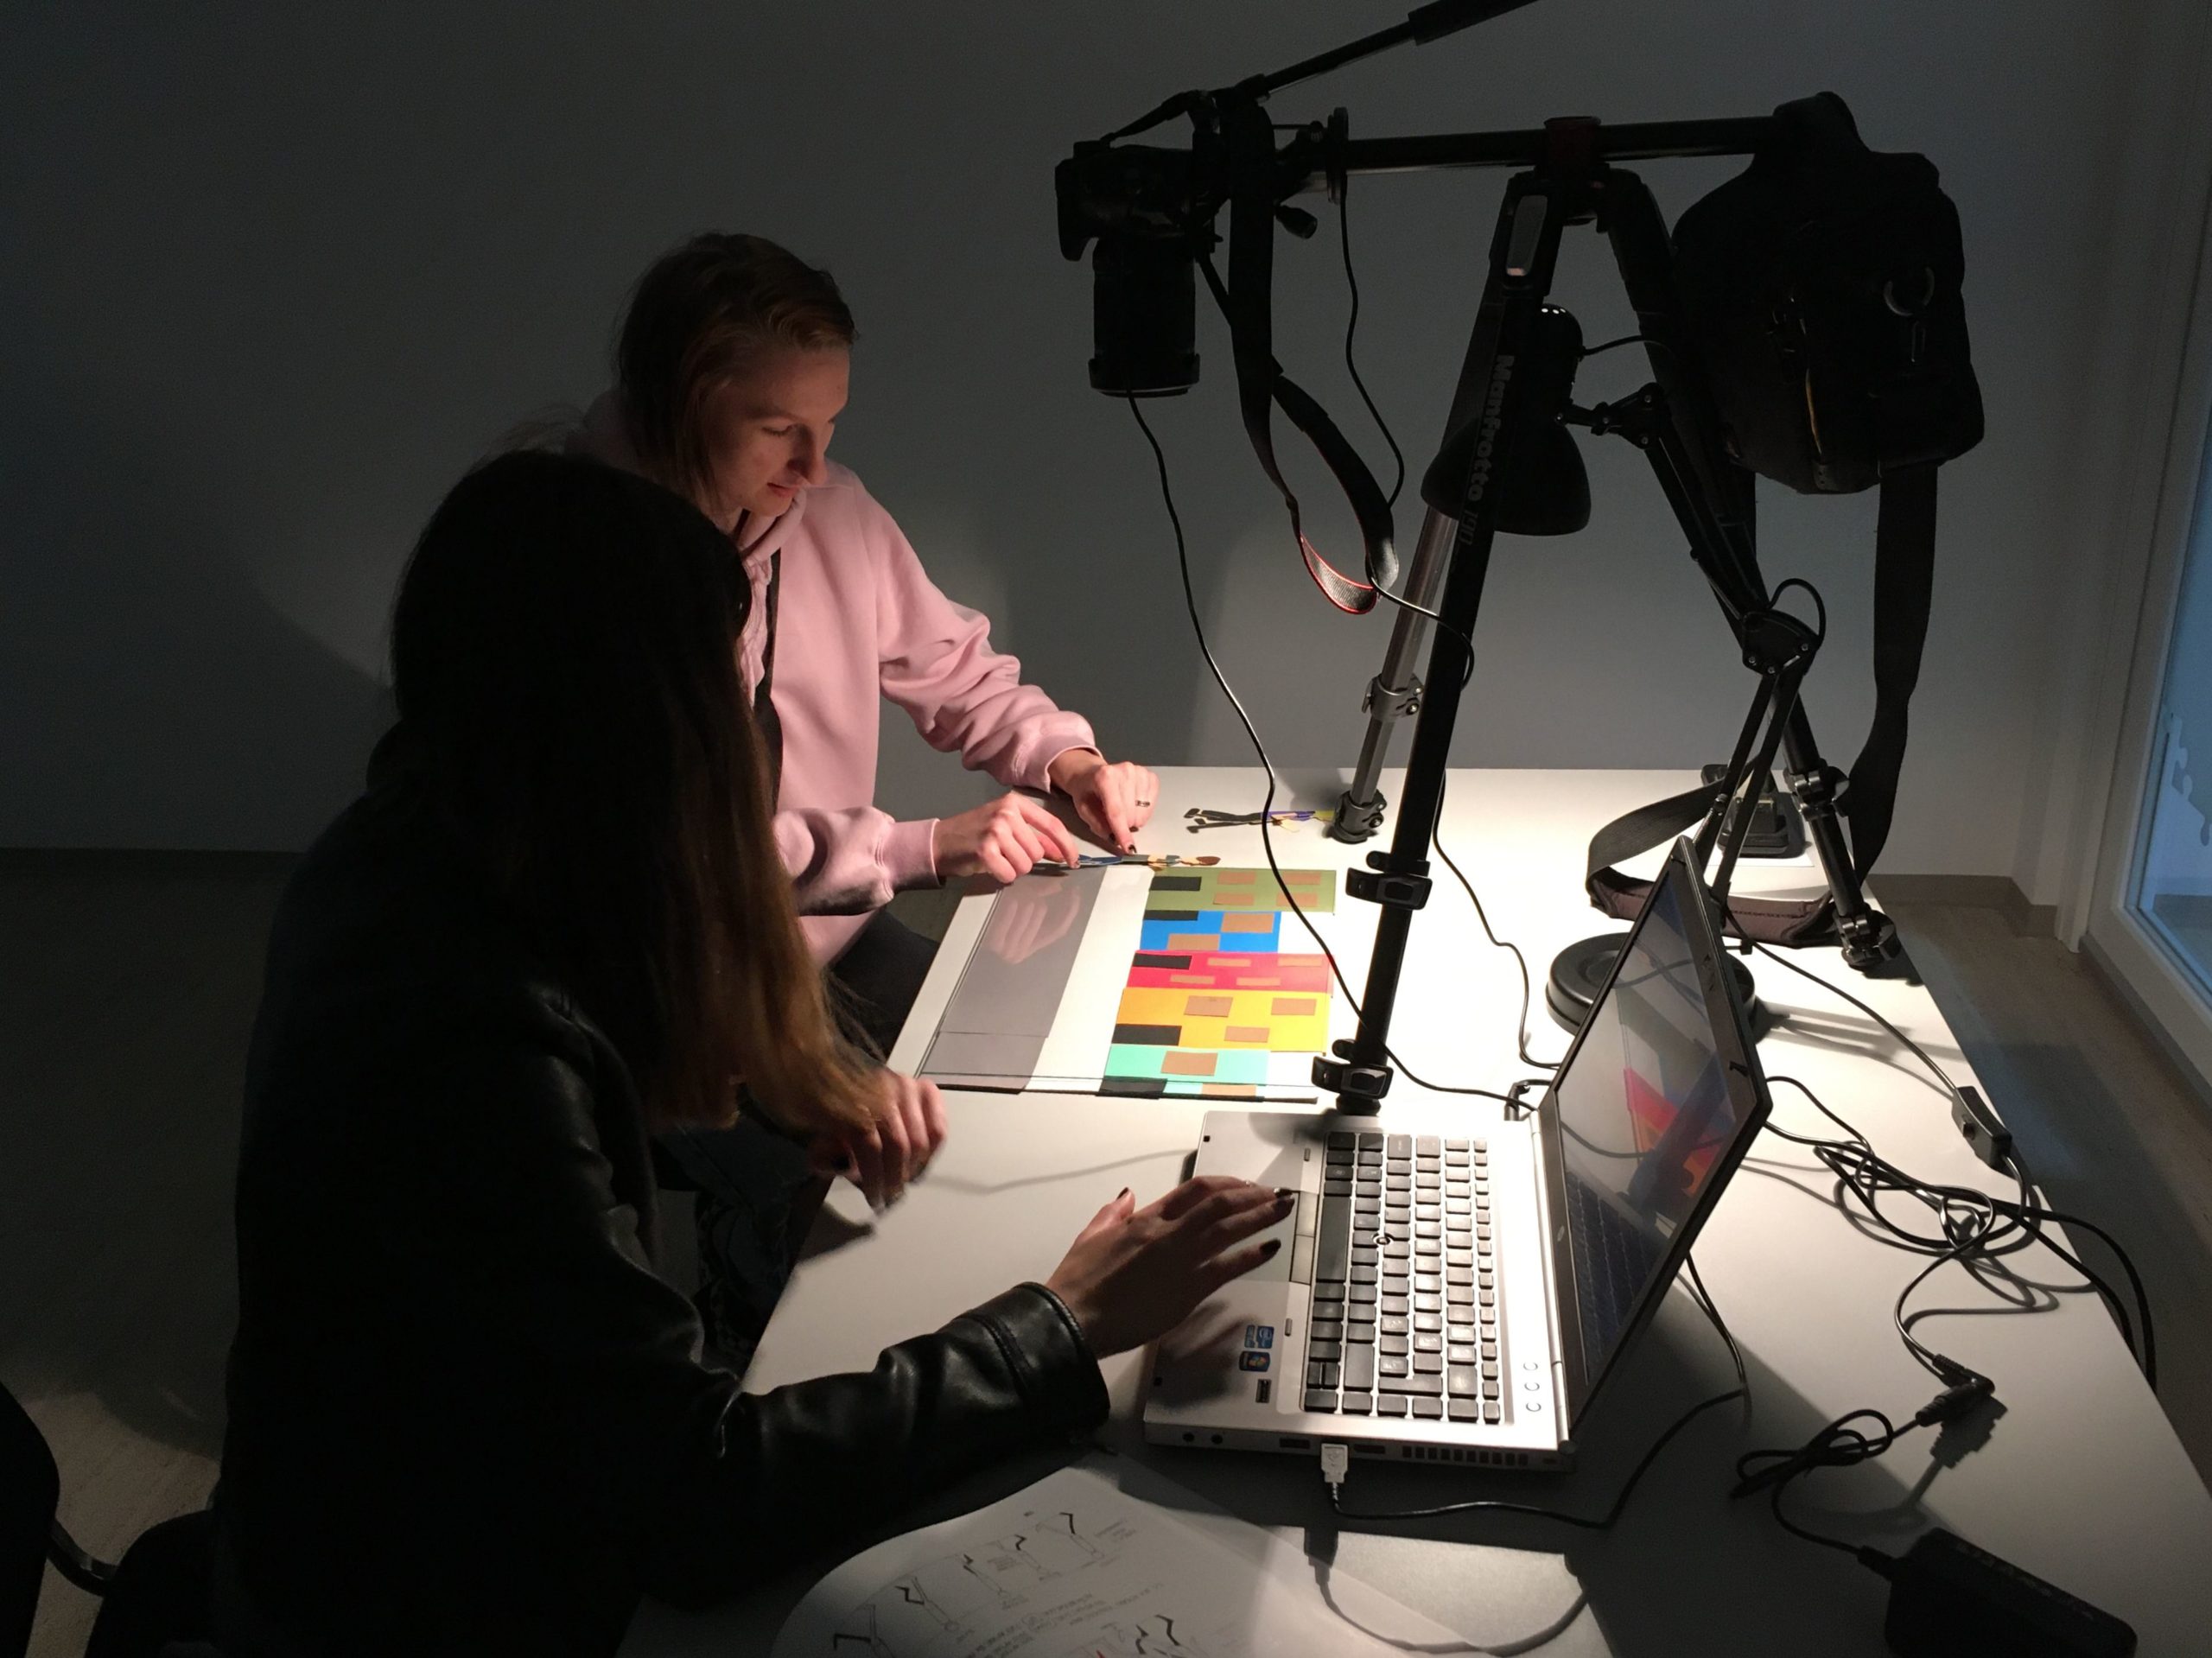
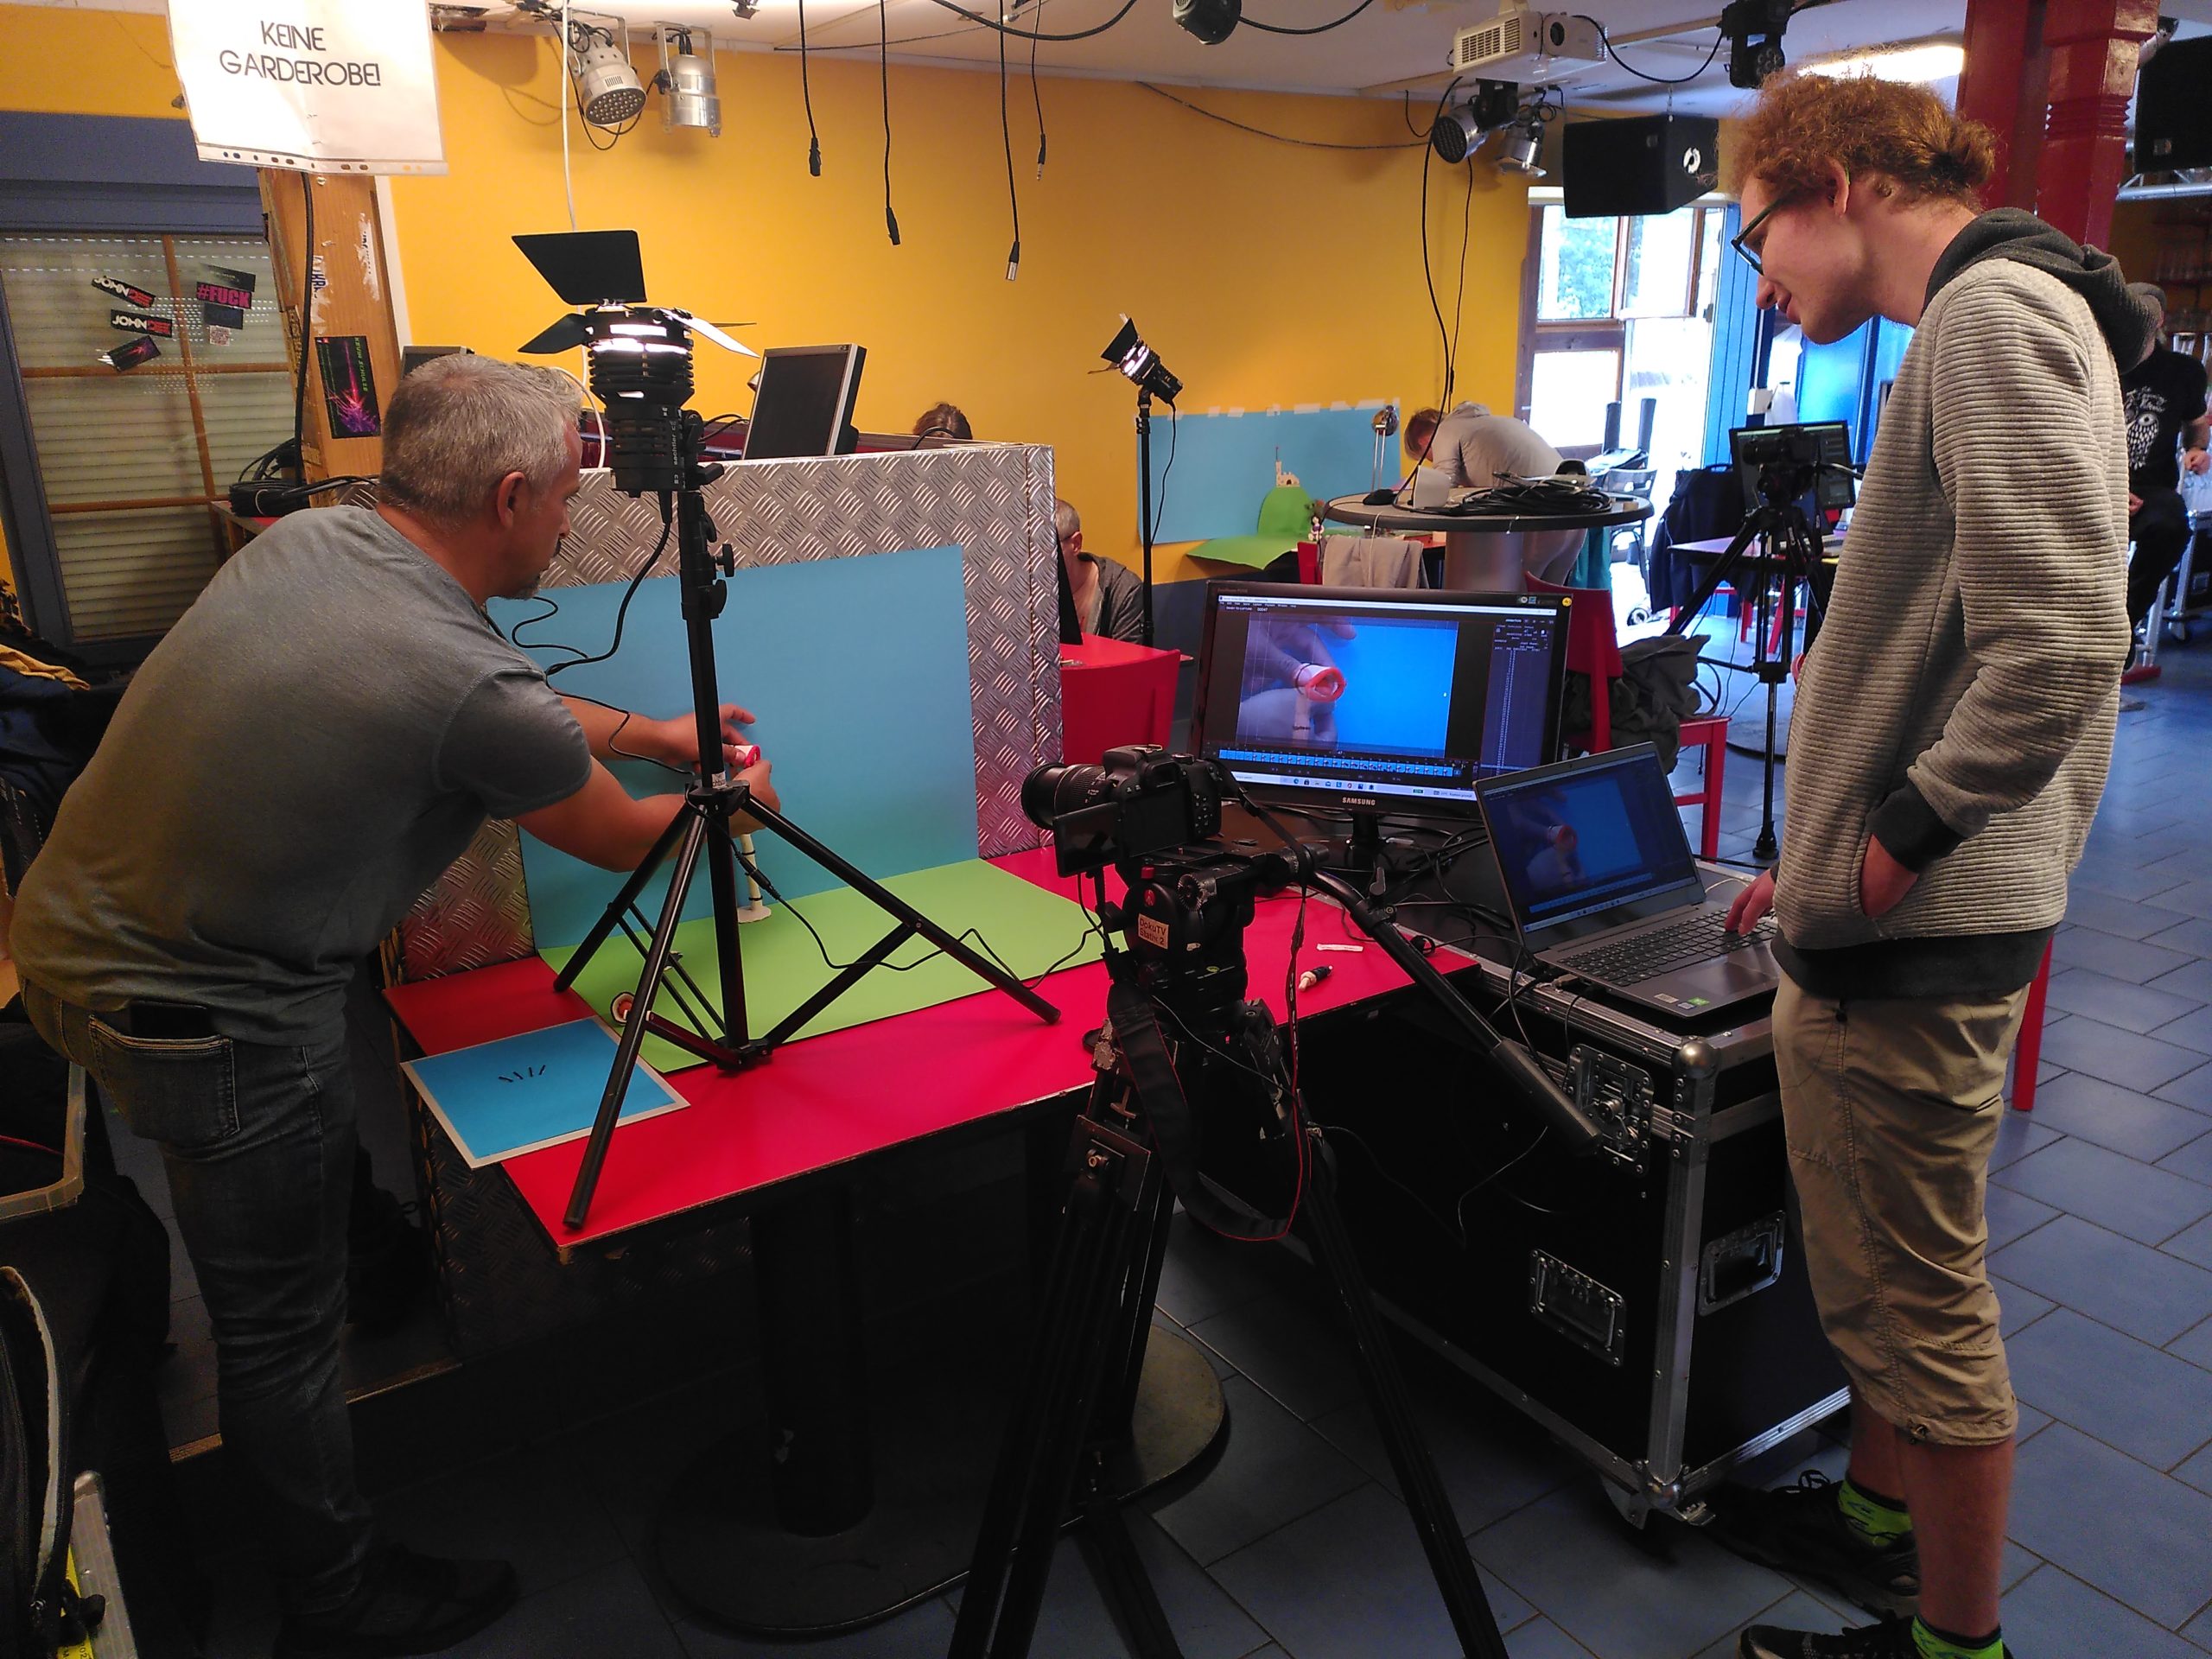
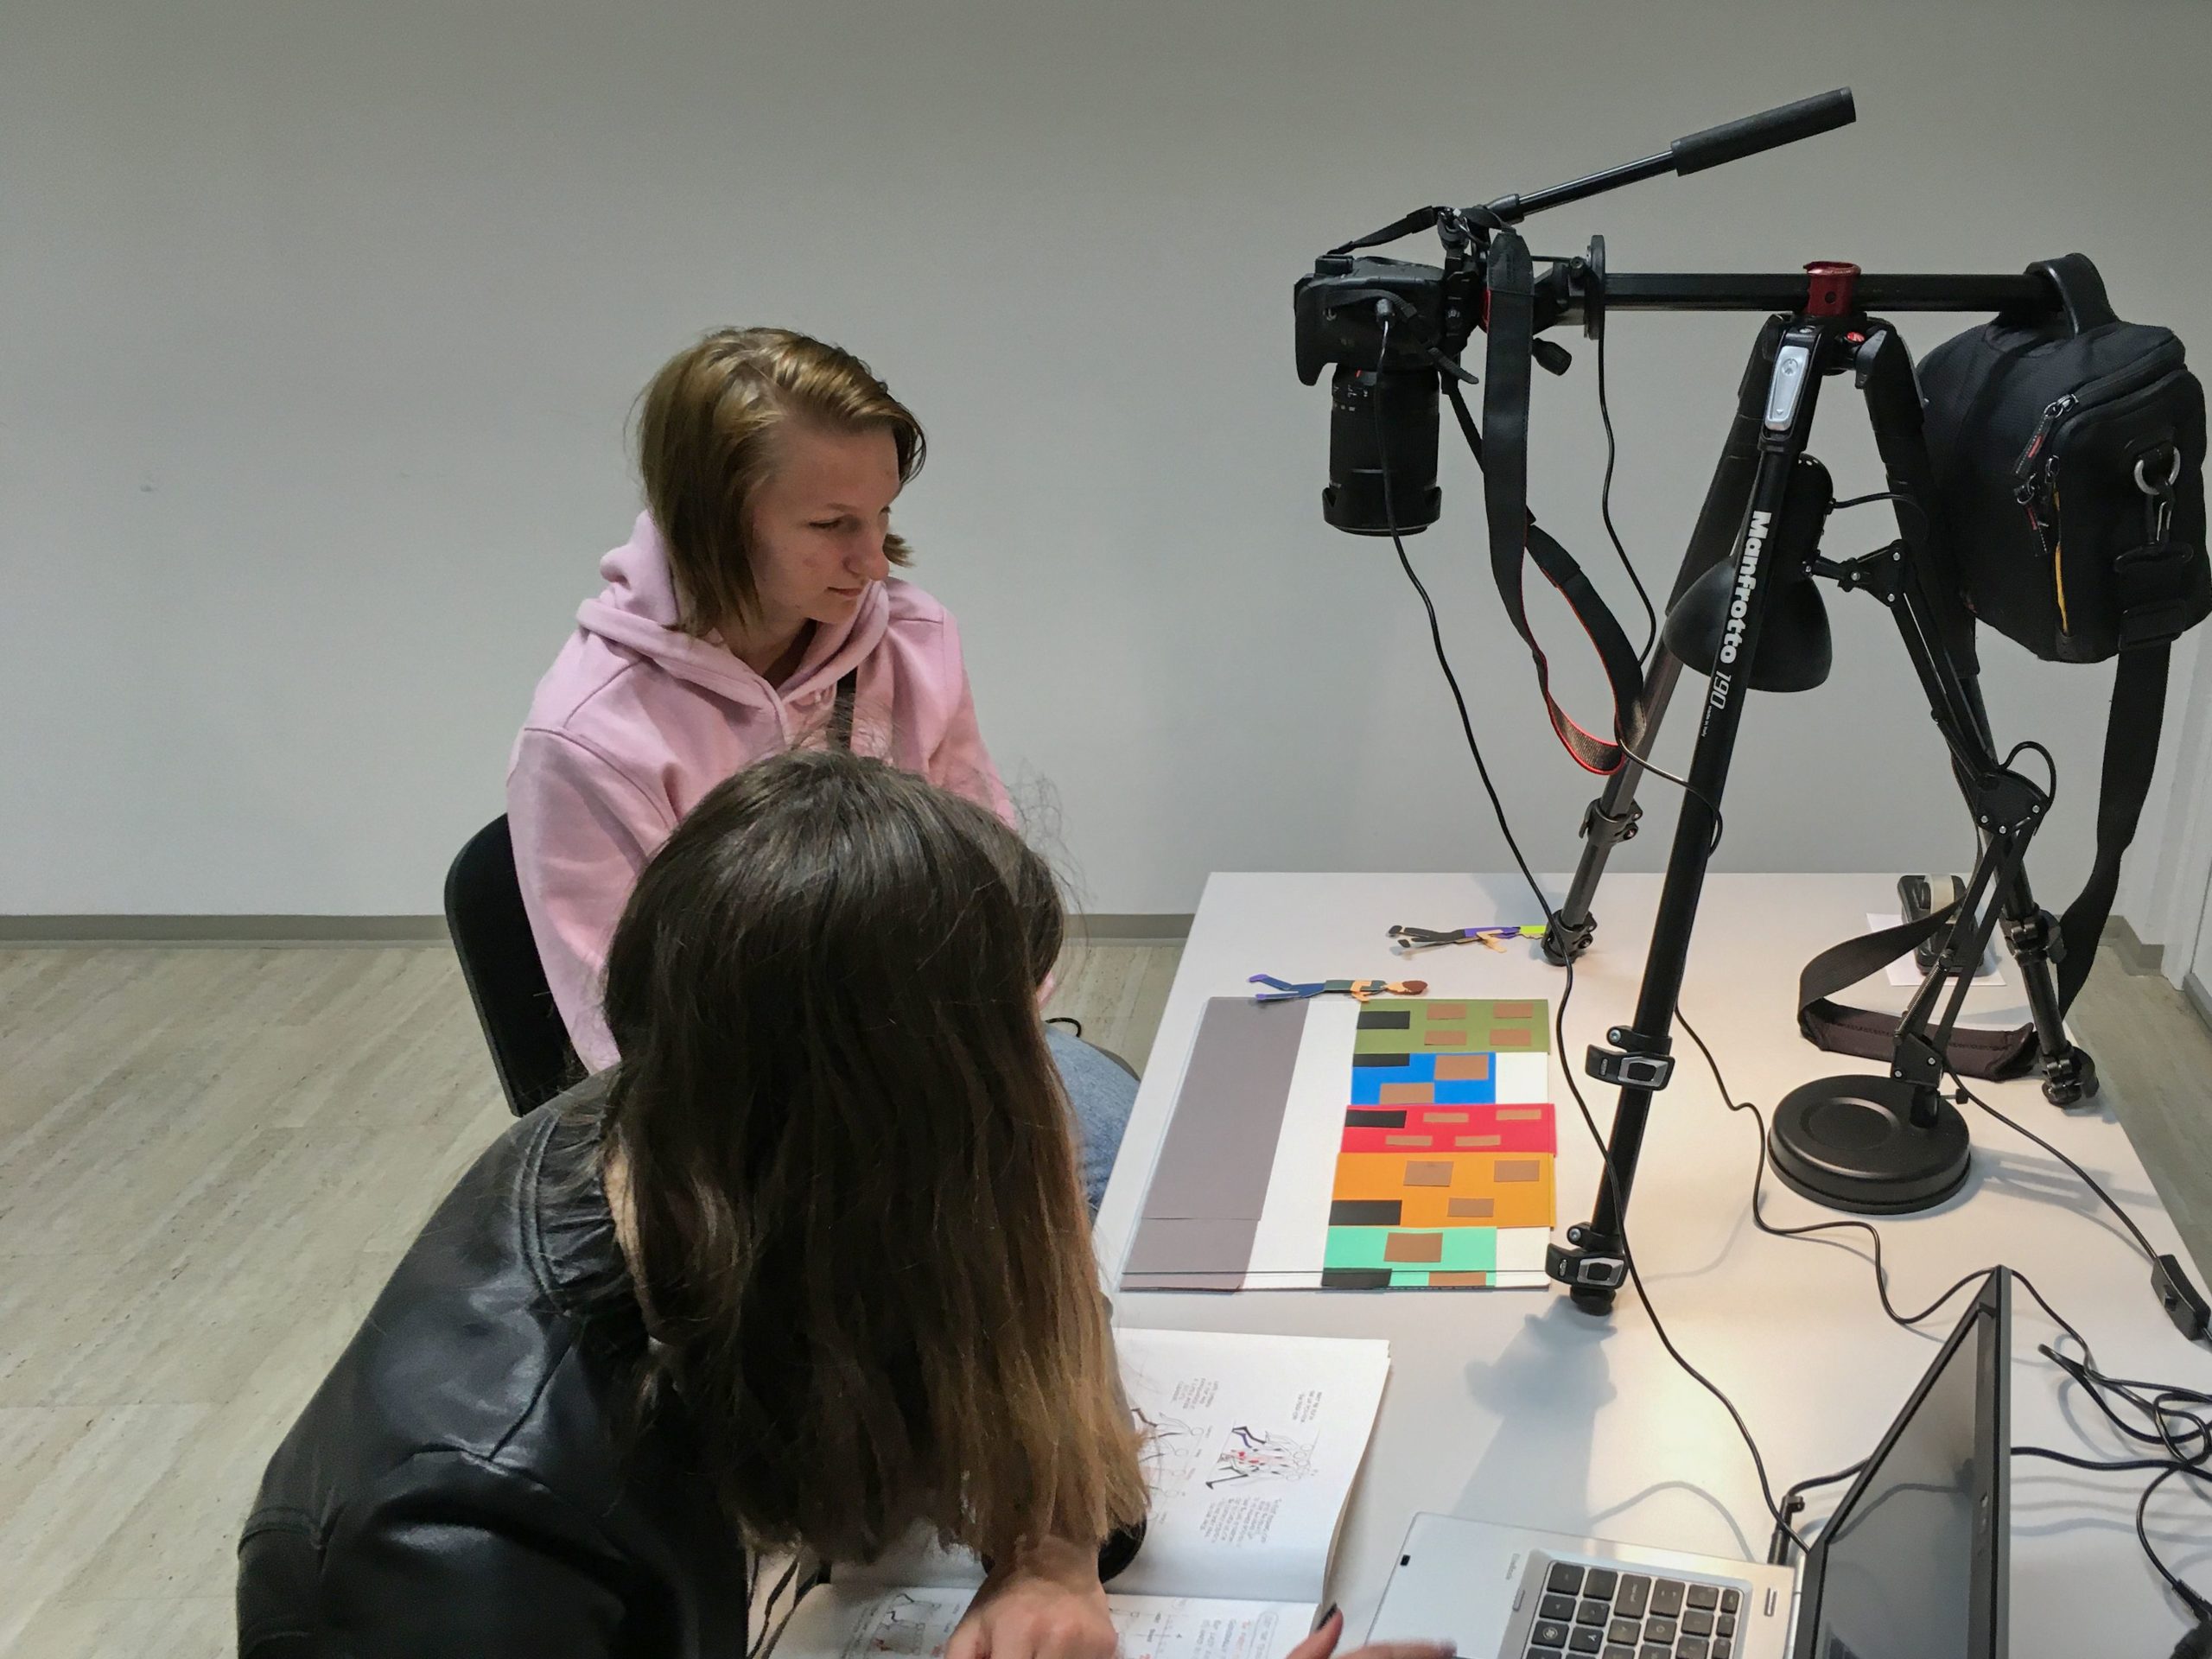
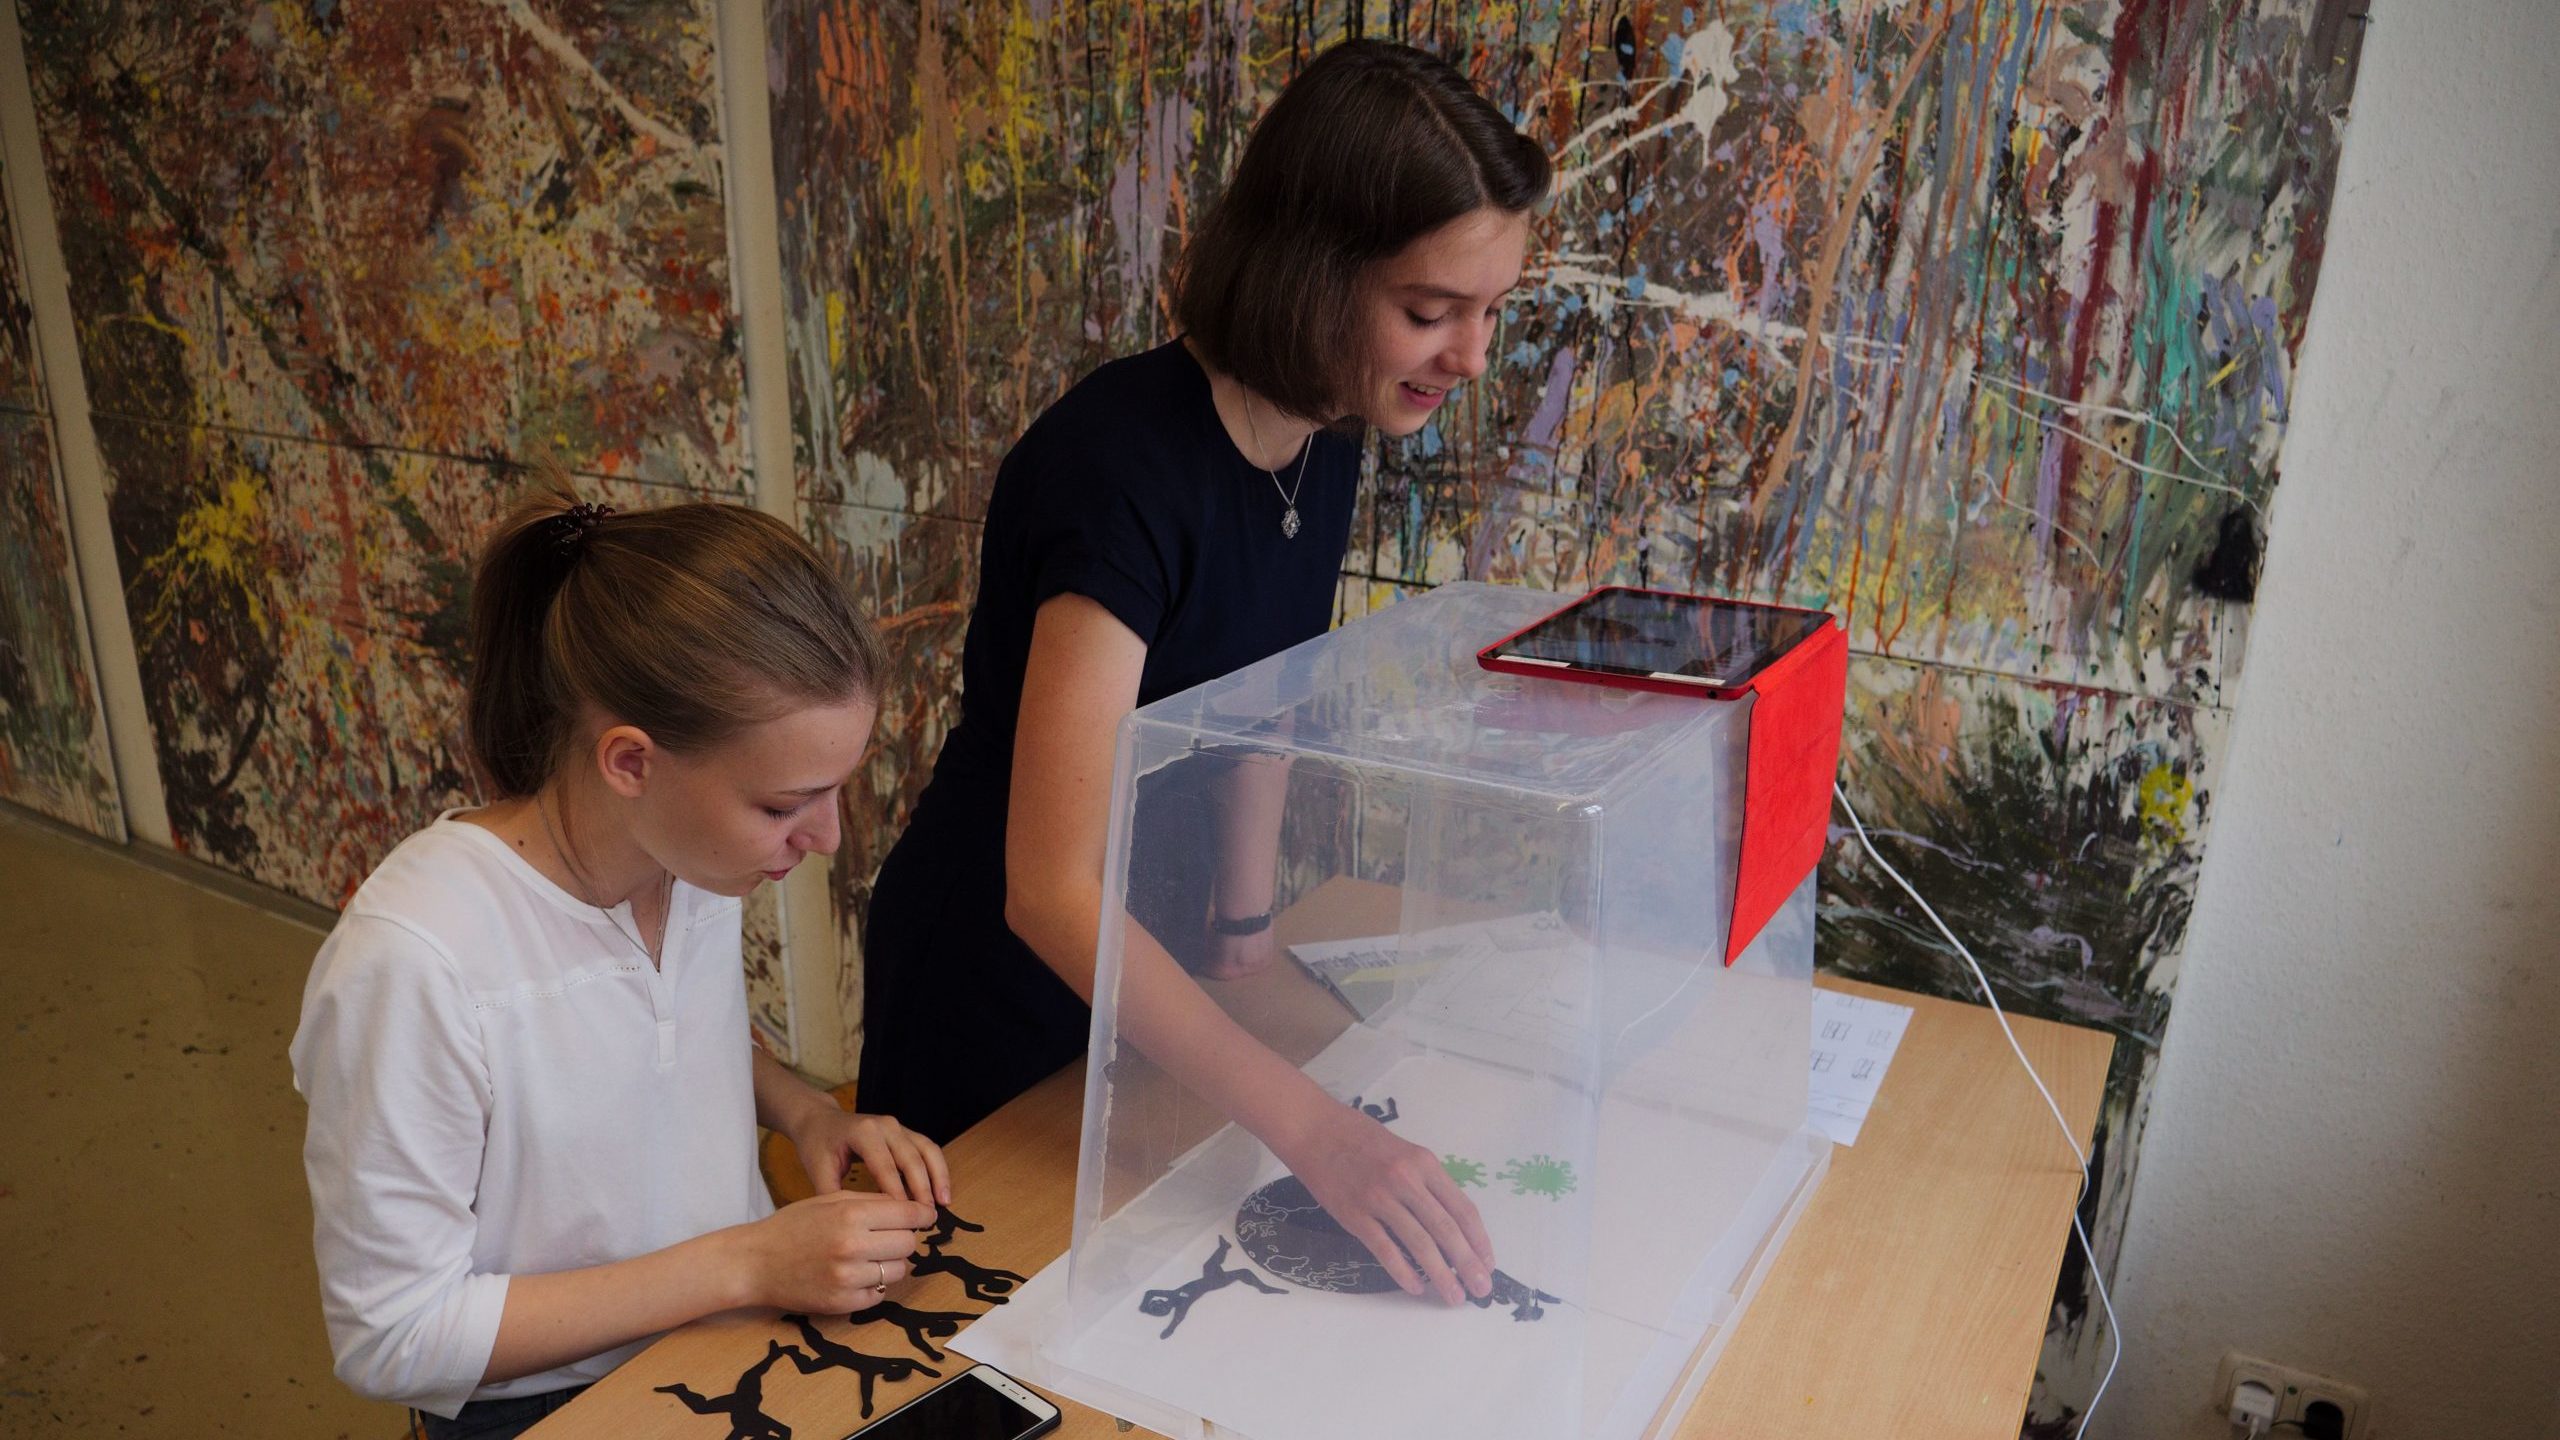
AnimaVision in action |
|
|
|
||
Work materials, equipment and tools
Work materials, equipment and tools depend on the type of animated film. The basic equipment includes a room where you can work undisturbed, a camera, a way to attach the camera (e.g. tripod) and one or more lights for illumination.
When we speak of a „camera“ in AnimaVision, it can be a camera, a smartphone/iPhone, a tablet/iPad or even a webcam. Only if it is crucial for the specific setup, the terms camera, smartphone, tablet or webcam are used separately.
It is possible to work on the floor or on the table, although experience has shown that working on the table leads to better results and is more comfortable. Working on the floor is more suitable for very young participants who, for example, want to create an animated film with their toys.
Main part
Locations
It is important to be able to build your animation film set-up somewhere where it can stay for the time between production processes without anything being changed. Ideally, the room can be locked and not be used by anyone else.
If the space is still used by others, it is good if the technical set-up and the animated objects can be stored somewhere safely. This can be in an area in the same room or in another room that is less frequently used. It is especially important with three-dimensional animated films to be able to store the set-ups, figures and objects in such a way that they do not change their position during the phases between project stages. This is the only way to pick up where you left off after an interruption.
No matter if you have the option of storing them safely during breaks or not, it is advantageous to complete all photos for a scene or a setting within a scene during the project time slot. This way, the problem of unwanted shifts in the technical set-up, lighting or figures and objects cannot arise in the first place.
The two-dimensional objects and backgrounds for the cut-out can also be kept in an art folder. It is also important here to finish a scene during one session, if possible.
In order to protect the animation set-ups from draughts and perhaps also changes caused by other people entering the room in the period between two project deadlines, it is a good idea to cover the set-ups of a 3D animated film with a large cardboard box. You can also weigh down cut-out paper objects with small stones or other objects so that they cannot change their position.
Darkening the room
Depending on the time of day and the amount of clowds, daylight can change the lighting situation in the room to a greater or lesser extent, which means that your stop-motion set-ups will be illuminated with varying degrees of brightness. This then leads to frequent changes between light and dark in the sequence of images for the film later on, giving the impression of an unattractive flickering.
Therefore, it makes sense if the room can be dimmed as much as possible. Then the sunlight has no influence on the lighting in the room and the lighting can be completely controlled via your lamps. This allows the light to be used almost identically over several dates.
Flickering in the animation due to changes in daylight.
It is best to find a room that has no windows or that you can completely darken with curtains or blinds. You can also cover the windows with cardboard or dark fabric. The door should remain closed if possible, because light can also enter through the door, which changes the brightness of the photos.
A room that can be darkened
But don’t worry if you don’t have the possibility to darken the room completely. Even then you can achieve very good results!
Floor or table
If your animation will be made on the floor, it is good to have a cushion or blanket to sit on.
Animating on the table has many advantages. You have better access to the objects in front of the camera compared to working on the floor, and you can reach them with your hands and have a better view as well. When working at the table, you should have chairs to sit on and if needed a stool that shorter people can stand on to be able to see the display of an raised camera (especially when doing the cut-out animation).
If you control the camera via an app on a second device (computer/tablet), no one needs to stand on a stool. However, you may need a larger table or a second table on which you can place the second device.
Animation setup and computer on two different tables to get more space
If you use a table, make sure it doesn’t wobble and put something under a table leg if necessary.
No matter if you animate on the floor or on the table, you should avoid running around the room because this can create a draught causing paper or small light objects, such as figurines, to move!
Power supply
For the lighting in the room or other equipment such as cameras or computers, you will of course need electricity and, if necessary, extension sockets or cable drums.
Caution: Cable drums must always be unrolled completely, otherwise they can get very hot and the fuse can blow out! You should also tape the cables that are lying on the floor so that no one can trip over them!
You can power cameras / smartphones / tablets using the batteries or connect a power adapter or charger directly.
It is not good for the lifespan of smartphone and tablet batteries if they are constantly charged. It is best to always charge them to about 90% and then let the battery level drop to 20%.
Some cameras do not have a power connection. For some models, however, there is a so-called battery dummy. This can be used instead of the battery and the camera then receives power directly from the socket.
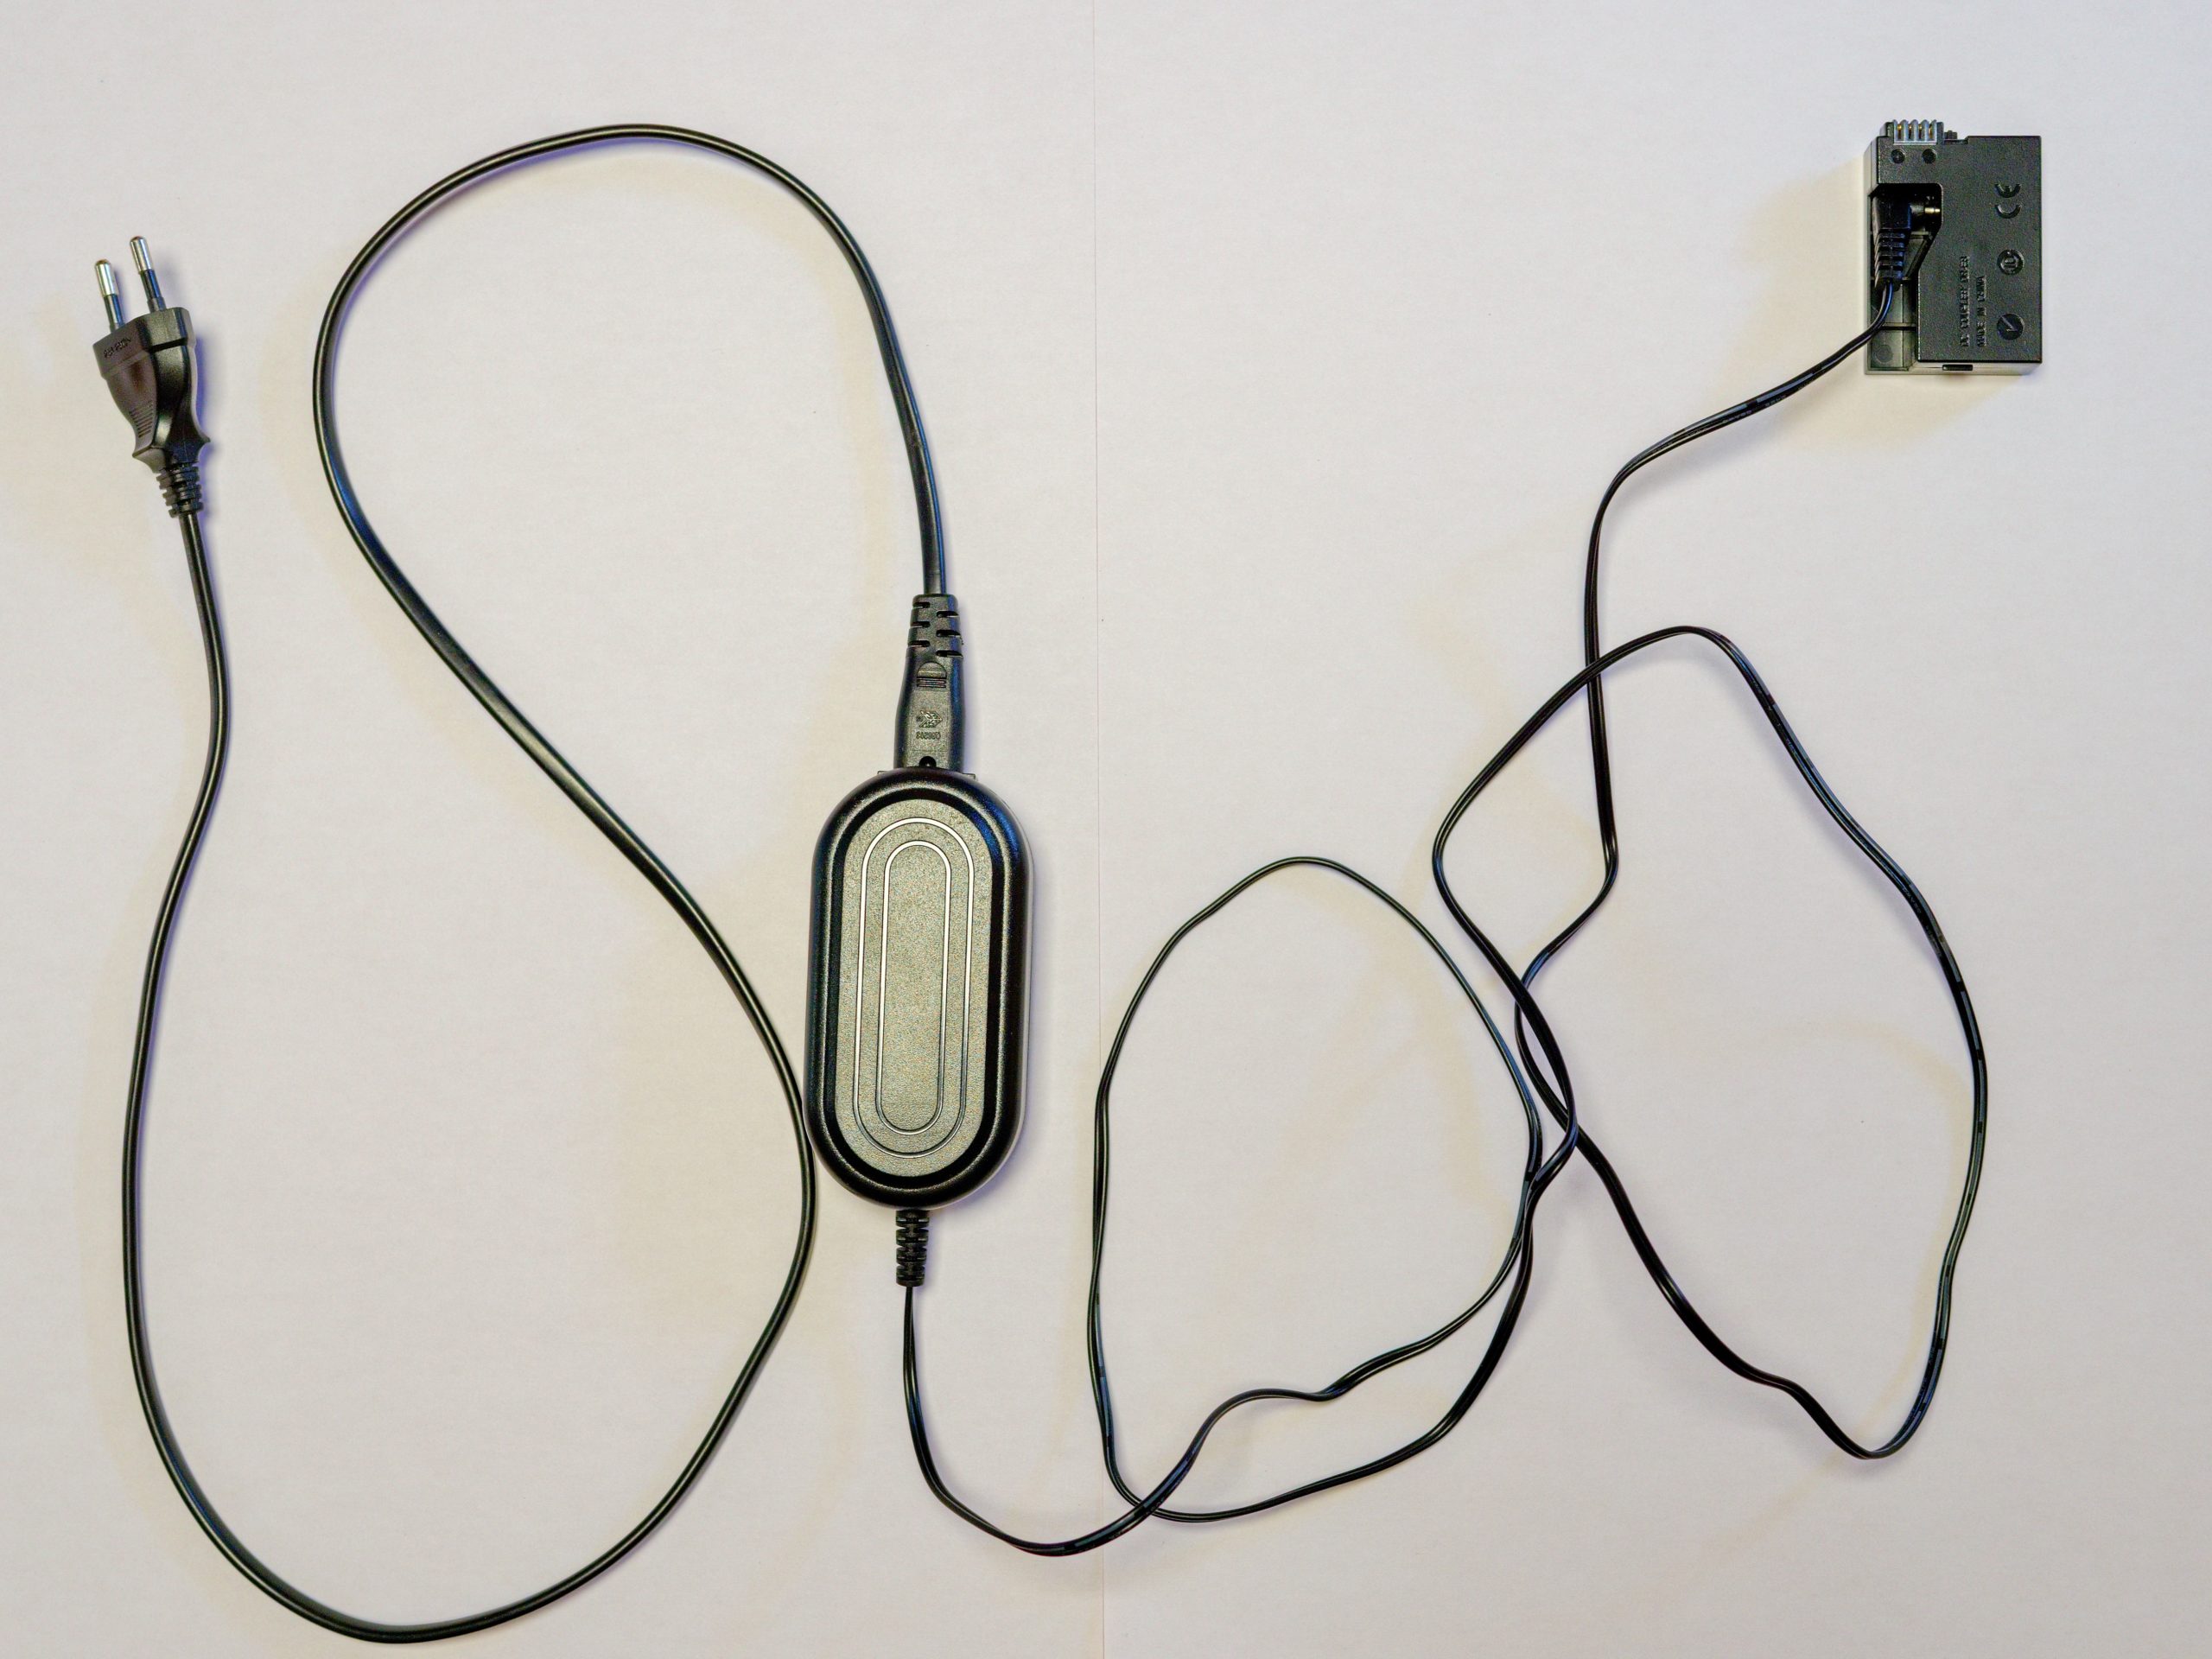
A battery dummy to get a constant power supply for a camera
Lighting
You can use ordinary desk lamps or special film lamps for the lighting. It is especially advantageous for three-dimensional animated films to have several lamps to illuminate the scene well and to reduce shadows.
You can also use shadows intentionally if you are producing an animated scene that takes place outdoors. In a real situation, the sun would also cast a shadow – and only one shadow!
Also make sure that the camera, the lamps or even you yourself do not cast a shadow during the production of the animated film!
More detailed information on lighting can be found in the chapter on the basics of lighting!
Internet
You might also want to have internet access so that you can download music or sounds (e.g. from the open-source platform freesound.org). Of course, it is better if you make the music and sounds yourself.
Unfortunately, not everywhere has internet via LAN or WLAN. If your smartphone provider’s tariff allows it, you can use your smartphone to set up a hotspot to use the internet on your tablet or notebook. If you have the means, you can also buy a mobile router, which is available from various providers. With some providers, you have to pay a monthly fee over a contract period of one or two years. Others allow you to pay by the day or by the month.
It’s best to arrange specific periods of time when you want to use the internet. It can distract you from your work when you are taking photos!
Technical set-up
Set-up for the cut-out animation
The set-up for a 2D animation is always the same in principle. The camera is placed parallel to a surface (this can be a table or the floor) with the lens pointing downwards.
First of all, you should determine how large the surface you want to photograph should be. For example, you can use a sheet of A3 paper as the base. Tape the corners and edges of this paper to the table. Now you can take the camera in your hand and see how much distance upwards you need so that the entire sheet is visible on the display.
Height of the tripod for a smartphone, tablet or webcam
If you are using a smartphone, tablet or webcam, you should not zoom (digitally) when testing the distance of the camera from the base.
Height of the tripod for a camera
If you have a camera with a lens with a fixed focal length, you can determine the distance to the base surface based on the image section in the display, just as you can with a smartphone, tablet or webcam.
However, it is important to choose the focal length of the lens correctly. This is because the minimum distance of the lens or the camera sensor (the so-called closest focusing distance) to a photographed object depends on it. Small focal lengths between 15 and 50 mm, i.e. focal lengths in the wide-angle and normal range, are more suitable for animated film production.
The focal length specifications refer to full-frame cameras (35 mm 35 mm sensor). With smaller sensors, such as APD-C or MFT, the focal lengths can also be up to about twice as large as with full-frame cameras.
Focal lengths longer than 50 mm (telephoto range) are rather unsuitable. With a focal length of 70 mm, for example, the base or object must be at a distance of about 1.4 m from the camera sensor. This in turn means that the lens would have to be mounted very high (cut-out technique) or very far away from the object to be photographed (3D)!
Macro lenses have a very shallow depth of field of only a few millimetres. As long as all the objects are on the same plane, as is normally the case with the cut-out animation, this is not a problem. However, they are unsuitable for 3D animated film because a greater depth of field is needed here.
You can normally find the minimum focusing distance directly on the lens. With older lenses it is usually located on the focus ring (smallest value, e.g. 0.3 m or 1 ft). With newer lenses, there is often no value on the focus ring, but the total depth of field range is printed on the side of the lens. If you can’t find the closest focusing distance on the lens, you can also search for it on the internet (search for: „closest focusing distance“ or „min focus“ + lens model).
Examples of set-ups for cut-out technique
Here you can see several examples of set-ups, which can be varied depending on the technique you use.
Below you can see a setup with very simple tools. When setting up the lights, make sure that the stools and slats do not cast shadows. You can mark the position on the slats so that you can put the smartphone or tablet back in the same position after an interruption. To prevent the smartphone or tablet from slipping, you can also tape it to the boards.

A simple set-up with two slats resting on stools on the left and right.
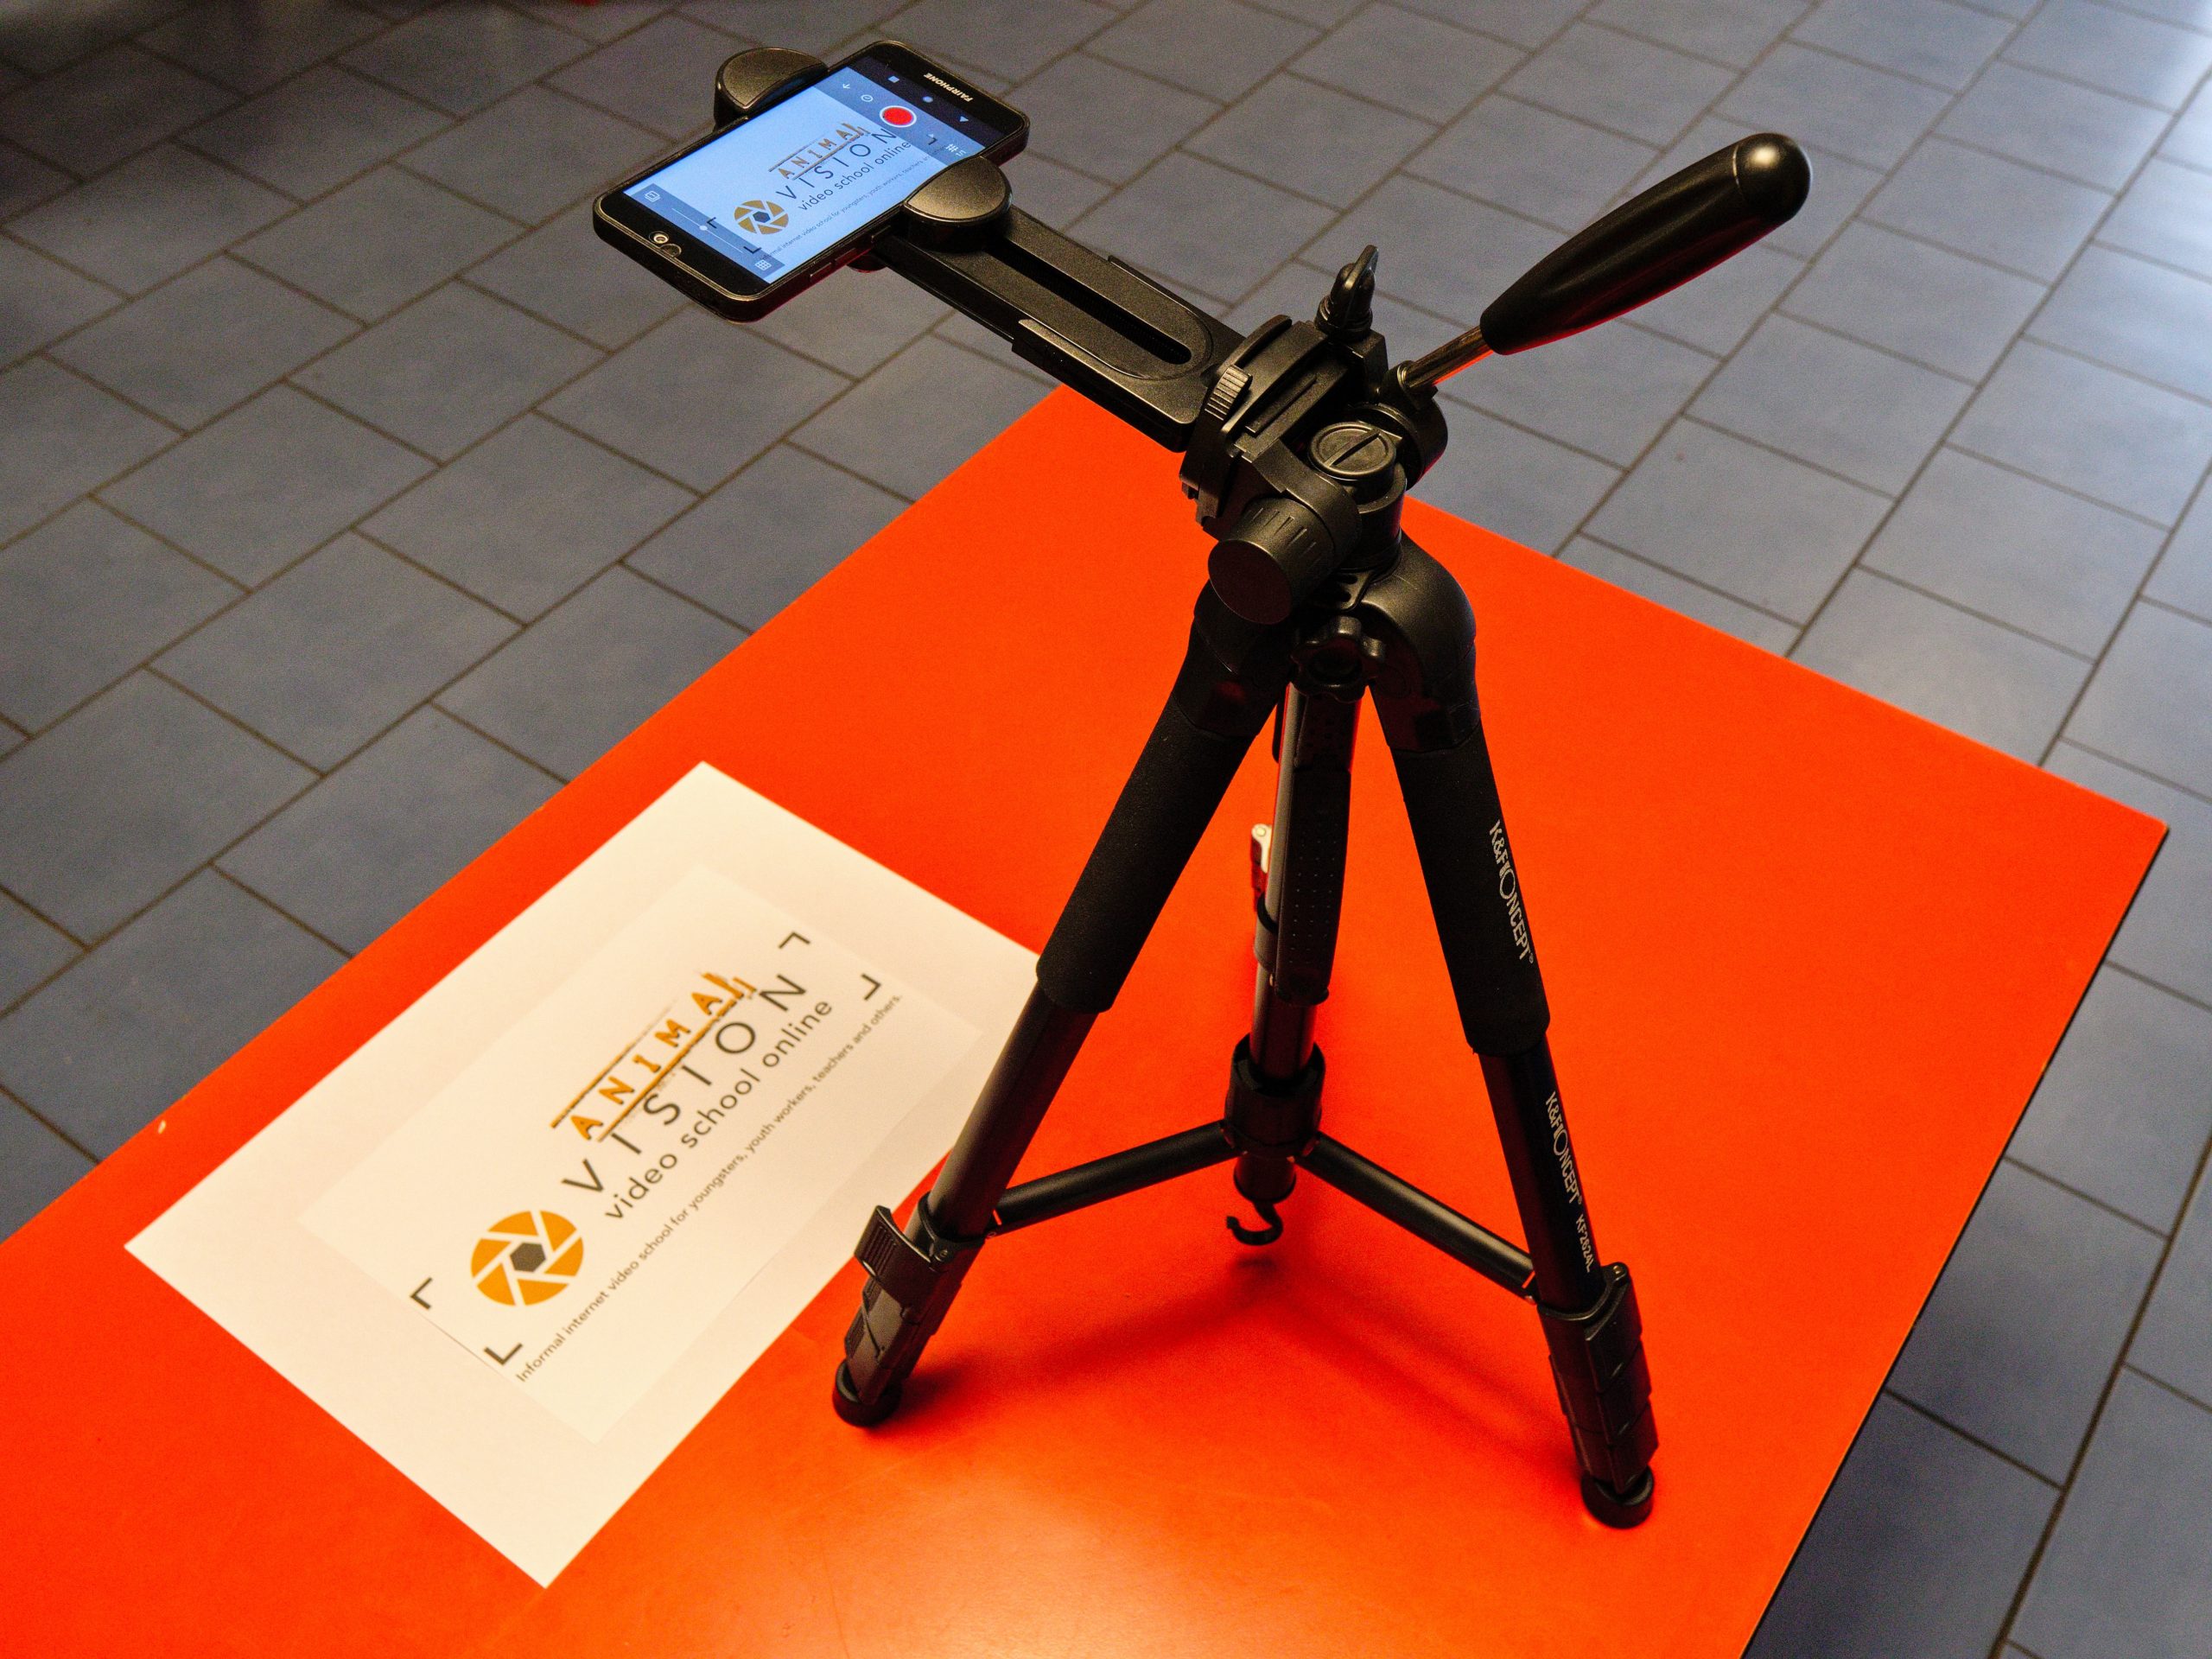
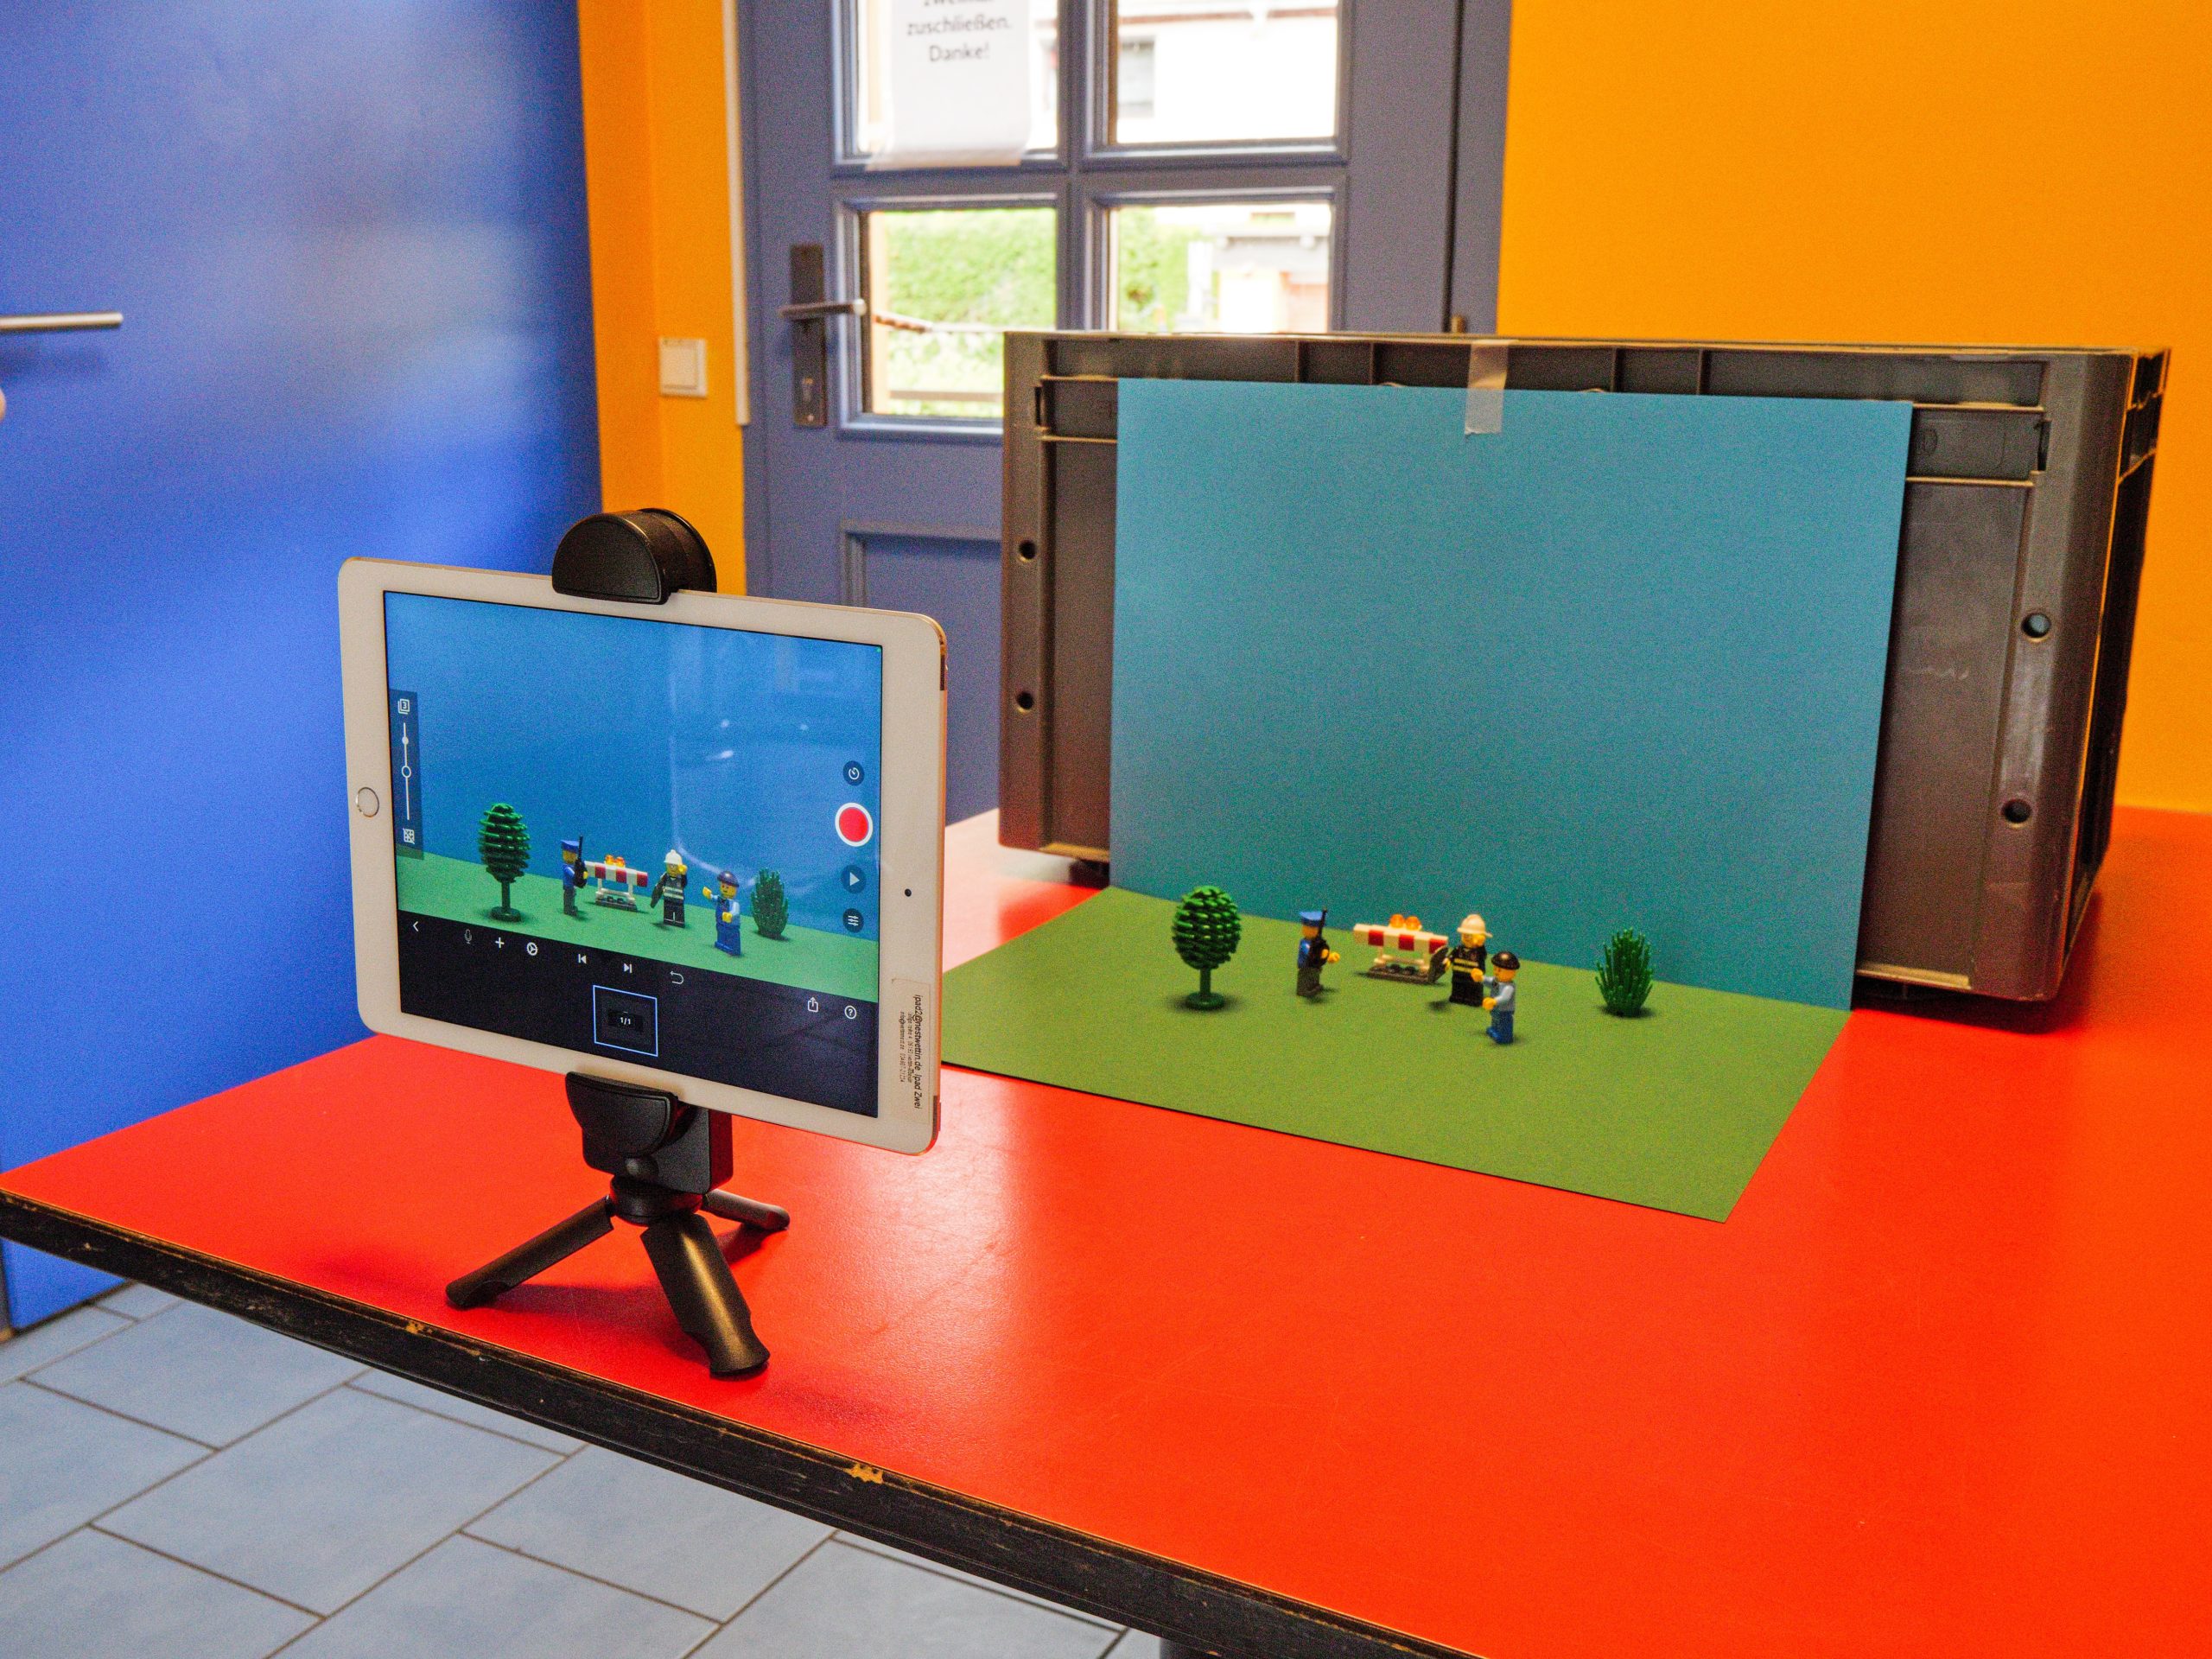
Typical set-up with smartphone on clamp tripod, sheet of paper on table
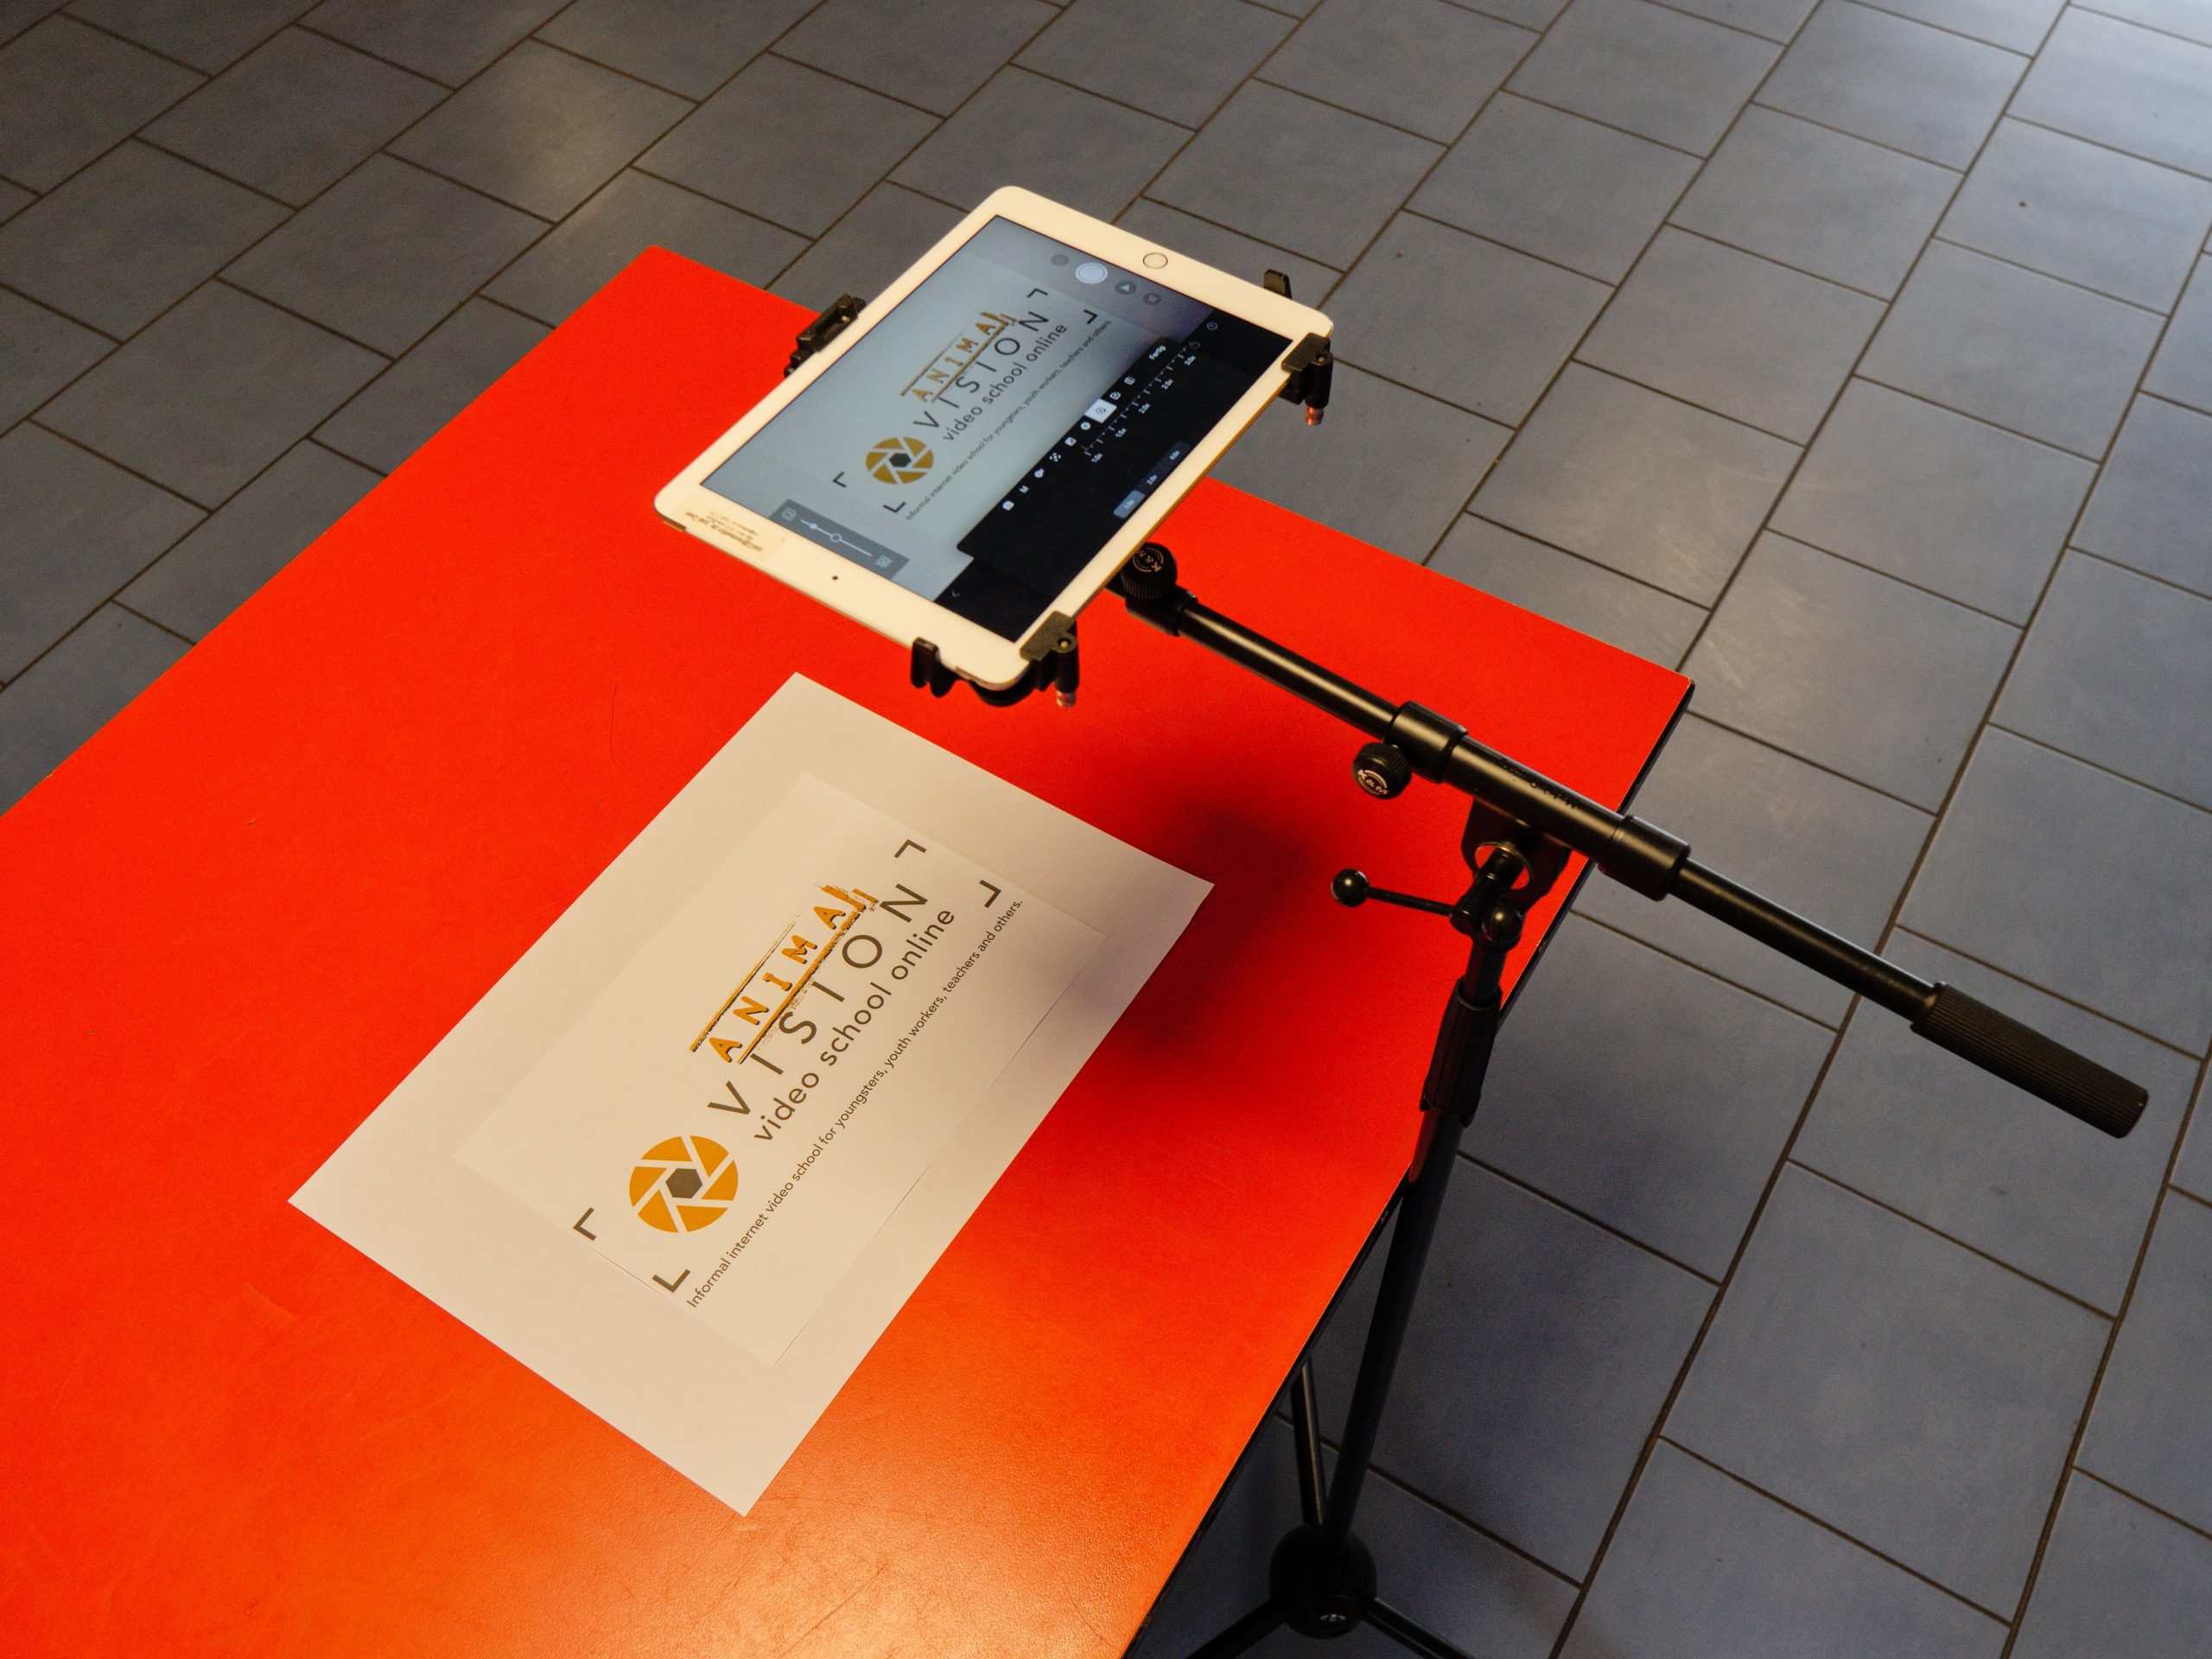
Typical set-up with tablet on microphone stand, sheet of paper on table
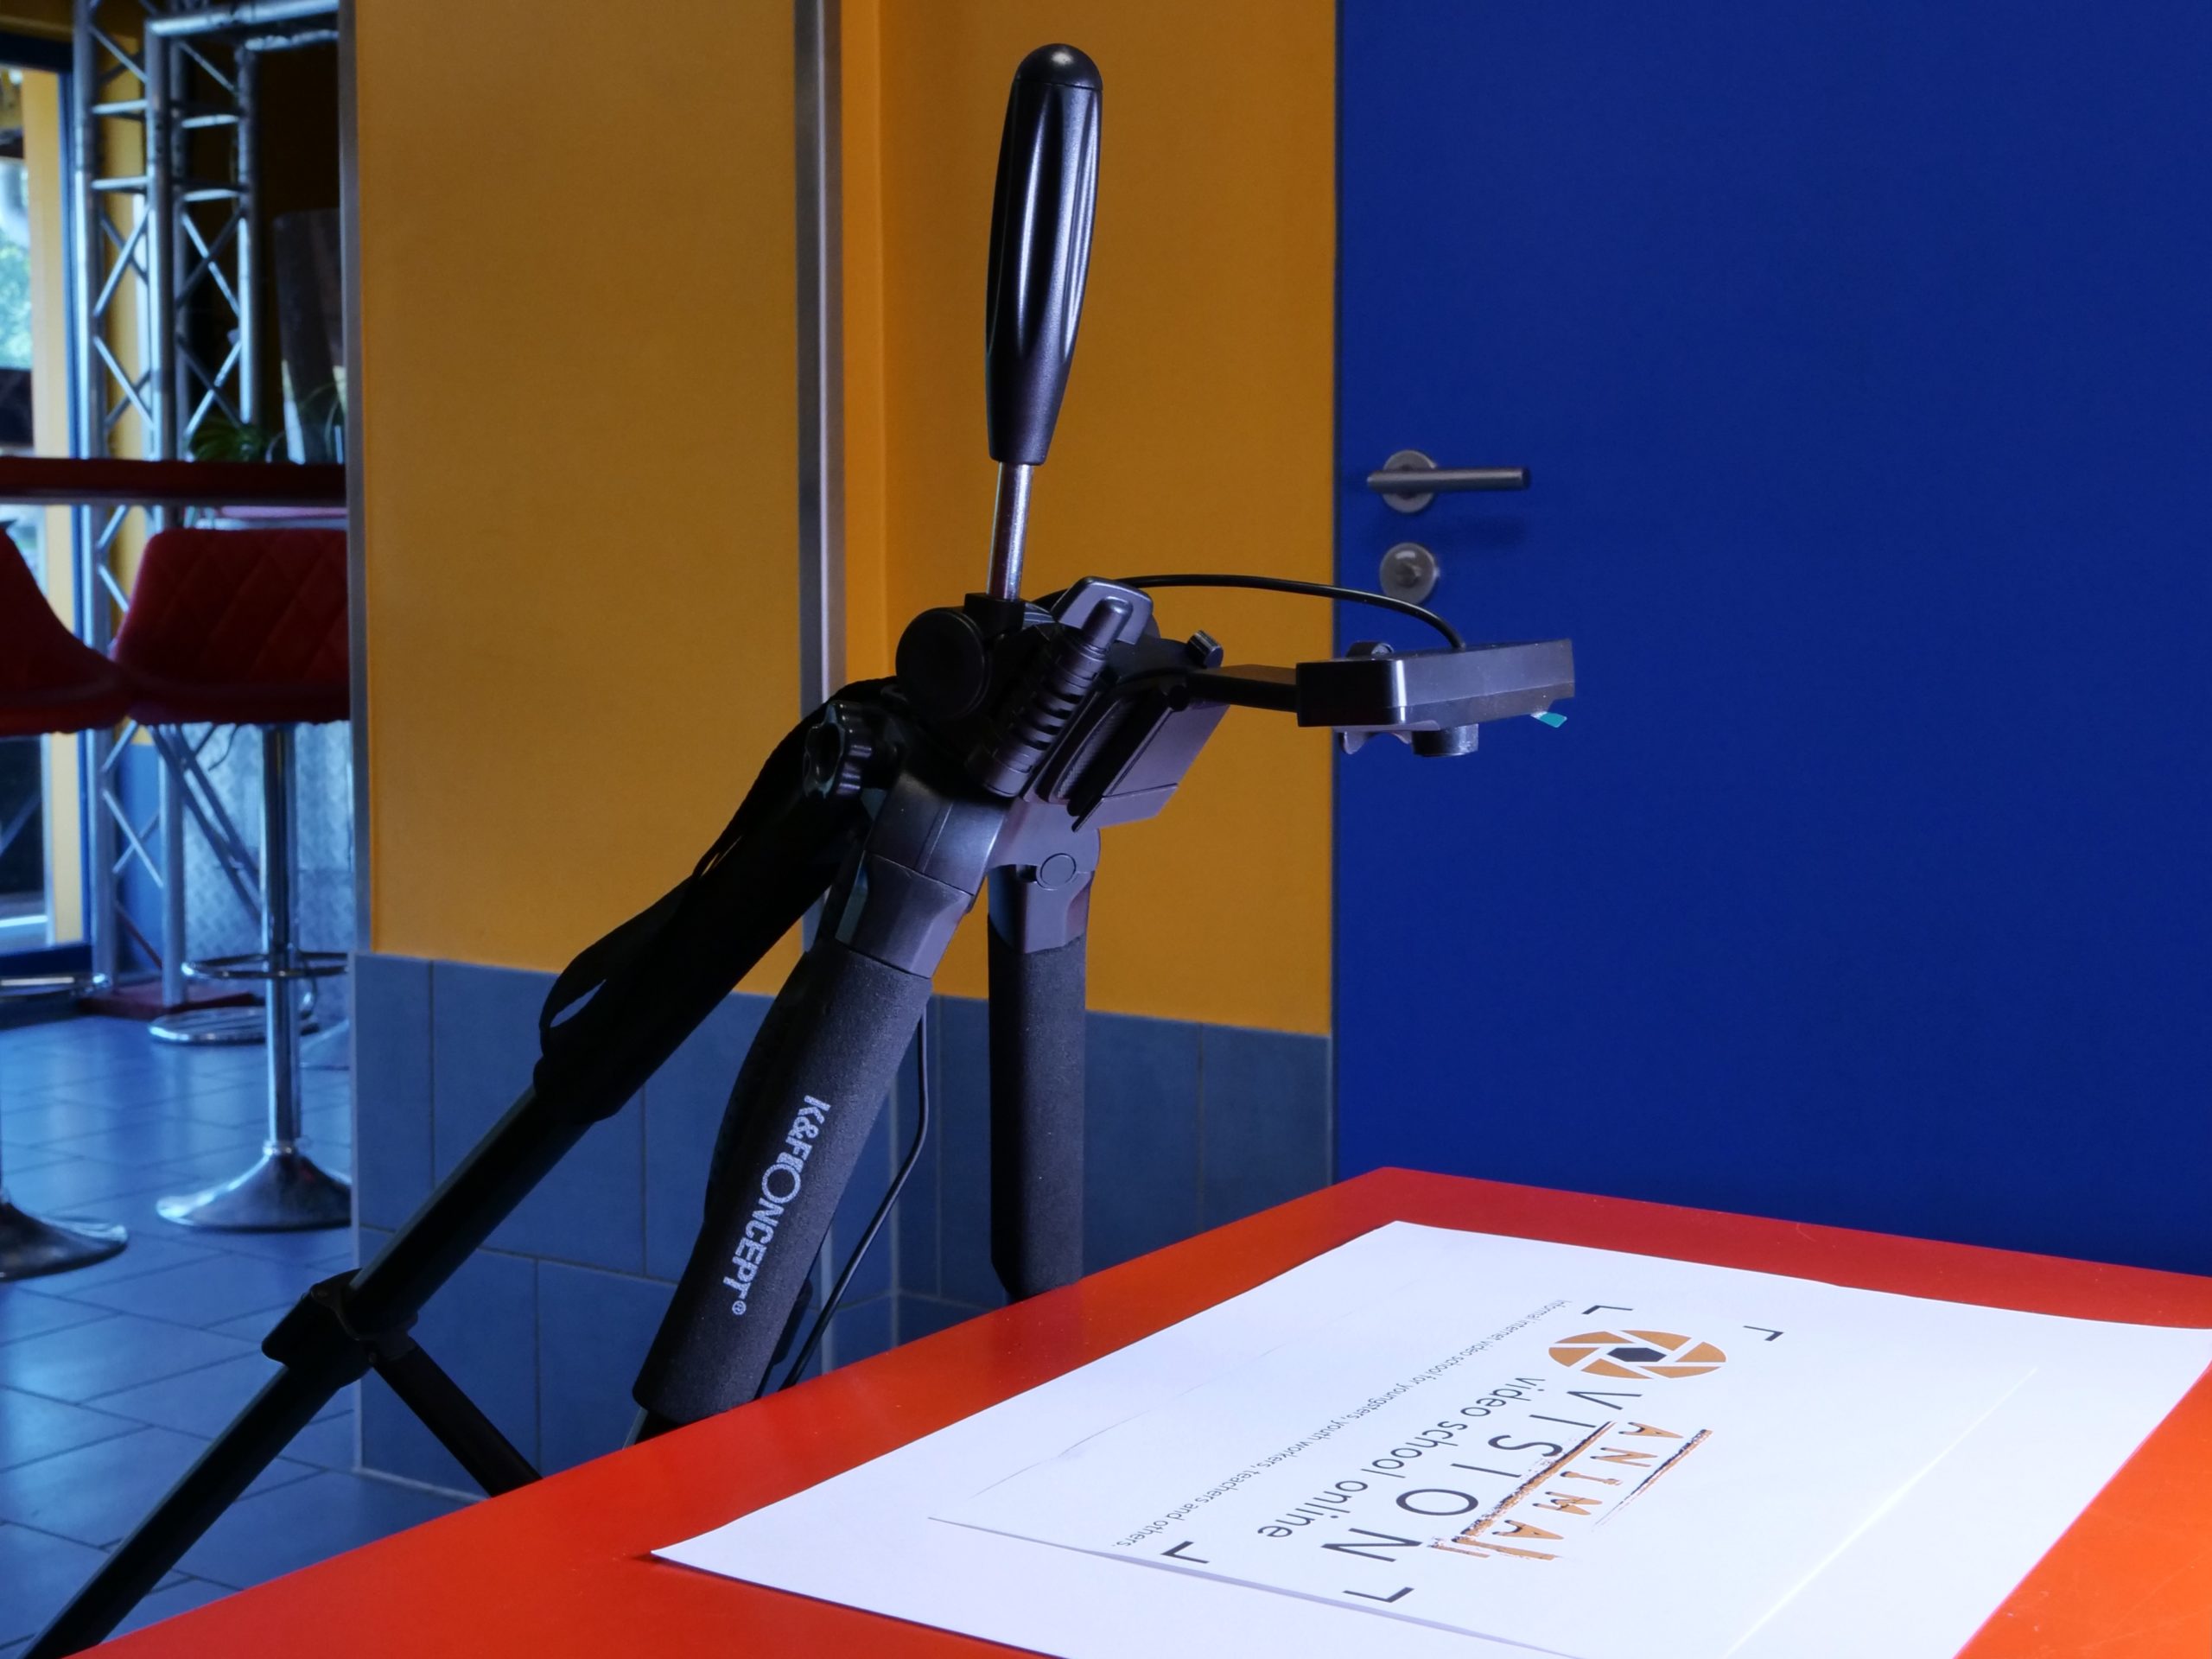
For ordinary photo and film tripods, as well as microphone stands, there are inexpensive mounts to which you can attach smartphones and tablets.
Pay attention to where the camera is located on your smartphone or tablet so that it is not covered by the mount.
For all types of cameras, make sure that the charging socket or the socket for a power supply unit is not covered so that you can charge it while you are using it.
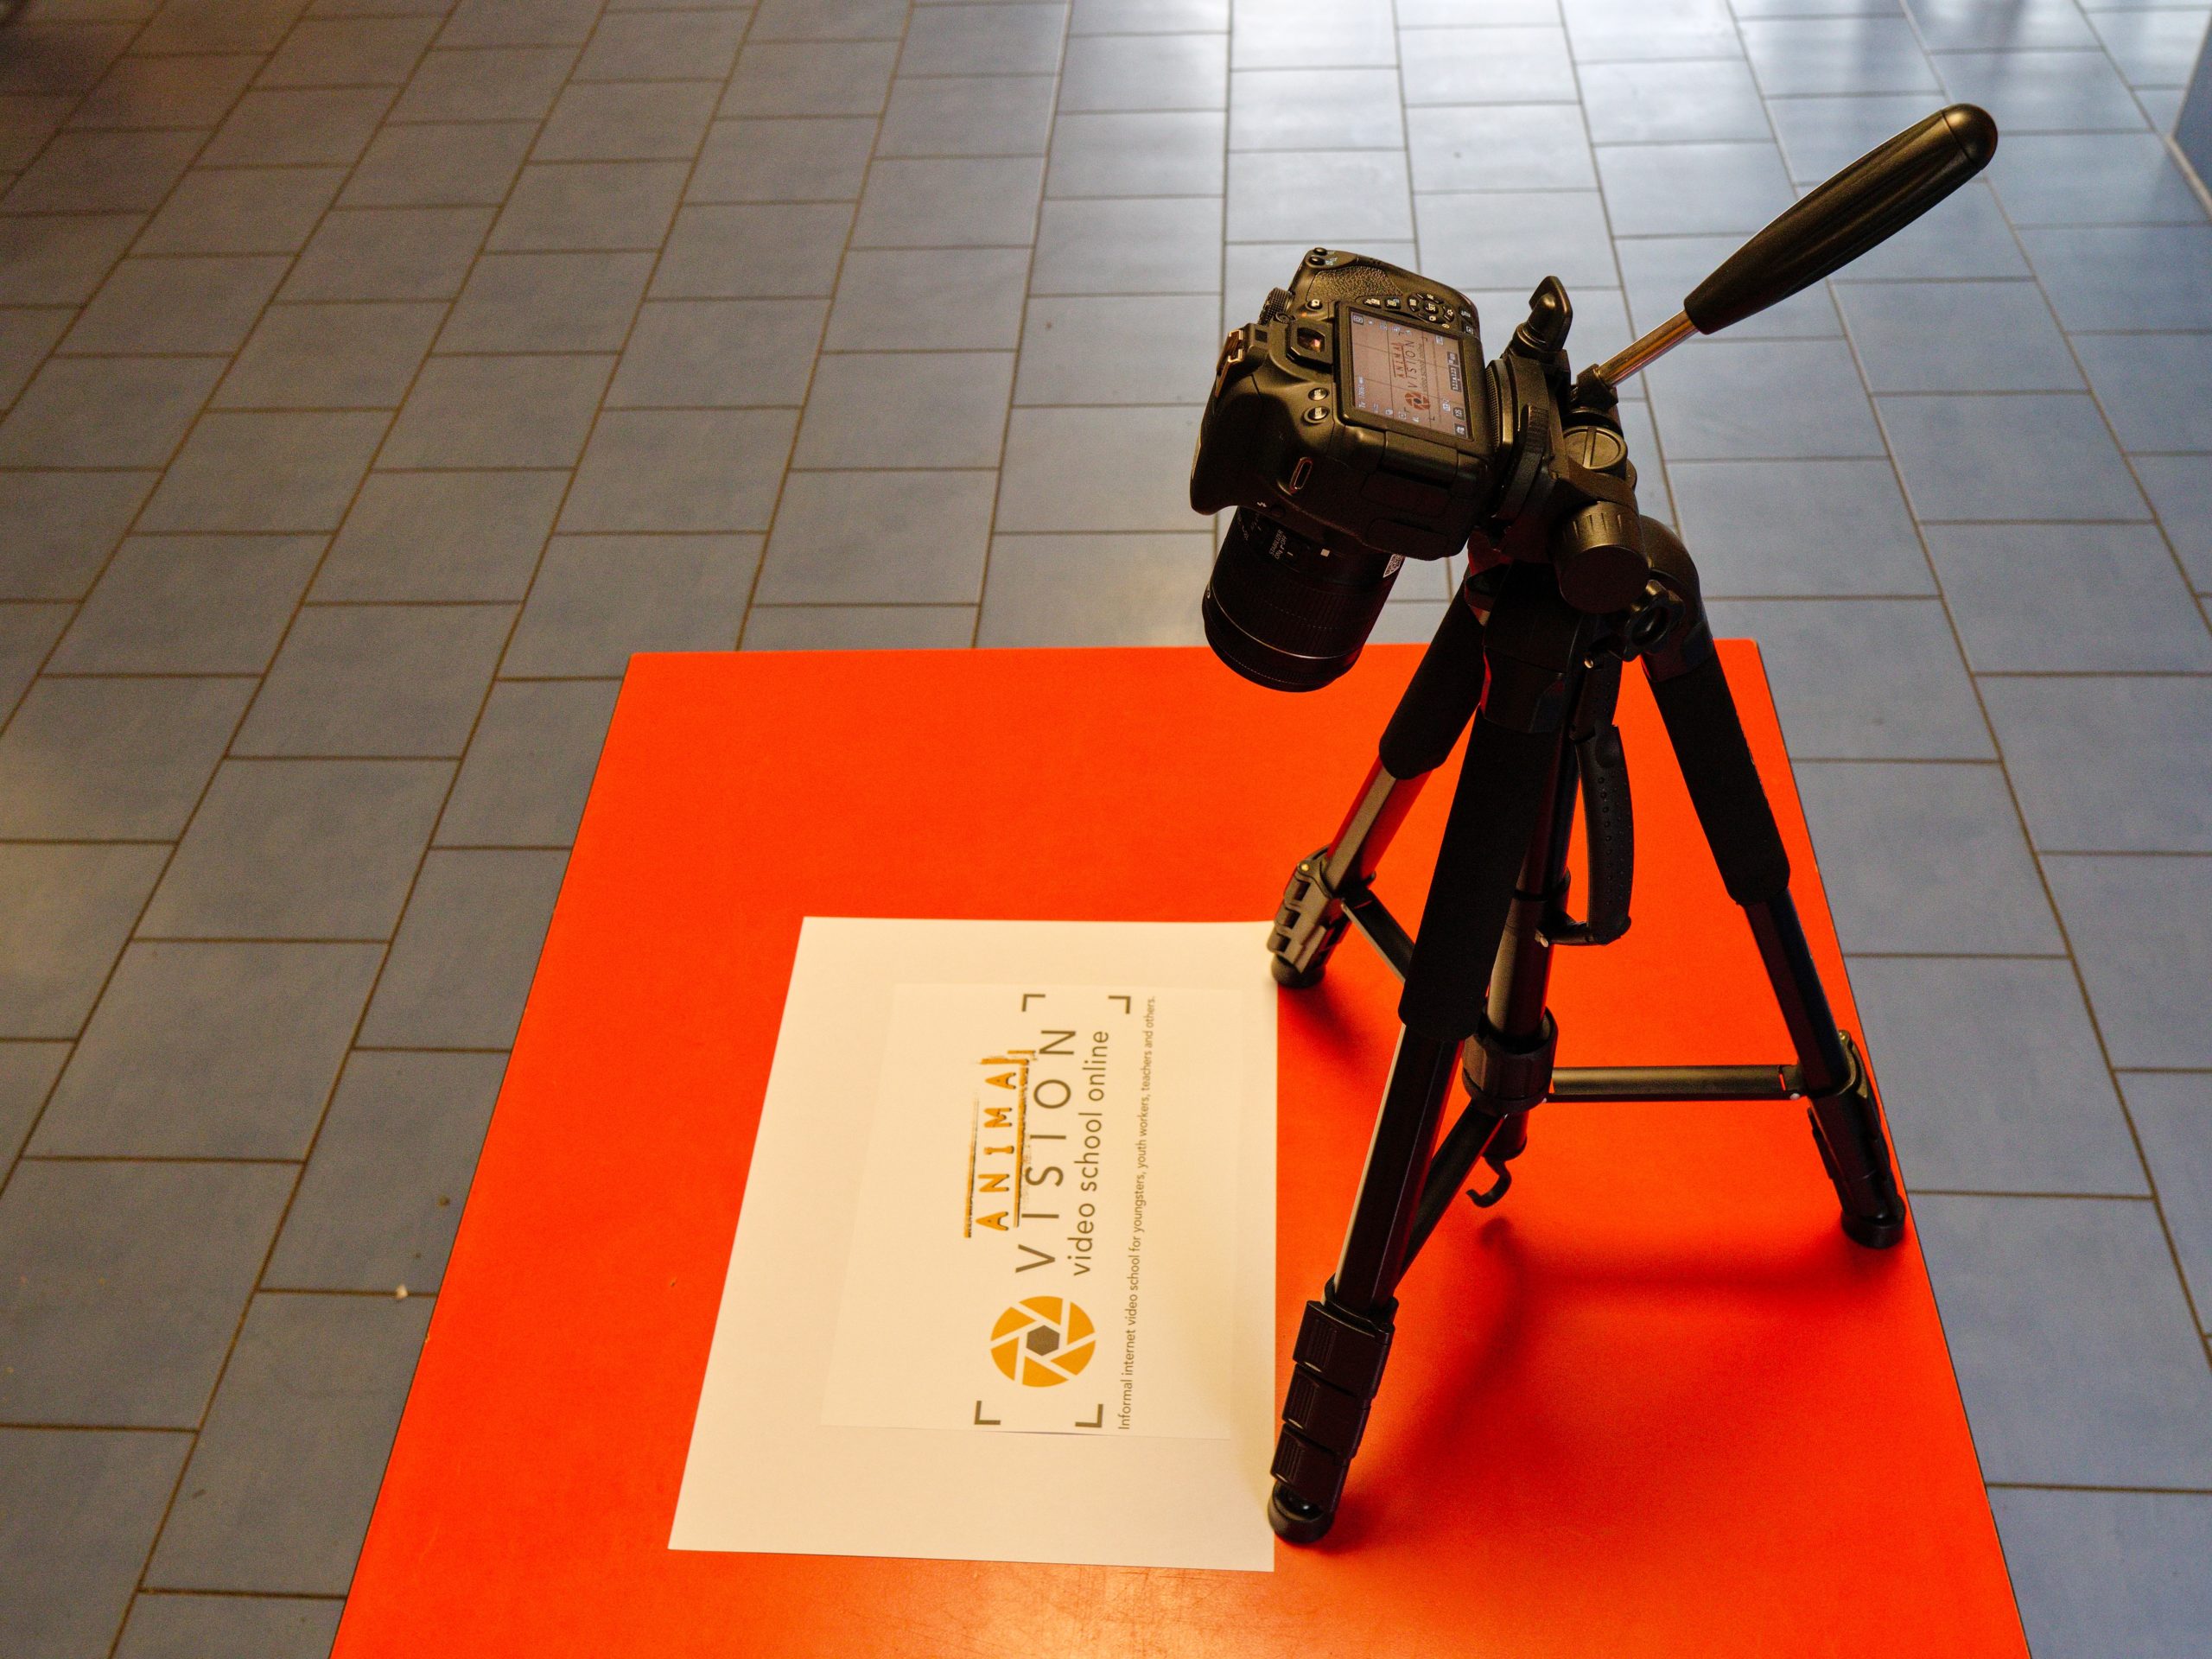
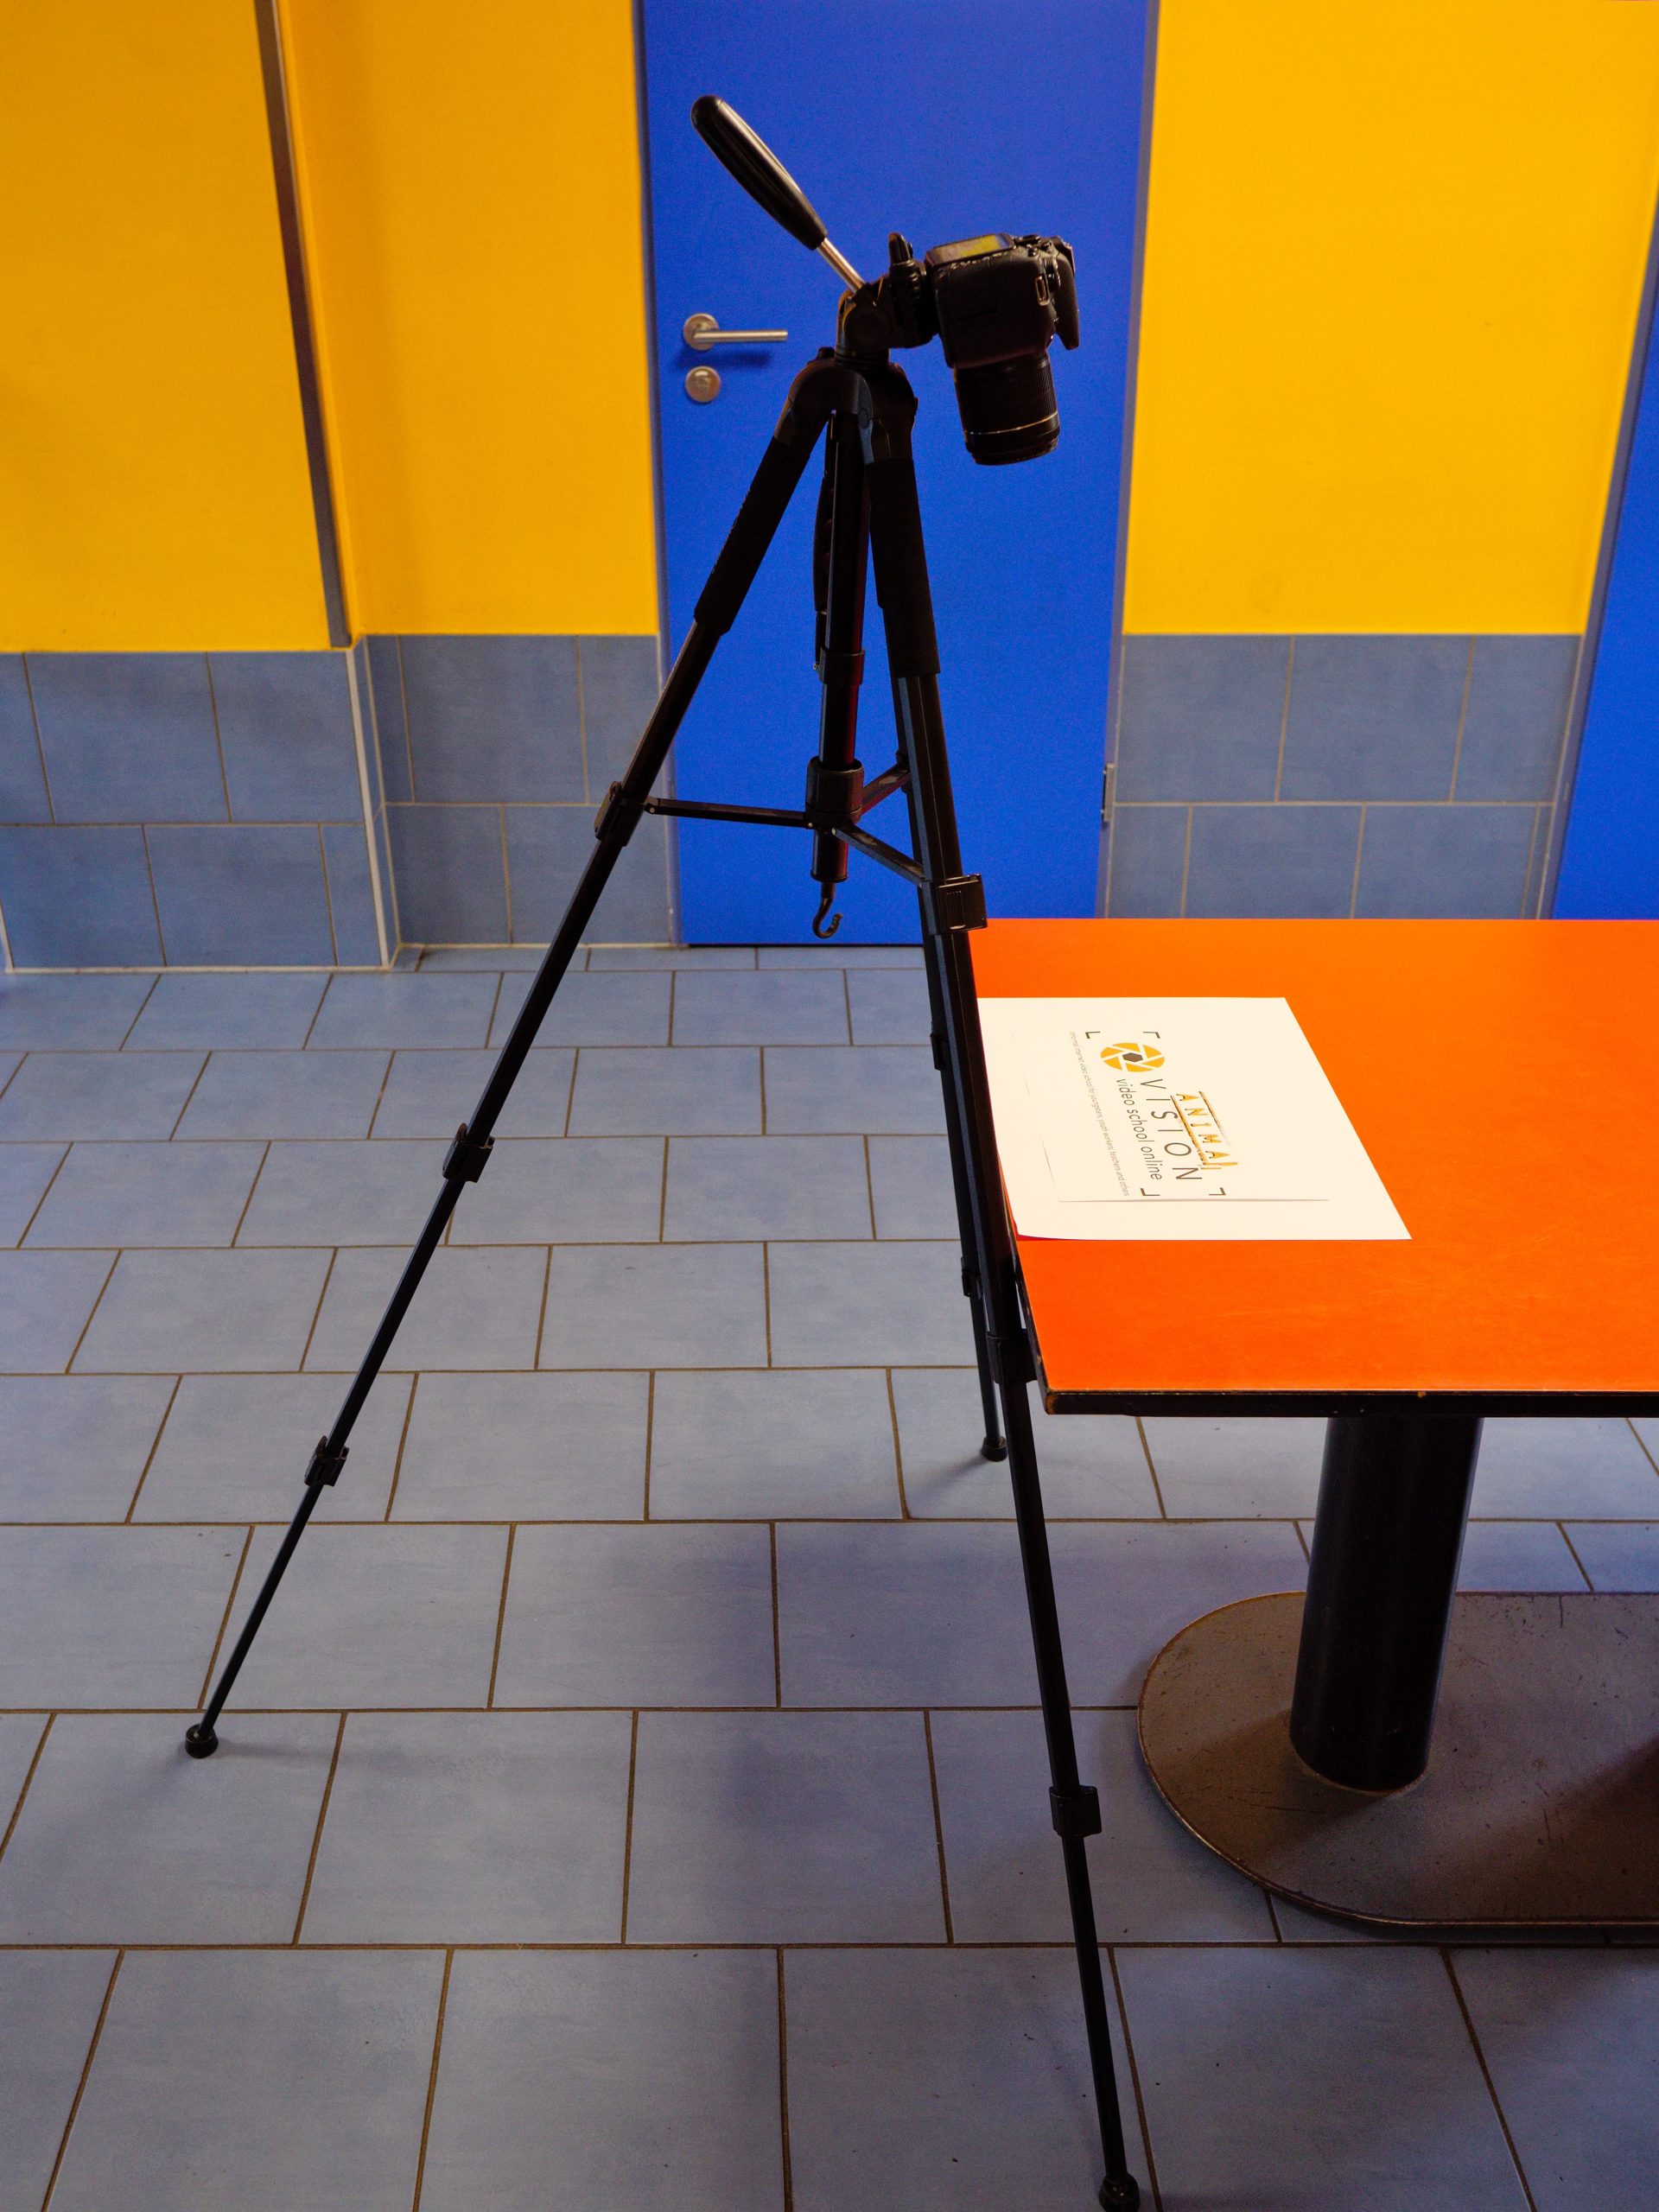 Typical set-up with camera on normal tripod
Normal tripods make it difficult for you to tilt the camera completely downwards. So the camera is never completely parallel to the ground. However, this is not noticeable if the tripod has a sufficient tilt angle. Make sure that the camera is tilted down between two legs and that no tripod leg is in the picture.
Typical set-up with a camera on tripod with a bracket connected to a laptop
With a camera tripod with a bracket, you can shoot exactly parallel to the ground. If the camera is a little heavier, it may be necessary to stabilise the bracket and the tripod with a weight. To do this, you can take a camera bag, for example, like the one in the picture, and put something heavy in it.
If you are using a camera with batteries, make sure that, if possible, you can change the battery without having to take it off the tripod or remove the tripod plate.
Typical set-up with webcam
A webcam has the advantage of being relatively easy to attach firmly to a tripod or other mount, and the image section can always be seen on the large monitor of the computer connected to it.
Set-ups for the three-dimensional stop trick
The perspectives and shot sizes we can use in three-dimensional trick film are comparable to those in real film.
However: when making a film with real people, the camera is frequently positioned at eye level. Since our figures are often smaller than the camera itself, this is not always possible.
Also, under-view perspectives are difficult to achieve in three-dimensional stop motion, because the camera is also too big to be placed below a figure or the minimum distance of the lens to an object is too big to get a good quality result.
One advantage of animated film as opposed to real film is that we do not need a crane or a drone for the top view.
For the most options, a photo tripod is convenient, and we can move it freely around the animated film set. By adjusting the height of the tripod, we can create the different perspectives. A bird’s-eye view is also possible with a jib, as in the cut-out animation.
As we have already shown with the two-dimensional animated film, you can also attach a smartphone / iPhone, tablet / iPad to a photo or microphone stand. There are special holders for this.
Sometimes webcams also have a socket to attach them to the tripod plate of a photo tripod or to a microphone tripod with an adapter.
If the webcam does not have a socket, you can also attach it to a conventional tripod using the clamp that is usually available or with adhesive tape.
It is not important that your technical set-up looks nice. Sometimes you need a lot of tape, for example. What is important is that the set-ups are sturdy and safe and that you can work comfortably with them and achieve good results!
Examples of set-ups for the three-dimensional stop motion animation

Photo tripod with camera
Mini tripod on table level with tablet
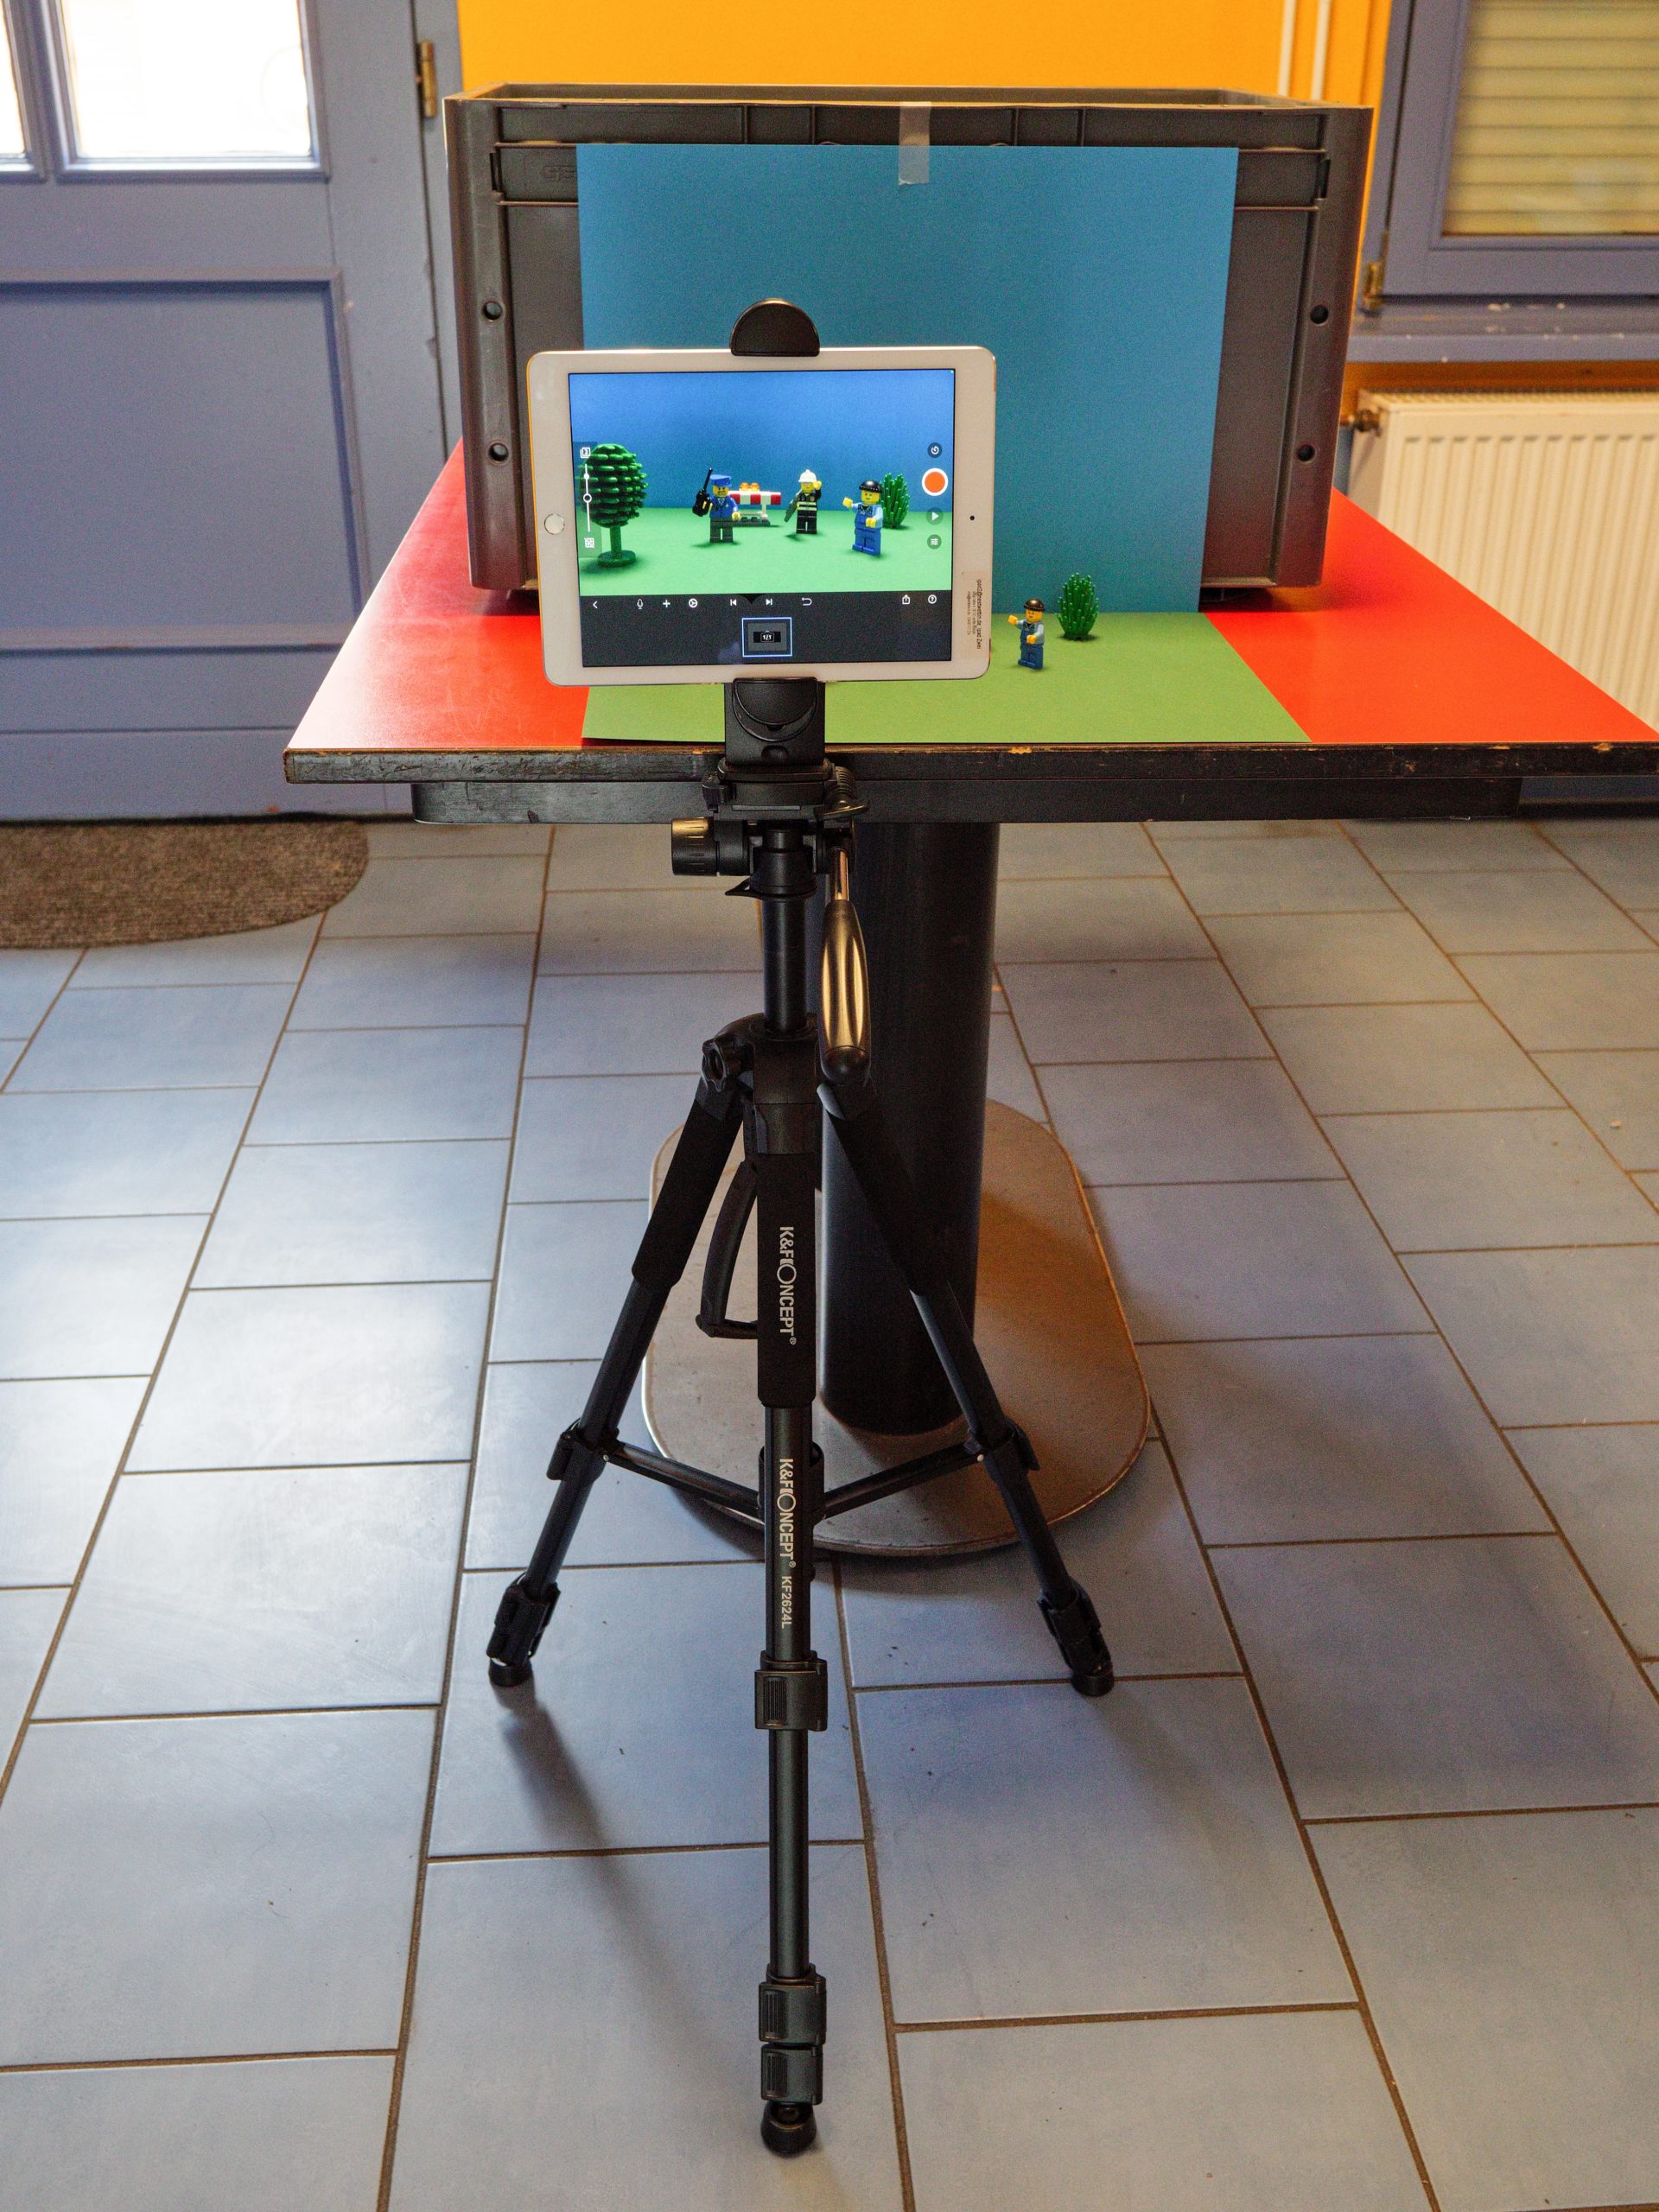
Photo tripod with tablet
Animation boxes for laying animation and 3D animation
Another form of set-up is the so-called animation box, which makes it very convenient to work with, both for two-dimensional and three-dimensional animation.
In principle, an animation box is nothing more than a large wooden box, the front and the back of which can be left open, depending on the construction and requirements.
For the laying animation, the animation box has a hole on the top to place a camera with the lens pointing downwards.
You can build a simple version of an animation box – primarily for the dummy animation – out of a transparent plastic box with dimensions from approx. 20 x 50 cm. You can find instructions for this at the end of this chapter under External Links.
DIY trickbox made out of a transparent box turned upside down with a whole in the top for the lens and the front side cut of for moving the objects
If the room is well lit or you illuminate the box with a lamp, you will get an even illumination of the surface on which you move the figures and objects.
To be able to use more surface or space, you can also build larger animation boxes yourself. Instructions on how to build an animation box can be found at the end of the chapter under Related Topics and Links and External Resources at the end of this chapter!
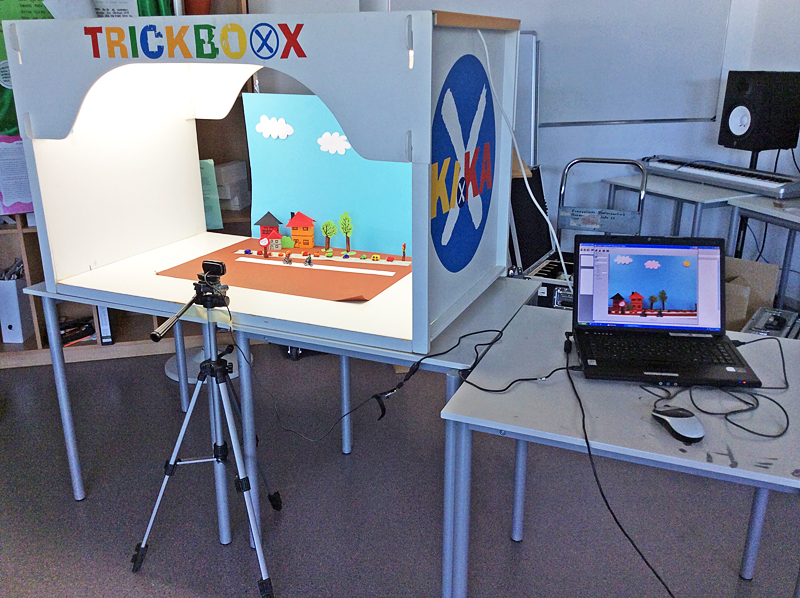
This animation box already has good lighting that illuminates the base area very evenly.
If you produce a three-dimensional animated film with such a large animation box, you can also close the back with a board. You can then attach various backgrounds to this back wall.
The camera is placed on a tripod in front of or inside the box, as is usually the case with 3D animated films.
There is also a possibility to build a big animation box out of a table. You can find instructions for this under Related Topics and Links to External Resources.
Common mistakes
Besides the mistakes you can already find in the chapter Basics of Stop-Motion Animation, we list some more mistakes here.
Generally speaking, all technical errors that the viewer can perceive while watching the film can distract them, or even take them out of the illusion of the animation, which is why they should be avoided:
In some of the images, you can still see the hands moving the figures or objects.
Camera or tripod or people in the room cast a shadow that can be seen on the individual pictures.
The section of the photo is bigger than the background and you can see a border.
Related topics and links to external ressources
You can learn about different animation techniques in Principles of Animation.
You can learn how to set up and operate the camera here: Camera settings and operation.
To learn about further possibilities for aesthetically sophisticated animation, visit The camera as a creative tool in animated film!
The necessary materials for the backgrounds, objects and figures are explained in the chapters Basics of creating figures, objects and backgrounds / Creating characters, objects and backgrounds in 2D and Creating characters, objects and backgrounds in 3D.
Instructions for building a small animation box with a transparent box (in German only): https://medienkompass.de/trickfilmbox-selber-bauen-anleitung/
Instructions for building a large animation box (in German only): https://www.filmothek-nrw.de/fileadmin/user_upload/publikationen/Leitfaden_LfM.pdf
Instructions for building a large animation box from a table (in German only):
https://www.lmsaar.de/wp-content/uploads/2014/06/Tricktisch_Bauanleitung.pdf
Instructions for building a multiplan camera:
Animation film using the Multiplan technique by artist Tess Martin:
Methodology
In addition to the tips from the chapter Basics of stop-motion animation, we also list the following tips based on our previous experience.
- Establish clear behaviour rules at the beginning of the project and not only when problematic behaviour occurs. In animated films, for example, there should be no running in the room because otherwise figures and objects quickly change their position. Expensive technology is often used and light bulbs can get very hot, which requires extra attention from the participants.
Also consider rules for the use of private smartphones. If you allow them to be used, participants often distract themselves with messenger apps or games. Therefore, you can say, for example, that the use of smartphones is only allowed during breaks.
If smartphones or tablets are needed for the creation of the animated films according to the principle of „bring your own device“, they clearly state that only the apps for the production of the animated films are to be used. - Once you have decided on one form of animation, e.g. a laying animation, it may happen that participants say that they would rather use another form, e.g. a three-dimensional animation instead of a laying animation.
Take this wish seriously and explain to the participants why you have chosen this form of animation.
However, remain consistent and do not allow any exceptions in the choice of technique. - As there may be some confusion among the participants about the formats of the animated film, we would like to clarify once again: by two-dimensional animated film, we in AnimaVision do not mean the drawn animated film or the so-called animated cartoon, in which the individual images are drawn anew each time.
And when we speak of an animated film in AnimaVision, we mean an animated film created from real materials that have been photographed for the animated film. These are different from animated films that were created with animation software only on the computer!
Examples of digital animated cartoons not covered in Animavision!
- The „Bring your own device“ approach has the advantage that participants can create animated films outside the project with their own camera (nowadays usually a smartphone or tablet). If this is the aim, ideally all other necessary technical requirements, such as tripod, lighting or apps, should also be made available to the participants, at least temporarily, for the creative activity at home. Since children and young people from disadvantaged backgrounds often do not have a camera, make sure that they can provide the children with a device to carry out the project. Also, avoid asking in plenary who owns a smartphone or tablet, as this can lead to bullying among children and young people. Clarify the need for technology with the participants or their parents in individual discussions or via a registration form!
- The quality of the films also depends on the age, motivation, motor skills and concentration of the participants. These factors should also be taken into account in the planning. The joy of creative work should be the focus and not the quality of the film. However, this does not mean that one cannot point out possibilities for improvement and encourage the young people to achieve better results.
- Especially in animated film production, which demands a lot of discipline and concentration from the participants, it is important to take frequent breaks and to offer the participants opportunities to work out physically through active games. This is even more important when doing an animation project after lessons. The students have usually been sitting quietly at a table all morning and are supposed to concentrate. Therefore, they also need movement after class.
Provide a clear time structure at the beginning of each session so that the participants can be prepared that there will be an opportunity to move and also to be loud. - Providing drinks and food should be a matter that is taken seriously in (extracurricular) cultural education and has an additional motivating effect.
- A clear distribution of tasks within a team is important. However, make sure that the division of tasks does not lead to phases in which participants have nothing to do. For example, all participants can take part in the phase of creating objects, figures and backgrounds.
When taking photos, the members of a team can, for example, swap from appointment to appointment or from scene to scene.
While one part of the group is taking photos, another part of the group can already select sounds, music or dialogue or record them themselves.
The preparation of the title and credits, whether as inserted text or as animation, also requires some time and should be prepared in advance.The form of task distribution depends on your pedagogical objective and the motivation of the participants: If it is important to you that the participants acquire as many different competences as possible, all participants should take part in all production steps. However, this can also reduce the motivation of the participants.
It is more motivating to distribute the tasks according to the motivation and talents of the participants, which also enhances existing competences.
Regardless of these two approaches, you should make sure that the tasks are not distributed on the basis of unfortunately still prevailing role clichés, e.g. „Girls are better at drawing, boys know more about technology! - When possible, upload the films to a video platform on the last day of the project or shortly after the end of the project and send the participants the link to their film. It is very important for the participants to have a chance to show the film to friends and family either in person or to share it via messenger and social networks.
- An incentive for good quality can also be a vote on the best film in social media or participation in a film competition.
A prize can also be given out, for example a trip to the cinema. In any kind of competition, it should always be ensured that the results of the „participants who lost“ are still sufficiently appreciated by you as the teacher.
This can be achieved, for example, by organising a final presentation in such a way that the performance of all participants can be appreciated by you as educator and also by the other participants and relatives.
Terminology
silhouette animation, multiplan method, three-dimensional animated film, power supply, charger, LAN, WLAN, mobile router, battery dummy, fixed focal length, closest focusing distance, normal range, wide-angle range, telephoto range, macro lens, depth of field range, microphone stand, clamp stand, tilt angle, jib, trick box, bring your own device