
Introduction
After preparing the story, characters, objects, backgrounds and setting up your camera, the time has come to animate. There are some tips or principles to be followed to make your characters look very alive and real even if you are a beginner. In this handbook we will present some of the general principles that have proven themselves useful for the beginners and share some information on animating two of the main human’s movements: walk and face movements during the speech.
AnimaVision in action |
|
|
|
||
Equipment and tools
There are no necessary tools to acquire when trying to understand this chapter. The best way is to try and apply these principles when working on a project. It is good to try to incorporate them in the beginning when preparing your storyboard and characters.
Main section
Every animator has a special task when executing their work and that is to transform a dead matter, something that is not movable into something that appears to be a living being. Principles of animation are one of the tools that were defined in Disney studio and are helping animators to create this illusion. They were published in the 80’s, that is not so long ago, but are based on Disney’s previous work, and on the work of generations of animators that explored, developed and worked in this genre as professionals or hobbyists.
12 principles of animation
There are 12 principles that you can master and learn how to incorporate in your work. Some are easier to implement than other. In this chapter we will – with simple examples – present some ofthe easier ones to use for us beginners and briefly describe the more advanced ones.
1. Squash and stretch – squashing and stretching of the objects creates an illusion of weight, elasticity, fluidity and exaggeration, it makes movement appear more organic.


A simple and clear example of squash and stretch principle is movement of a ball.
2. Anticipation – anticipation is a reaction that prepares the character for the big action, for example a character can bend the knees before they jump, a car can go a bit backwards before it starts to go, the arm of the character can move back before they throw something…
3. Staging, clarity and readability – it is important to have a clear shot in order to show what you want to show, it is a broad topic that covers the knowledge on how to plan a shot to make it understandable to the viewer and direct their attention to things that you as director want to emphasize. Part of the staging planing you already did when creating a storyboard.
4. Pose to pose and straight ahead – this are two principles that were developed for drawn cartoons, your character or object that is moving can be drawn changing one pose after another or you define the key poses first and then add the missing poses.
5. Folow through and overlapping action – it tells us how the parts of the body follow through when the main action is finished. For example, a torso of the body can move first, other parts like arms, legs, hair move after it. This applies for objects as well.
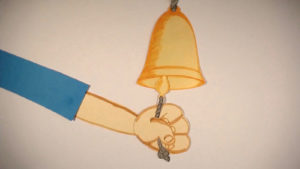
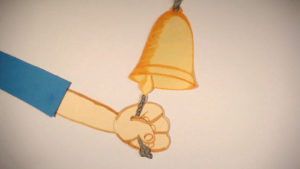

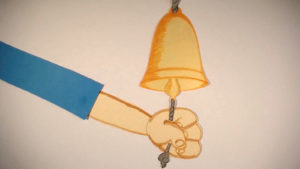
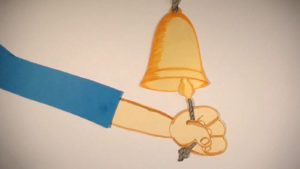
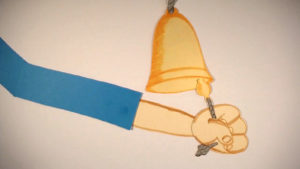
In the pictures above you can see a simple example of this principle; the last part of the rope follows (as the secondary movement) the movement of the hand and the bell that is a primary movement.
6. Slow in slow out – movement is never linear, usually it slows in and out, you can achieve that with playing with spacing, when you animate with more spacing between the poses, you get faster movement and when you animate with less spacing between the poses you get slower movement, the same spacing gives you the impression of linear movement. When creating movement you can, for example, slowly zoom in, make movement linear and then slowly zoom out.


The apple in the pictures above is falling down with an increased speed. This is achived by the spacing between the poses of the apple, the spacing is increased in each picture.
7. Arcs – arcs are invisible lines that animation follows on the screen, for example the movement can be built following figure eights that is more appealing then the straight lines, as well as partial figure eights.
8. Secondary action – doing something apart from the main action, it is in the human nature to make more movements at the same time, secondary action can be something completely unnecessary, simple example of this is an eye twitch.
9. Timing – how to come from point A to point B. For example, if the character is tired or sad the timing will be slower, if they are happy – the timing will be faster.
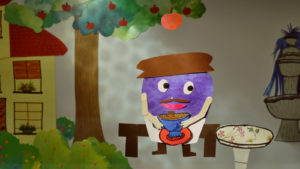
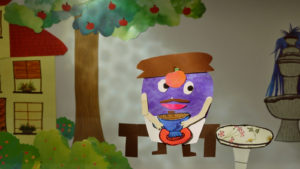
10. Exaggeration – exaggeration is often what makes the difference between animated world and reality, you can exaggerate important features and minimize unimportant, you can, for example, exaggerate elements of movements, take what is real and exaggerate it photos
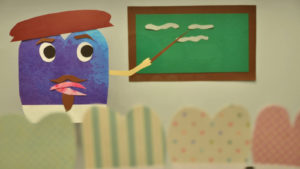
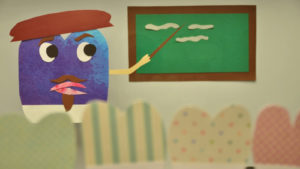

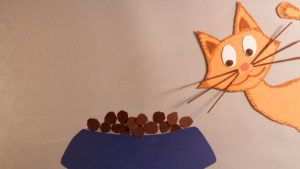
The movement of the eyes in the pictures above is exaggerated, the eyeballs go way more out the eye sockets than in reality.
11. Solid drawing – understanding the proportions, understanding basic 3d shapes.
12. Appeal – characters should be interesting to look at, they don’t have to be beautiful, but should have to appeal to the audience.
It can be very helpful to structure the movement of your character before you start animating. You can ask a friend or colleague to do the same action live and you observe the move. You can also to film the same action and then play it slowly. This can help enormously to break down and observe the moves that you will then recreate in your film with animated characters.
Eyes
Eyes are the main human or animal (or even of an imaginative character) feature that the viewers are noticing when watching the film. Therefore you have to put special attention to the creation of the eyes. Since you are making an animated film, there is no barrier to stop you from, for example, oversizing the eyes a bit, which is quite impossible in feature film. The character can have simple or very defined eyes with eyelashes and eyelids. Blinking is a great move when you want to keep a shot a bit longer or when you want the character to look into another direction.
You can use an eyeblink to change the direction into which your main character is looking.
Mouth positions
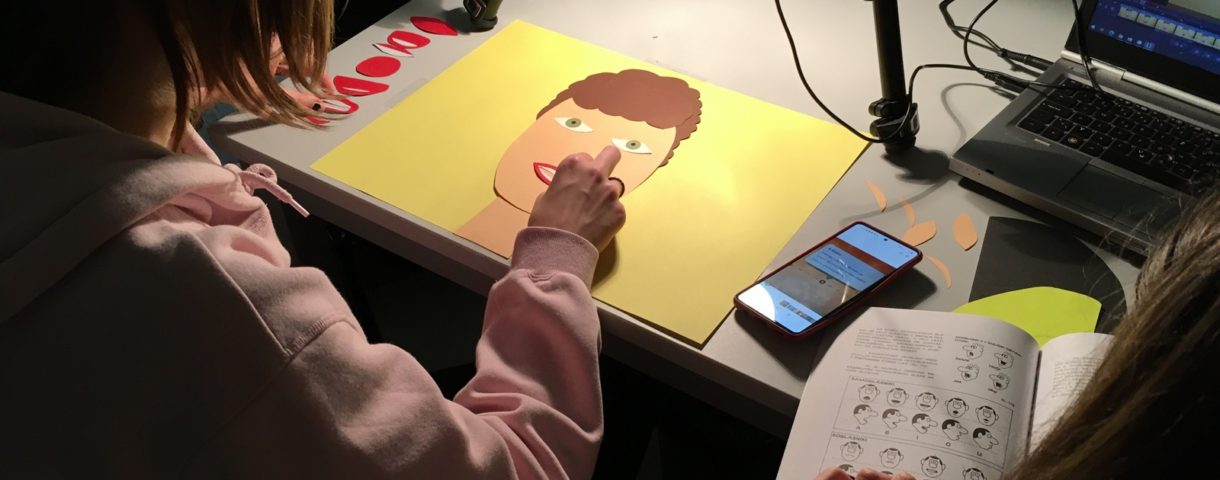
Mouth positions are the positions of the mouth used for pronouncing different syllables. Your character can speak like a human would or just move the mouth a bit to make them appear like speaking. When you want to make them speak with full human features you have to create several mouth positions for different syllables that are used in your word or sentence.
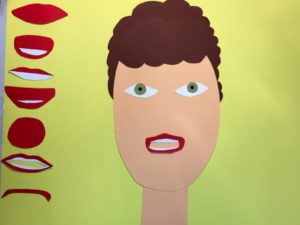
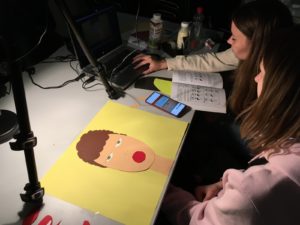
In the pictures above you can see photos from a workshop on animating speech with different mouth positions. In the first one you can see different forms that were created for different syllables an in the right one the animating process.

Above you can see ideas for different mouth positions for different syllables, they however vary on the language.
It is important to first record the voice (sound) and then animate the mouth movement according to the recorded sound.
Walk cycle
Creating a walk cycle is one of harder things to learn and implement as a beginner. Many times you can use strategies in your movie that will cover leg movements. You can put some barrier or a bush in front of the main character when walking or avoid the shots in which you see them walking.
If you decide to learn how to create the walk cycle, you can film a friend or colleague and break down the shot into frames and observe the leg movement. We also created a simple walk cycle in this chapter that you can use as a prototype.
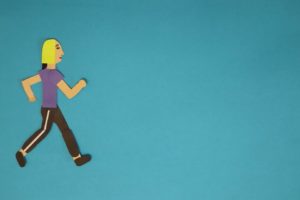


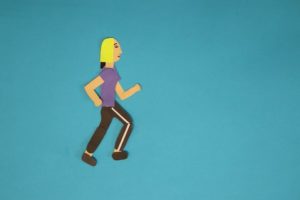
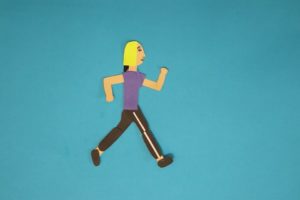
Above you can see leg and arm positions in a walk cycle for one step.
In the video you can see an example of a walk cycle with five positions of a step as shown in the pictures above.
There is a whole study on different types of walk. The professional animators study a walk of a happy person, sad person, the person in love, person that is in a hurry, old person, young person …
Common mistakes
The most common mistake is that you create your character flat, with not many interesting features and with rigid movement. Although the above described principles take quite a long time to master, if you learn to apply at least some of them, they will improve your movie enormously.
Exercises
It is easiest to learn and apply these principles when working on your movie but if you have time you can do some exercises in advance.
- The classical example is to animate a ball. You can try to use principles like slow in and slow out and squash and stretch.
- Create different mouth positions using plasticine or paper and play with animating words or sentences.
- A walk cycle can also be practiced in advance. Create a person out of paper with all the movable features you need to walk, and animate a walking cycle.
Related topics and links to external resources
12 principles of animation (short version)
12 principles of animation (long version)
Methodology
If you have enough time or work in a bigger group you can carefully go through your storyboard and check where it would be possible and how to apply one or more of the above mentioned principles to make your film even better. Be careful, however, that you don’t use your motivation to go too deep in your beginner project as well.
Terminology
Squash and stretch, anticipation,staging, clarity and readability, pose to pose and straight ahead, follow through and overlapping action , slow in slow out , arcs, secondary action, timing, exaggeration , solid drawing, appeal, mouth positions, walk cycle