

Introduction
After you have become familiar with camera settings and operation and have gained some experience, you can deepen your skills in this chapter.
This will open up many more creative possibilities for you and your animated films will become more dynamic and aesthetically more sophisticated.
| |
AnimaVision in action |
|
|
||
Material, equipment and tools
For precise panning in three-dimensional animated film, a good tripod with an indexing (degree display) would be helpful both for vertical and horizontal panning.
For camera movements in three-dimensional animated film, it may be necessary to use a camera slide or a so-called dolly.
You can make a camera slide or dolly yourself – there are links to this under External Links and Resources in the last section of this chapter.
You will also find an overview of camera slides and dollies available for purchase.
For a pan, the camera can also remain fixed and the base on which your three-dimensional animated film set-up is located can be rotated.
There are special electric turntables for this purpose.
However, you can also use non-electric turntables, such as those used for monitors, cakes or potted plants.
If the background for a camera movement is supposed to move parallel to the tripod in a two- or three-dimensional animated film, it makes sense to use a measuring tape that is attached to the table. You can also print out a millimetre scale on a piece of paper if you don’t have a measuring tape.
For some of the design tools shown here, it is important to minimise the shadows cast by the figures and objects. Good lighting is a prerequisite for this.
Main part
Shaping the depth of field
A camera makes it possible to shape the depth of field in very different ways. The depth of field is the range in which objects and figures can be seen sharply. Depending on the object and the camera settings, the range can be from a few millimetres to infinity.
The focal length of the lens and the size of the aperture are decisive for the depth of field.
Examples:
Small depth of field
For portraits of people, a very shallow depth of field is usually used, so that only about the person’s body is in focus and the background is blurred. Within the sharp area, however, the sharpness is already different. For portraits, the focus is therefore placed on the eyes so that they are absolutely sharp.
In three-dimensional animated film figure can also be depicted in such a way that it is the only thing in the depth of field and the background is blurred.
To get this so-called bokeh effect, you should use a lens with an aperture of 2.8 or larger and then choose an aperture value that is as small as possible.
Another possibility is to use a zoom lens and zoom in on the subject or figure. However, this also means that the camera must be placed at some distance from the object / figure.

Bokeh of a portrait photo
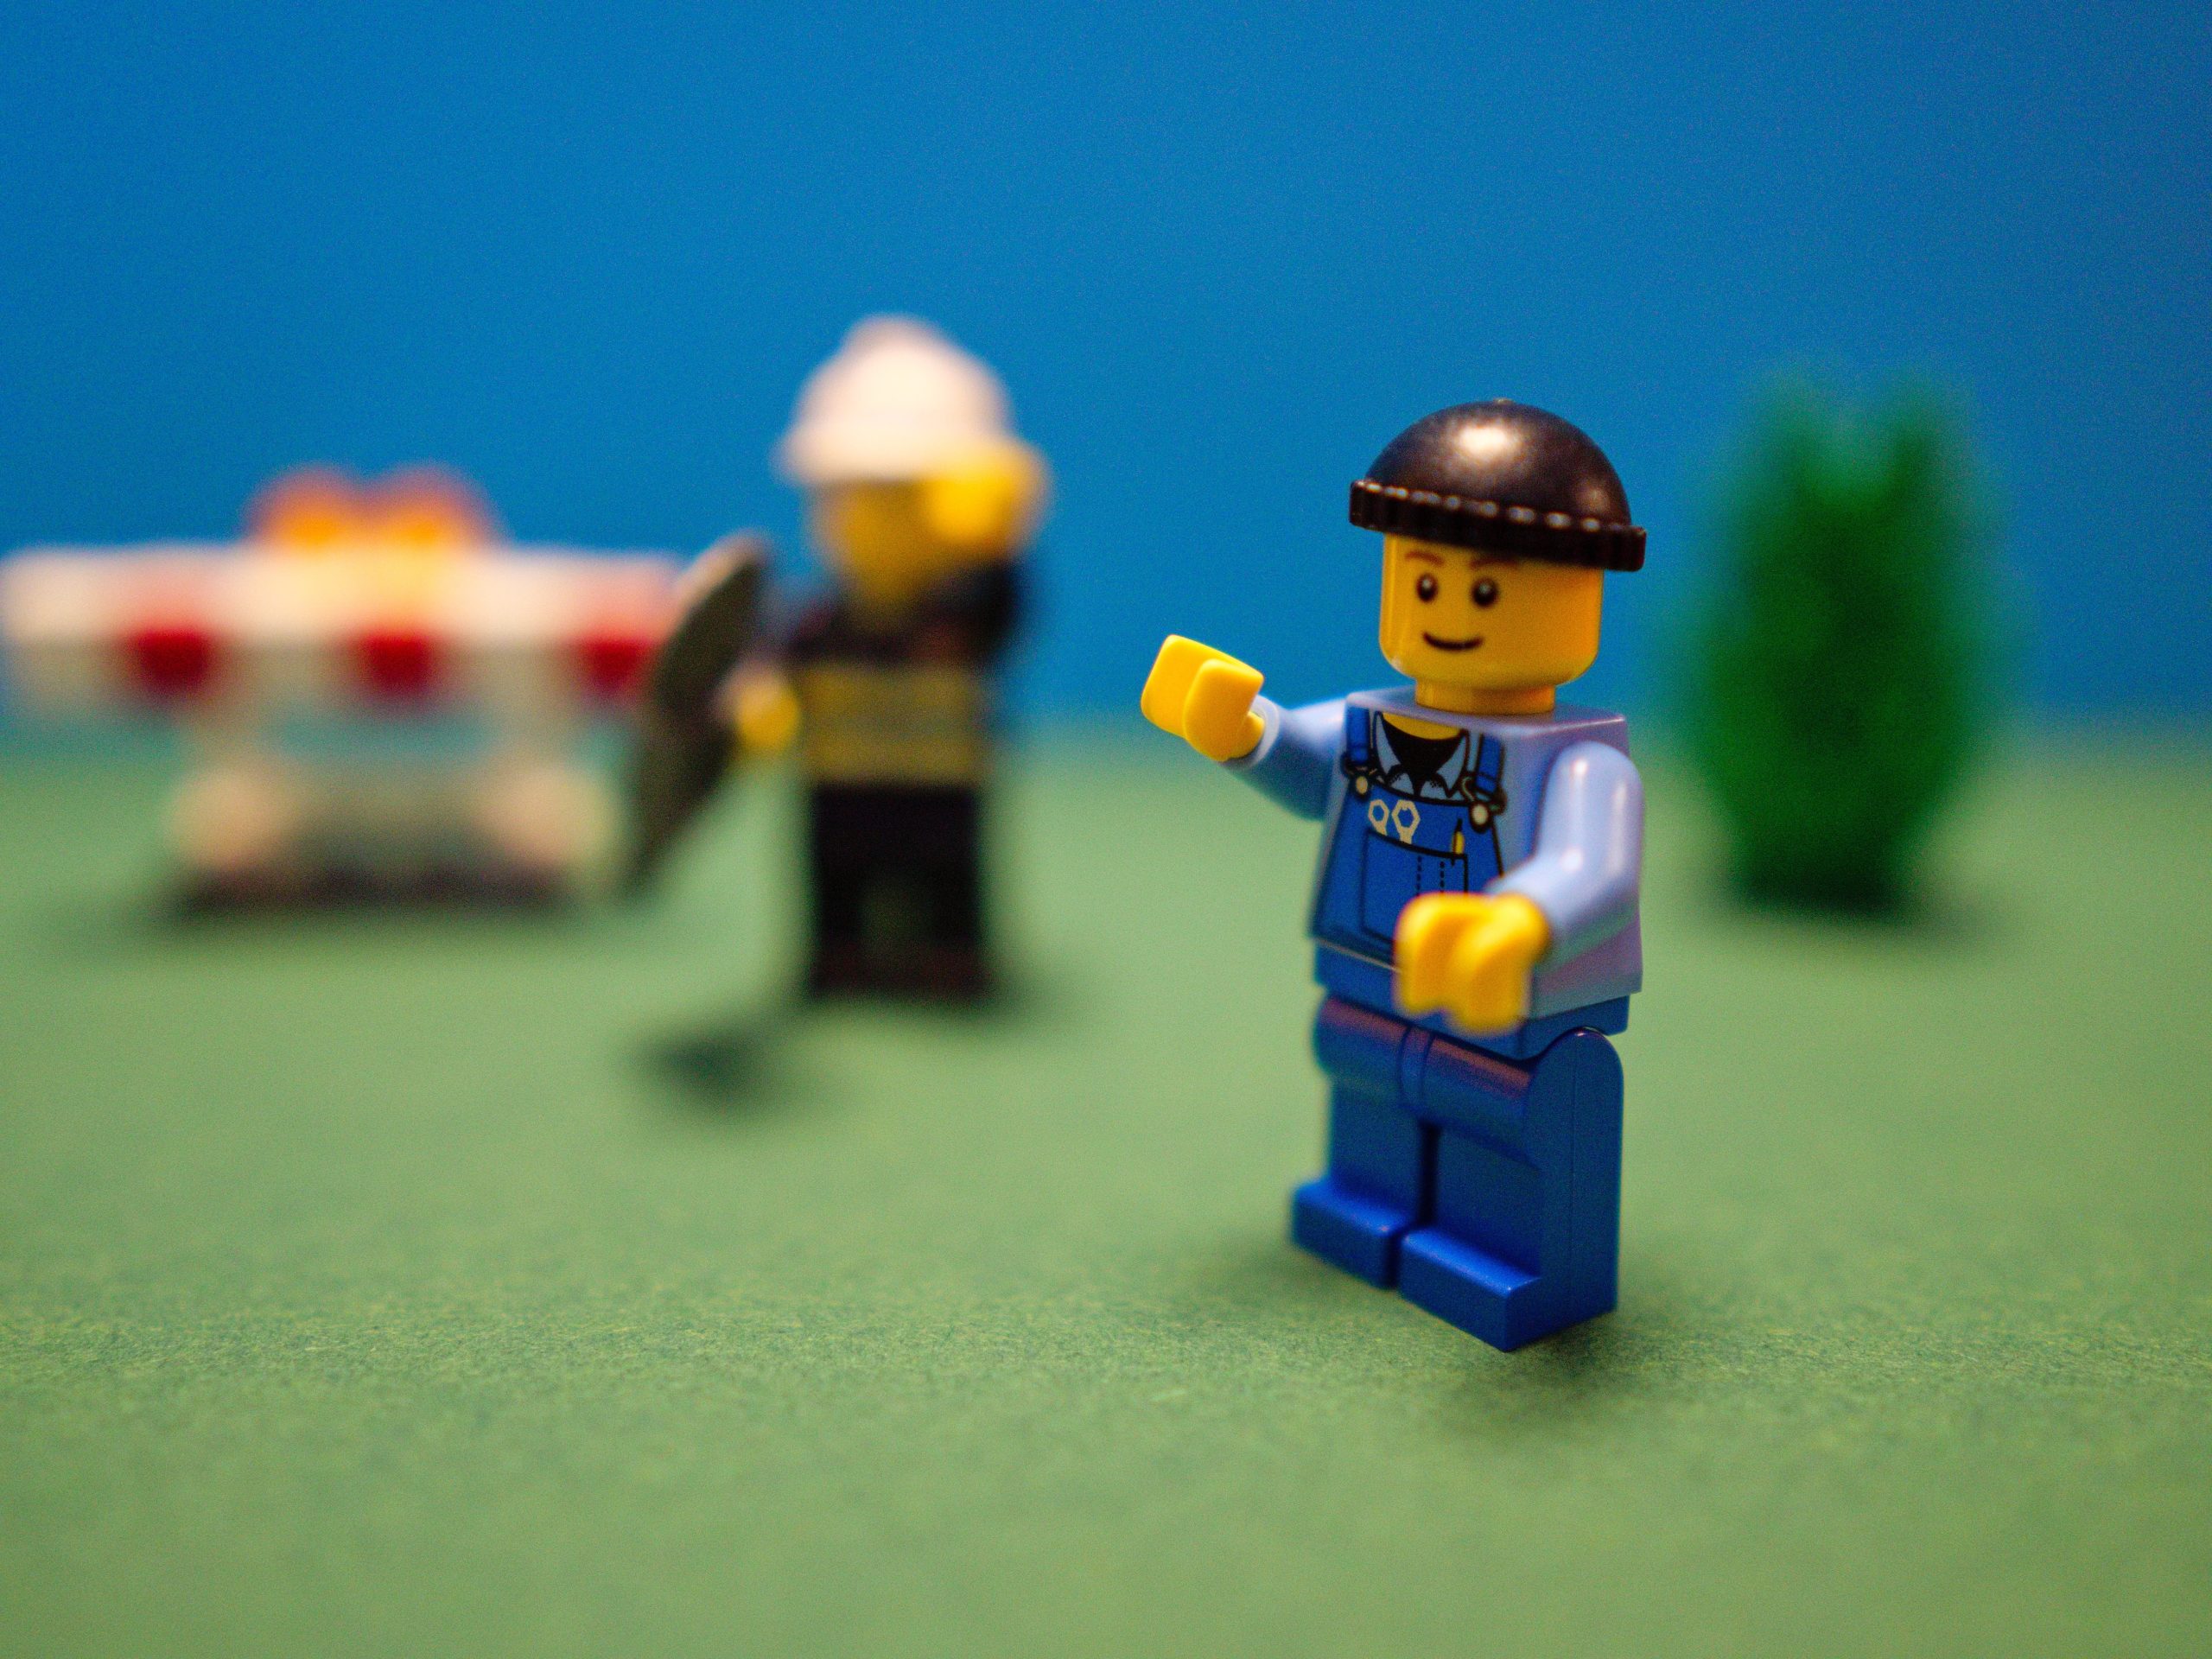
Bokeh in 3D animation
With a smartphone / iPhone, tablet / iPad or webcam, the possibilities to change the depth of field are limited because they do not have large lenses and an aperture.
If you only want to crop an object or a figure, you can try using the portrait mode of your camera app, for example, which crops the object using software.
Large depth of field
In landscape photography, you often want a large depth of field, since as much of the landscape as possible should be in focus all the way to the horizon. Of course, there is also a very small area that should be in focus. You should choose this area deliberately. For example, it makes no sense to focus on a mountain range because it is too far away to get it perfectly clear. You should rather choose a landscape element that is at most a few hundred metres away from the viewer.
In animated film, we often need a large depth of field if we want to depict a whole scene in a supertotal or a long shot.
For a large depth of field, you should close the aperture as much as possible (aperture value 11 or larger). This is possible with any lens. Fixed focal lengths with a long focal length often offer a large depth of field, but are usually unsuitable for the distance between the camera and the set-up of the animated film scene for the animated film.
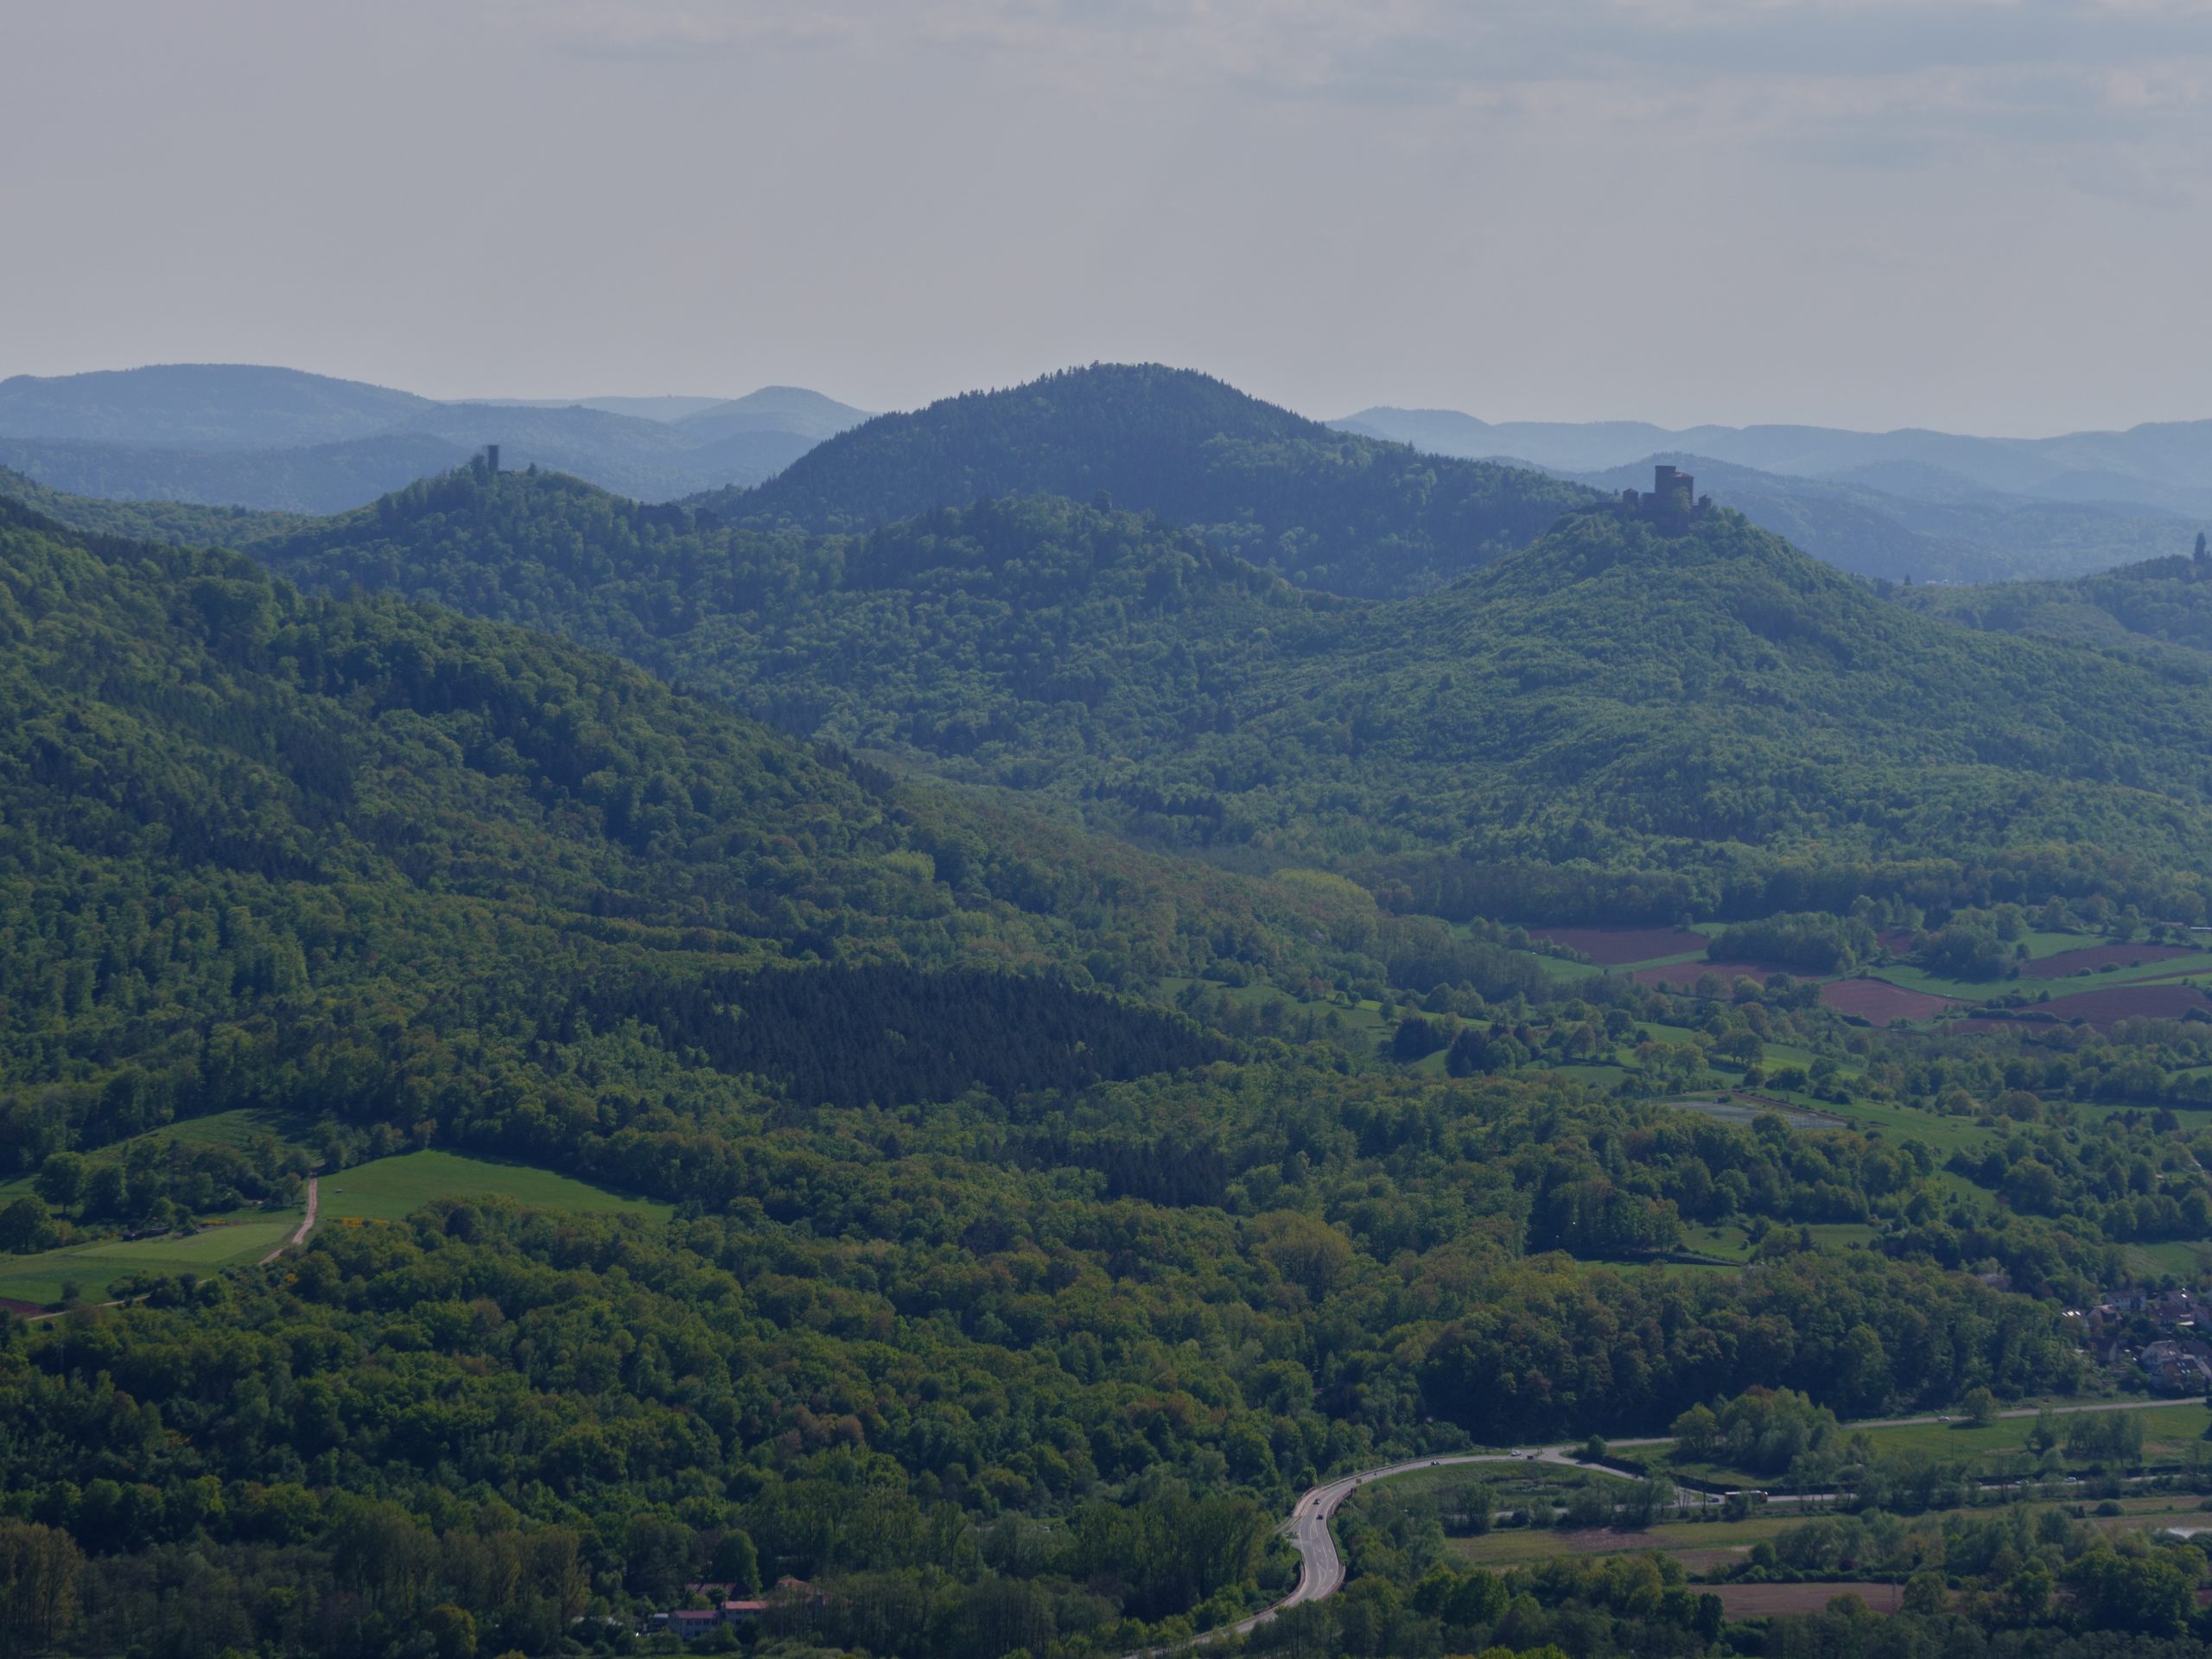
Great depth of field in landscape photography
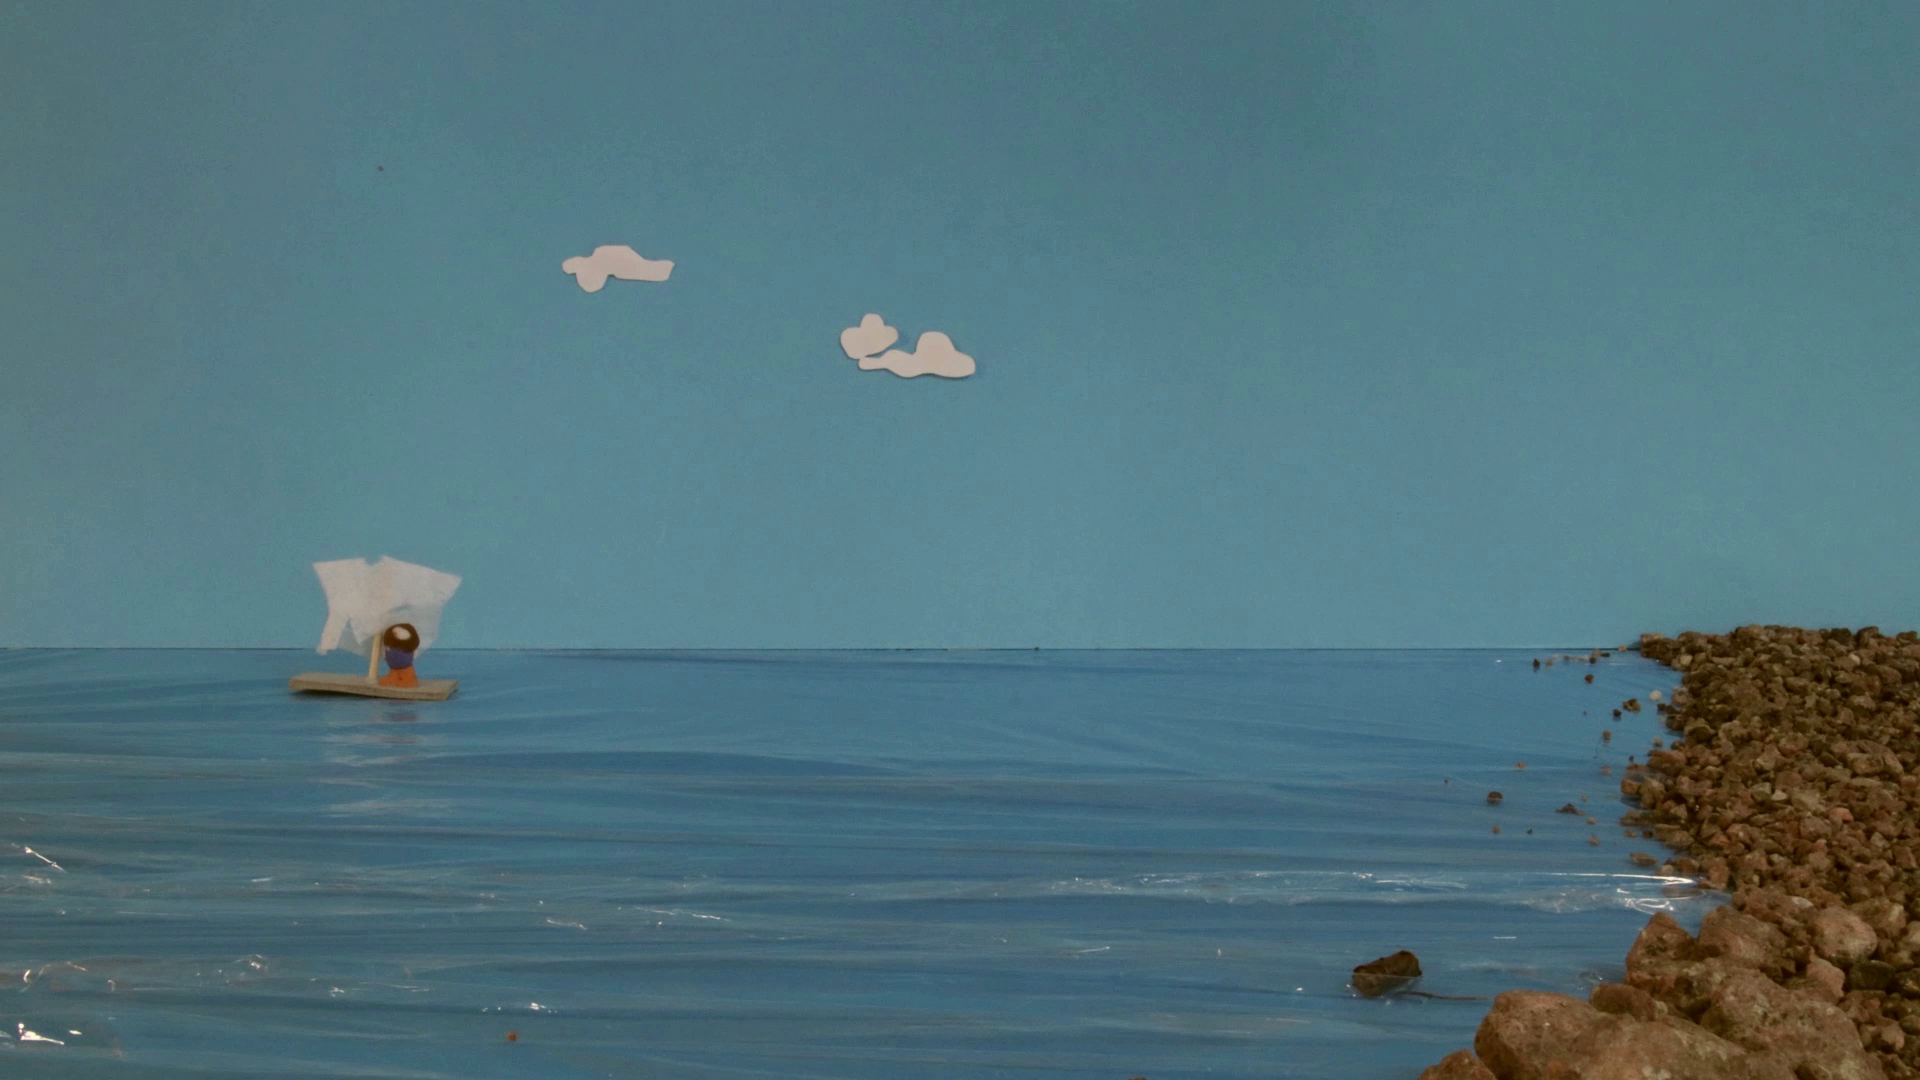
Great depth of field in the total of a 3D animation
Smartphone / iPhone, tablet / iPad or a webcam often offer a large depth of field as standard.
Two-dimensional animated film
In layering and in the multiplan process, the focus is placed on only one plane if possible. This is where the figures and objects that are at the centre of the action located.
The depth of field doesn’t play such a big role in the cut-out animation, because only one plane is visible anyway.
In the multiplan process, we can first consider whether the planes in front of or behind the plane in focus should be rather focused or blurred. This is not only an aesthetic question, but also one of content, since the viewer’s gaze and thus attention is always drawn to the sharp planes.
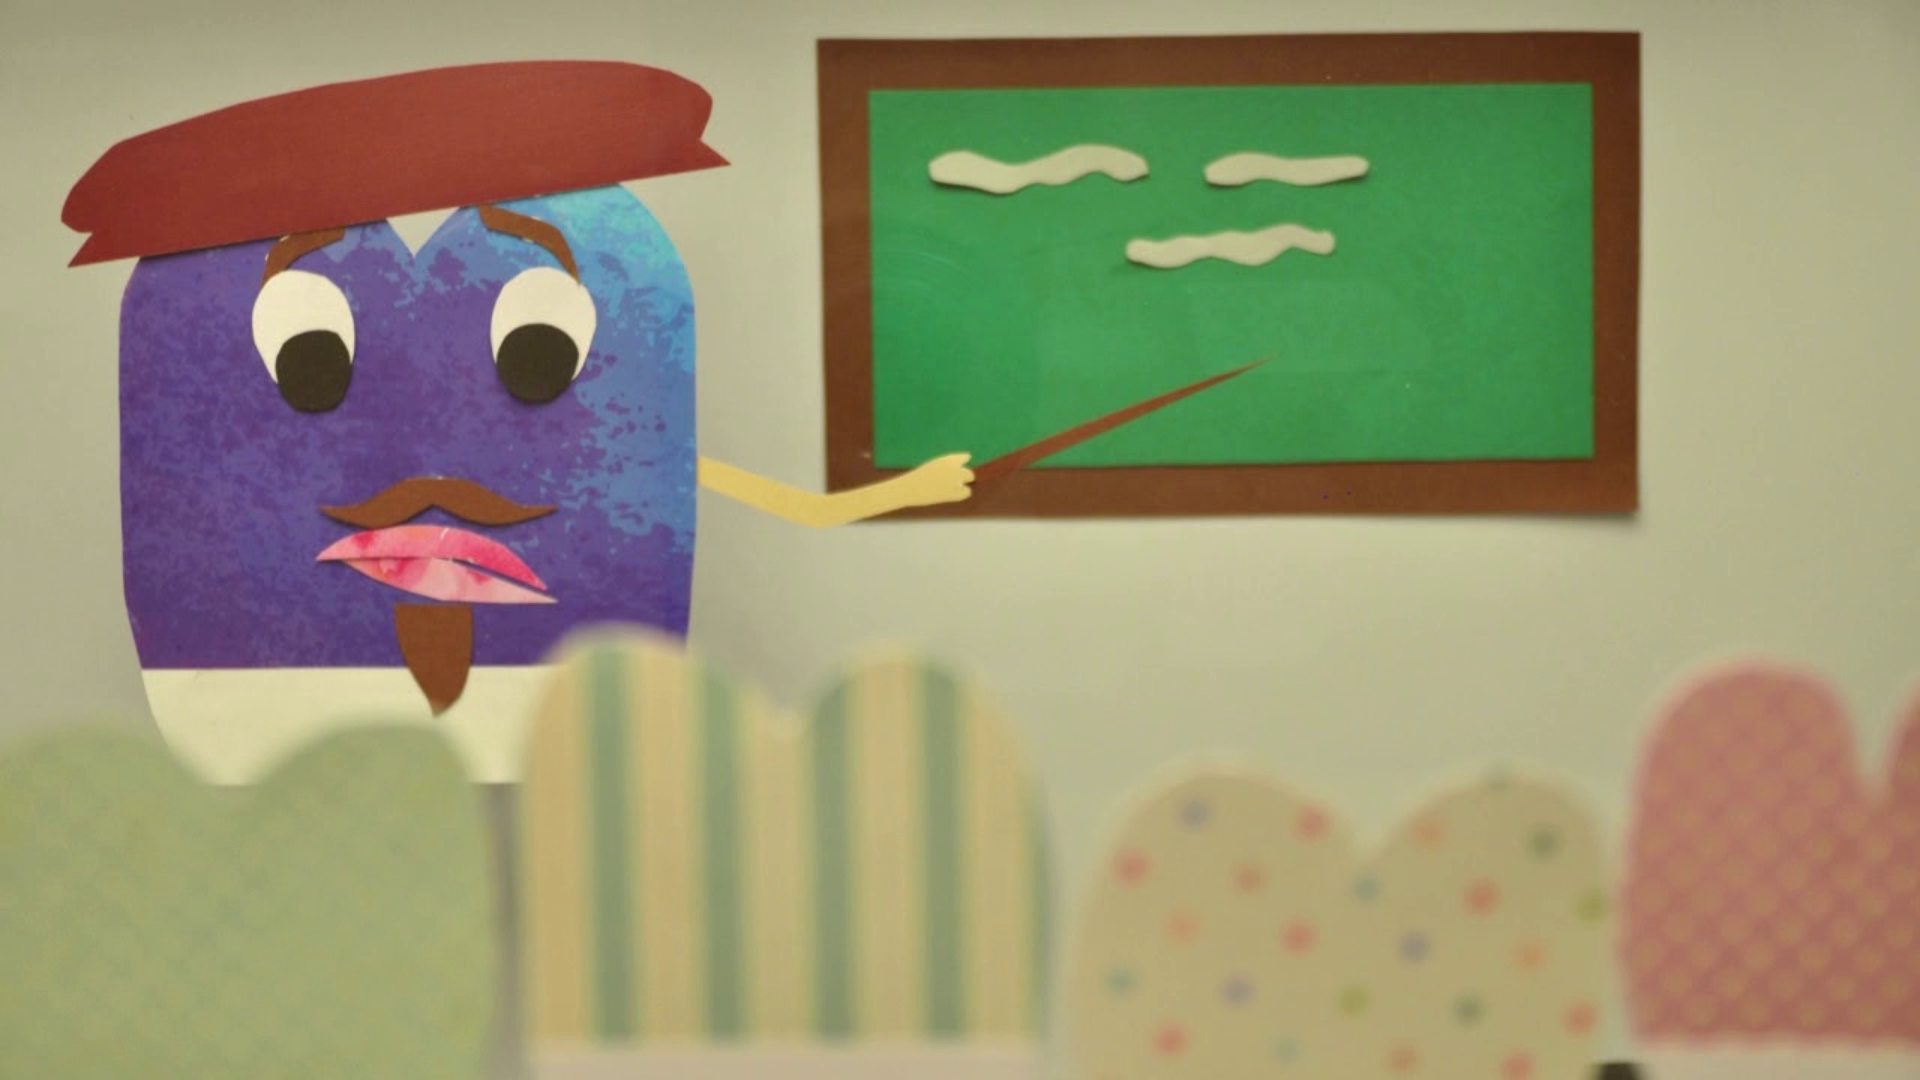
Foreground blurred in mulitplan process
If only one layer is really sharp, the viewers will concentrate on this layer. If several levels are in focus, the viewers will perceive the action on several levels.
We can then adjust the depth of field on the camera accordingly.
Three-dimensional animated film
In three-dimensional animated film, comparable to the Multiplan method, there are also situations in which the action takes place in a small area or in a larger area at a distance from the camera. Here, too, we can adjust the depth of field accordingly by changing the camera settings.
Be aware that the depth of field on the display or on a preview monitor does not correspond to the result of the photograph after the shutter has been released! The depth of field is greater in the preview because the lens is not stopped down. Only when you look at the photo you get an impression of the actual depth of field!
The parameters for shaping the depth of field
In order to be able to design the depth of field according to our ideas, we will now briefly deal with the various parameters for designing the depth of field.
Actually, only a precisely defined plane at a distance from the camera is also sharp, but there is an area in front of and behind it that can also be perceived as being in focus. This area is called the depth of field.
The length of the area depends on the focal length of the lens and the size of the aperture:
- With the increase of the focal length either by choosing another lens with a fixed focal length or by – optical, not digital zooming in with a zoom lens – the depth of field becomes smaller.
It is important to note that increasing the focal length usually means that less light hits the sensor. This in turn can be compensated by better lighting, by increasing the exposure time and/or by increasing the ISO. - The more open the aperture (i.e. the smaller the aperture value), the smaller is the depth of field.
In contrast to the reduction of the depth of field via the focal length, more light hits the sensor with a more open aperture. This in turn can be compensated by less lighting, shortening the exposure time or reducing the ISO. - Since the aperture must be closed for a large depth of field, it may be necessary to increase the exposure time and/or the ISO. Be aware that a high ISO can result in unsightly image noise, especially in darker areas of the image.
This also depends on the camera type or the smartphone or tablet. As a rule of thumb, you should not exceed an ISO of 1600.
A simple way to visualise the relationships between aperture, shutter speed and ISO is the so-called exposure triangle. You can find this under External Links and Resources.
You could also find a link to an illustrative online simulator with which you can precisely calculate the depth of field of a camera in combination with a lens. The simulator can also help you choose the right lens for your animation.
Shifting the focus
The so-called shifting of focus can also be used as a creative design tool in 3D animated films. By shifting the focus, you can consciously shift the viewer’s attention from an object or figure in the near distance to an object or figure in the far distance or vice versa. To shift the focus, you need the smallest possible depth of field.
In order to gradually shift the focus from one object to another, it is a good idea to move said object, which is only used for focusing, cm by cm along the course of the focus. Before each release, this object is removed, of course.
Focus shift in 3D animation
Panning / zooming and tracking shots
As with live-action film, panning / zooming and tracking shots can be implemented in animated film.
Cut-out animation
Panning
As you have probably already guessed, panning is not possible in a cut-out animation because the camera is in a fixed position and this type of animation is only two-dimensional.
Zoom shot
If you have a camera with a zoom lens, you can change the size of the shot frame by frame by zooming or changing the focal length on the lens. To achieve a smooth result, you should pay close attention to the scale on the lens or the zoom factor shown on the camera display.
With a smartphone/ iPhone, tablet/ iPad or a webcam, you cannot change the focal length. However, you can also use the digital zoom for zooming. But without loss of image resolution, this is only possible if the sensor’s image resolution is higher than that of the subsequent film. For example, you have a sensor with an image resolution of 4K (3840 x 2060 pixels). Before zooming in, a photo has exactly this resolution. If you zoom in, there is no real enlargement through optics, but rather pixels become larger. For example, if you zoom in with a zoom factor of two, only 1920 x 1080 pixels are visible.
If your film had an image resolution of 2K (1920 x 1080), you would not lose any resolution by zooming in.
If your film had a resolution of 4K (3840 x 2060 pixels), you would lose resolution due to zooming.
If you use the digital zoom, pay attention to the magnification factor displayed so that you get a smooth zoom.
Zoom shot in 2D animation
With a camera, smartphone/iPhone, tablet/iPad or webcam, you can avoid zooming while taking photos by zooming into the pictures step by step during post-production. This way you can create a very smooth zoom! Here too, the resolution of the camera should be higher than that of the film!
Tracking shot
With the cut-out animation, camera movement is of course only possible in relation to the base surface. The distance between the camera and the ground plane does not change. So you can either change the position of the camera or the position of the base.
In most cases it is easier and gives better results to move the ground plane.
For example, if your base area is A3, you can add another A3 sheet to one or both sides of the sheet. Then you can use these two or three sheets as a background. For the tracking shot, you then move the joined sheets cm by cm from left to right or vice versa and take a picture each time. To achieve a good result, you should mark the axis along which the paper should be moved using a pencil to mark it on the table or with tape and use a measuring tape to move it step by step.
Tracking shot 2D animation
If the resolution of your camera is high enough, you can also photograph the entire extended sheet and then move it frame by frame in post-production.
3D animated film
Panning
To create a so-called panorama pan, you can rotate a camera on the tripod step by step around its own vertical axis. This can be done very precisely if your tripod has a so-called indexing (grand indicator). Without a degree indicator, it is difficult to make precise pans. You can then try to print out your own scale and attach it to the tripod.
Camera pan on tripod in 3D animation
You can also place the base with your scenery on a turntable, which you then rotate frame by frame. You can mark the scale on the disc itself. With this option, however, it is important to eliminate all shadows of the figures and objects as much as possible, because changing shadows would not make sense in an animated film.
Camera pan with turntable in 3D animation
Zoom shot
A zoom move in a three-dimensional animated film behaves in the same way as in cutout animation.
Zoom shot with zoom lens in 3D animation
Here, too, make sure that you take small steps from frame to frame when zooming manually.
Good zoom and pan at 40 sec.
In this film, the manual settings of the lens or tripod were fine enough to achieve smooth zooms and pans.
Tracking shot
To get the effect of a tracking shot, the position of the camera is changed frame by frame in relation to an object, a character or the whole scenery.
For example, you can move the camera into the scenery or out of the scenery. In contrast to the zoom move, the entire camera is moved. While the focal length is changed step by step in the zoom movement, the focal length always remains the same in the camera movement.
Tracking shot in 3D animation with camera sliding along the table
In a tracking shot, however, the camera can also be moved from left to right, for example, to show the details of a larger scene.
A tracking shot is also used for the so-called bullet time effect, known from the film „The Matrix“ (example under External Resources and Links).
If your camera stands on a large tripod, it is difficult to move it in small regular sections. Even with rollers, small movements are hardly possible.
You could put the camera on a table tripod or just set it up on a plank and then move the plank across the table in relation to your animation set-up.
In professional film and photography there are also special camera slides and dollies.
You can build a camera sled using your toys. For example, you can use the rails and carriages of a toy train.
You can also easily build a dolly out of toy bricks.
It is also possible to make a camera sled or a dolly yourself with materials from the DIY store.
You can find pictures of professional and homemade camera sleds and dollies under External Resources and Links.
If you can’t move the camera, there is also a possibility to move the surface on which your figures and objects are standing frame by frame. For example, the entire scenery can move towards or away from the camera, or from left to right past the camera.
The disadvantage of this method is that figures and objects can quickly fall over when moving the base and therefore have to be fixed. This is where working with toys that can be attached to one another is an advantage.
As with the rotating disc, another disadvantage is that the shadows cast by the objects and figures can change quickly when the base is moved. Therefore, all shadows should be eliminated via good illumination.
Common mistakes
- The steps between the individual images when shifting focus, panning, zooming or moving the camera are too large or too irregular, so that no fluid animation is created. In the video from 43 sec.
- In a mobile scenery (along an axis or on a disc), the shadow cast was not completely eliminated by the illumination. The changing shadows cast by the objects and figures do not make sense in terms of content.
- Working on a single scene or shot size with the options presented here takes too much time and the whole production process gets bogged down.
External resources and links
Complex simulator for depth of field
https://dofsimulator.net/en/
Exposure triangle (in German) https://dofoto.de/blog/2015/09/20/belichtungsdreieck/
Self-made camera sleds and dollies:
Camera on toy rails SRC: https://www.instructables.com/Basic-Stopmotion-Camera-Dolly-Based-on-Lego-Train/
Camera sled that can be produced using a 3D printer: https://www.myminifactory.com/object/3d-print-simple-camera-slider-43091
Professional camera slides and dollies:
Overview of various professional camera slides (in German – contains links to commercial suppliers): https://stativwelt24.de/kameraslider/
Overview of various professional dollies (in English – contains links to commercial providers: https://www.bhphotovideo.com/c/buy/table-top-dollies/ci/37602
Technical setup for the so-called bullet time effect from the film „The Matrix“: https://www.stopmotiontutorials.com/en/expert-guides/animation/bullet-time-effekt/
Methodology
- Participants can be motivated by the idea of using the photography skills they have acquired in the production of animated films to photograph people, landscapes, etc. This is a good way of encouraging them to take part in the project.
- Be aware that the design options presented here can significantly lengthen the production process! They should therefore only be introduced for longer projects or for participants with previous experience in the field of animated film production.
- The same applies to the knowledge presented in this chapter: do not overwhelm the participants! If you notice that the participants have potential and interest to expand their creative possibilities, do not hesitate to offer them the possibility to do so. However, the basics presented in the previous chapters are already enough to produce great films!
- Our experience in working with young people has shown that they often use the creative tools presented in this chapter without being introduced to them properly. Even if you have planned not to introduce these extended tools, do not stop the creativity of the participants and support them in the creative process!
Terminology
camera slide, dolly, turntable, bokeh effect, pan, zoom, tracking shot, bullet time effect